Monday, February 8, 2016

Roasted Duck and A Happy Chinese New Year Dinner Family Reunion...


A whole duck! My first time working with an entire duck-- head, feet and all. Intimidated I was to attempt roasting one, after all I heard, read and seen on how elaborate it is for Chinese Chefs to achieve the incredible mahogany roasted skin and succulent meat results. But this year Susan's Savour-It! is about stepping outside the culinary comfort zone, embracing new food discoveries and have a heck of a good time learning and cooking along the way! Well, certainly this is one of 2016's highlight so far! I wanted to create deli-style siu lap classic roasted duck siu ap you see hanging from hooks in Chinatowns, and not the Peking-style duck, which is full-on crispy skin duck with fat rendered, and thinly sliced to wrap in pancakes with green onion slivers. Many recipes researched, comparing the techniques and replicate-friendliness, it was actually a recipe from Chef Tyler Florence on Food Network that agreed with me in every aspect-- no elaborate tools or equipment, or hanging on a hook to air-dry overnight and could be done in one day! Steaming first, then roasting-- here is my rendition in the kitchen then toting to cook it at my parents for "toon neen fan" Chinese new year family reunion dinner last night; I more than impressed myself and everyone and believed I delivered a Chinatown-worthy roasted duck! Wicked! =。:.゚٩(๑>ω<๑)۶:.。+゚


Of course my artist brother and wife will add their personal artsy touch to the occasion.

Our festive dinner celebration spread...


Chinese Roasted Duck (adapted from Food Network Chef Tyler Florence's recipe)

1 whole (4 to 5 pound) duck (look for it already gutted in Asian supermarket's)
1Tbsp. Chinese five-spice powder
2 tsp. sugar
2 tsp. salt

dashes of ground white pepper
5 big slices fresh ginger
4 garlic cloves
1/2 bunch green onions
1 tangerine, peeled in big strips
1/4 cup rice vinegar
1/2 cup soy sauce

1/2 cup honey

NOTE: Omit the dark soy sauce-- it will brown the skin too much during roasting.

The beautiful and fragrant aromatics for stuffing.


Duck is notoriously a fatty bird-- to diminish the fat and produce a good slightly crisped skin for this style, begin by trimming the excess fat from the neck and body, leaving some intact at the buttocks to close the cavity. Rinse the duck, inside and out, and pat dry thoroughly with paper towels. 

I lopped off the neck attached to the head and feet before rinsing.

Combine the Chinese five-spice, sugar, salt and pepper in a small bowl. Rub the spice mixture all over the duck, inside and out (salt and five-spice powder makes a fragrant dry marinade, which draws some of the moisture from the duck so that the spices penetrate). Stuff the duck cavity with the aromatics: the ginger, garlic, green onions, and tangerine peel. Fold the wing tips back under the duck and tie the legs together with kitchen string. Poke the duck breast a few times, piercing the skin. Let marinate at least one to four hours or if only you have time covered in fridge overnight.


Massage that baby!


Place a roasting pan on the stove top over two burners and fill with 2-inches of water, turn the heat to medium. Set a rack insert inside the pan and lay the duck on the rack, breast-side up. Cover tightly with aluminium foil. Steam the duck for 45 minutes, checking the water level periodically. Steaming the duck first melts away some of the fat and shrinks the skin.


Before and After (look at the shrivelled skin and fat rendered in pan)...

Don't waste the awesome duck fat-- save it for other uses like fried rice and stir-fries :)

In a small saucepan combine the vinegar, honey, and soy sauce over low heat. Cook and stir for five minutes until thick. The duck will be lacquered with the sweet glaze, which caramelizes during roasting, making the skin crisp and brown.


Preheat the oven to 375 degrees F with the baking rack at the second lowest level in oven (this is to prevent browning the top too darkly before cooked). Take the foil off the duck, remove the rack with the duck, and pour out the water and all the fat that has rendered out. Put the rack with the duck back inside the roasting pan. Baste the duck with the vinegar mixture, until all the skin is completely coated in the glaze. Stick the whole thing in the oven. Roast the duck for about 45 minutes to one hour, basting periodically with any remaining glaze to set in a deep mahogany colour. Tent the breast with some foil if it gets too dark. The legs will wiggle easily when it's done and juices will run clear when poked in the thickest part of thigh. Remove from oven and let rest ten minutes before carving.

I wrapped the wing tips to prevent them from burning during roasting.

I got the dibs down for classic glazed roasted duck-- Woo Hoo!

Using a proper pan rack will prevent burning from the drippings being exposed to the heat.

Remove the aromatics and follow the guide below for carving and slicing.

I leave my dad to the pro-butchering!


Credit: Mastering the Art of Chinese Cooking by Eileen Yin-Fei Lo

Traditional CNY Treats and Sweets

Gotta get drinks in theme too with Chinese beer!


First things first, upon arriving at my parents, a family joint prayer by burning incense. Incense sticks are lit up, held between clasped hands, wishes and prayers are silently chanted while performing a sequence of three standing bows. Then the sticks are placed into the rice bowl and left to burn until finished.  We do this first looking to the sky facing the window for overall blessings and then again in front of a mini altar dedicated to our ancestors.This is to pay respect to the loved ones who've passed on as well as asking for protection and good luck for the gods above.


I always thoroughly enjoy these celebrations because we all get to cook together and show off our favourites, and exchange tips and feedback. 

My sis-in-law and her son preparing kappa cucumber maki rolls as an appie.


My dad, ever-the-butcher getting down-- hacking and whacking all the awesome deli delicacies!

Steamed chicken and roasted crispy pork 

Mushrooms, Sea Cucumber and Abalone dish also graced the table.


Come and get it gang-- fill your rice plate to your hearts' desires!


Happy Chinese New Year everyone with gorgeous Chinese eats!


And capping it with a visit to the temple today to say new year prayers & blessings for ourselves and loved ones here and thereafter life with my incredible and gorgeous gal pal Eve!

At Cham Shan Temple in York

For more awesome Chinese eats from this week's series of posts, see PF Chang's famous Chicken Lettuce Wraps, Crispy Roast Pork Siu Yok, and Barbecue Pork Buns Char Siu Bao. For more auspicious foods to ring in the new year, check out Double Steamed Fish with Green Onions and Ginger and Marbled Tea Eggs. Now Let's Eat! Dai ga sic fan!


Sunday, February 7, 2016

Happy Chinese New Year 新年快樂...


To all my family, friends and fans celebrating Chinese New Year Eve...
Gung Hay Fat Choy! 恭喜發財 
☆*~゚⌒(‘-‘*)⌒゚~*☆


Celebrated the whole week with awesome Chinese eats from PF Chang's famous Chicken Lettuce Wraps, Crispy Roast Pork Siu Yok, Barbecue Pork Buns Char Siu Bao and tonight's family reunion "Toon Neen Fan" dinner at my parents with Roasted Duck. For more auspicious foods to ring in the new year, check out Double Steamed Fish with Green Onions and Ginger and Marbled Tea Eggs. ENJOY!


Friday, February 5, 2016

Steamed Roast Pork Buns (Char Siu Bao)...


Leftovers from my exciting first-ever home roasting of Crispy Roast Pork Siu Yok the other day turned into another proud session with steaming Char Siu Bao or should I say Siu Yok Bao :)-- everyone's top dim sum favourite! One I've been meaning to attempt but didn't get overly inspired until making my own siu yok got me thinking creative with the leftovers. These delectable filled buns soften and open like flowers as they steam and my kids adore them! Their history dates back to when ovens were rare in China and most foods, including these buns were cooked in steamers over the fire. My filling is brownish in colour due to using roast pork siu yok, double soy and oyster sauces as opposed to what you eat at most dim sum joints, with a red centre barbecue glazed pork char siu filling and perhaps a few drops of red food colouring :P. These didn't turn out to be fluffy snow mountain-white pull-apart ones like in the steam baskets at restaurants, as I learned afterwards it is due to using cornstarch in the dough-- one part to two parts all-purpose flour.  That will be the revision in my next bao-making attempt and perhaps another tablespoon of sugar to further sweeten the buns (it's all part of the recipe development process- tweaking and testing until you get results just right for you and your family's preference). However, this dough was utterly A.M.A.Z.I.N.G and versatile-- slightly chewy and denser (reminiscent of other kinds of Asian baos), but nevertheless delishush!! So wearing my happy pappy smile, let's take it away... Bao Wow Wow!


Steamed Roast Pork Buns (Char Siu Bao)
Makes about 20 baos

For the dough:
3-1/2 cups all-purpose flour
1 tsp. active dry yeast
1/4 cup warm water
2 Tbsp. sugar
1/2 tsp. oil
1 tsp. baking powder (this will be added after the dough had a chance to rise for two hours)

For the filling:
1/2 cup water
1-1/2 tsp. all-purpose flour
1-1/2 tsp. tapioca starch
1 Tbsp. light soy sauce
2 tsp. dark soy sauce
1-1/2 Tbsp. sugar
1-1/2 Tbsp. oyster sauce
1 tsp. sesame oil
1/2 lb. Chinese roast pork or barbecued pork, deli shop-bought or try my homemade crispy roast pork siu yok, cut into 1/4-inch dice
2 Tbsp. chopped green onion (optional)


To make the dough: Place the flour in a large mixing bowl. In a separate small bowl, combine the yeast with warm water. In a small saucepan over medium heat, warm the milk; remove from heat and add the sugar; stir to dissolve. Stir in the yeast mixture into the milk. Slowly stir the milk mixture into the flour and add oil to form a soft, firm dough. In the bowl, knead the dough for ten minutes until smooth and elastic; cover with a damp cloth and let rise in a warm place for two hours, until doubled in size. 

Use Your Mixer: In the bowl of an electric mixer fitted with a dough hook attachment turn on to the lowest setting and let it go until a smooth dough ball is formed. 


Knead in bowl until smooth and cover with damp cloth.

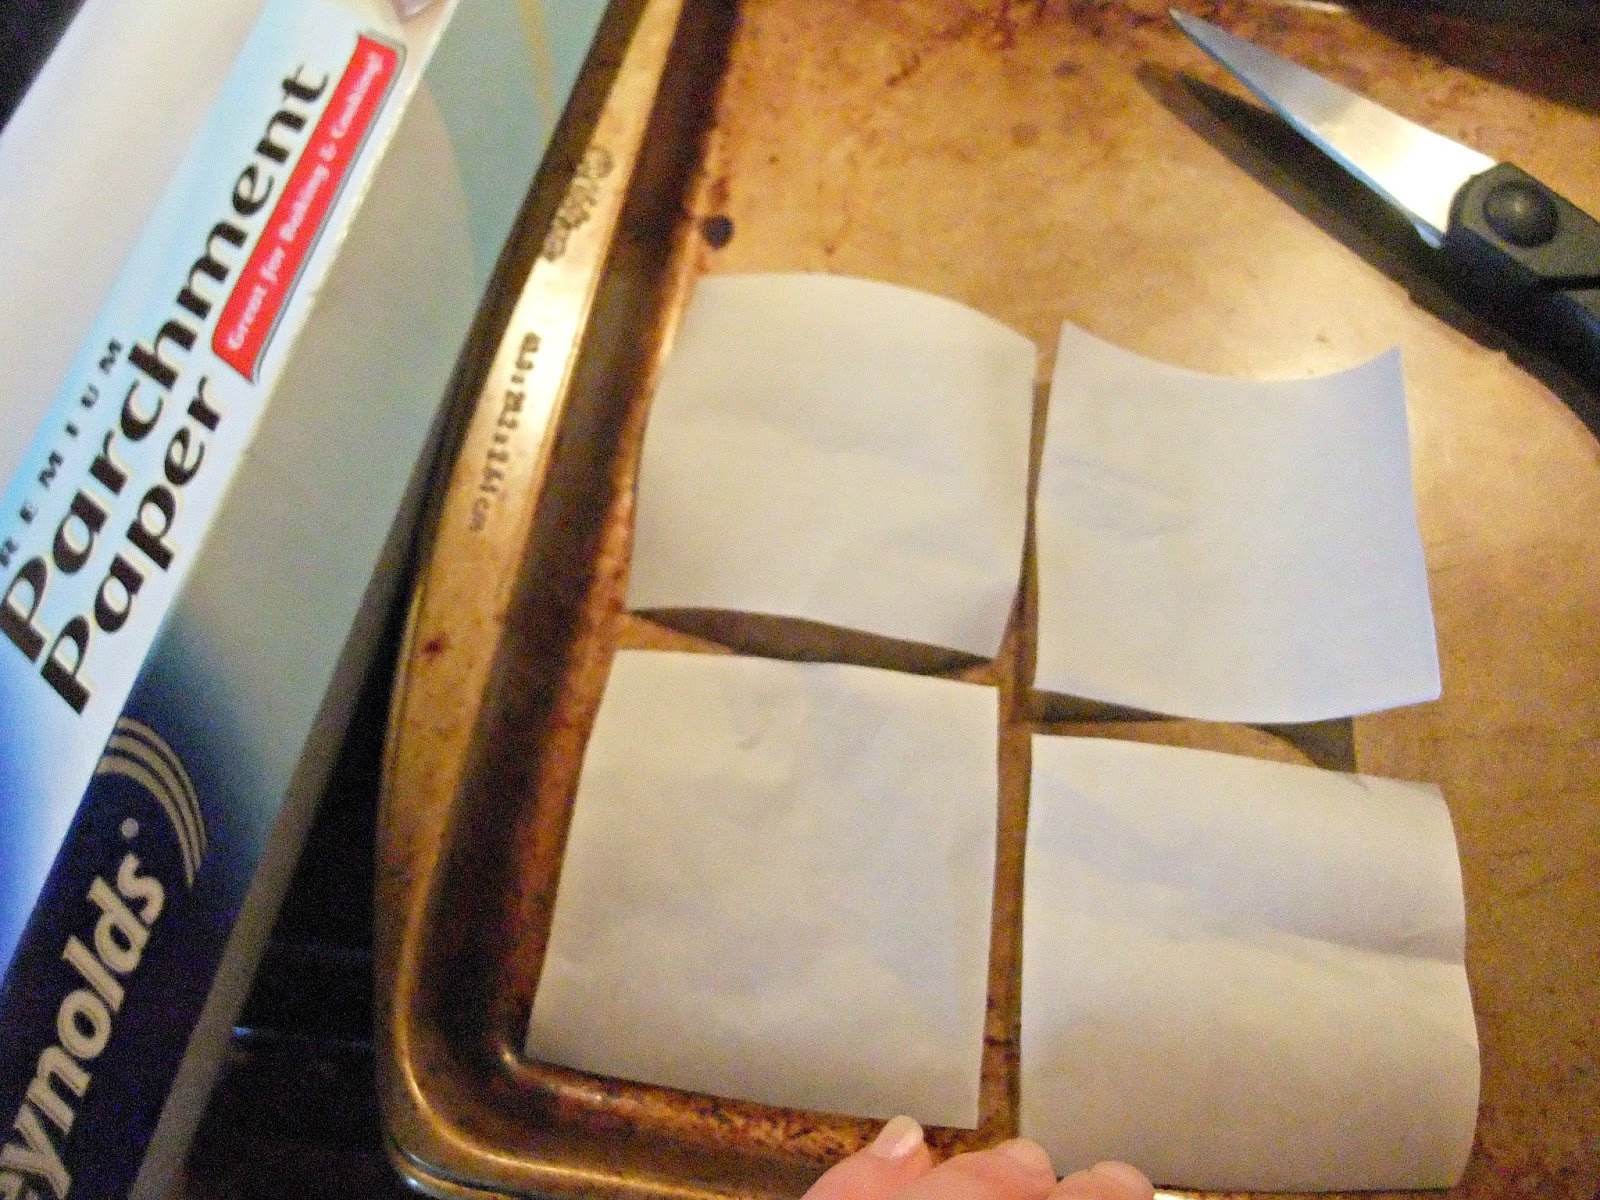
In the meantime, get a large piece of parchment paper and cut it into 20 4x4 inch squares, or you could set out 20 paper muffin liners and flatten them out side-by-side on a baking sheet. 


While the dough is rising, make the meat filling. In a saucepan combine the water, flour and tapioca starch. Stir to dissolve. Add the soy sauces, sugar, oyster sauce and sesame oil. Heat and stir until the mixture thickens. Add the cubes of roast pork and onions (if using) mix well. Let the filling cool. TIP: If you are making the filling ahead of time, cover and refrigerate to prevent it from drying out.


After your dough has rested and risen, punch down the dough and turn it onto a lightly floured surface. Add the baking powder to the dough and knead for about 10 minutes, until the dough is smooth; sprinkle with flour from time to time while kneading (talk about using your muscles). If you are using a mixer, turn it on to the lowest setting. If the dough looks dry or you're having trouble incorporating the baking powder, add 1 to 2 teaspoons water. Roll the dough into a long sausage 1-1/2 inches in diameter. Cut into 20 pieces. 


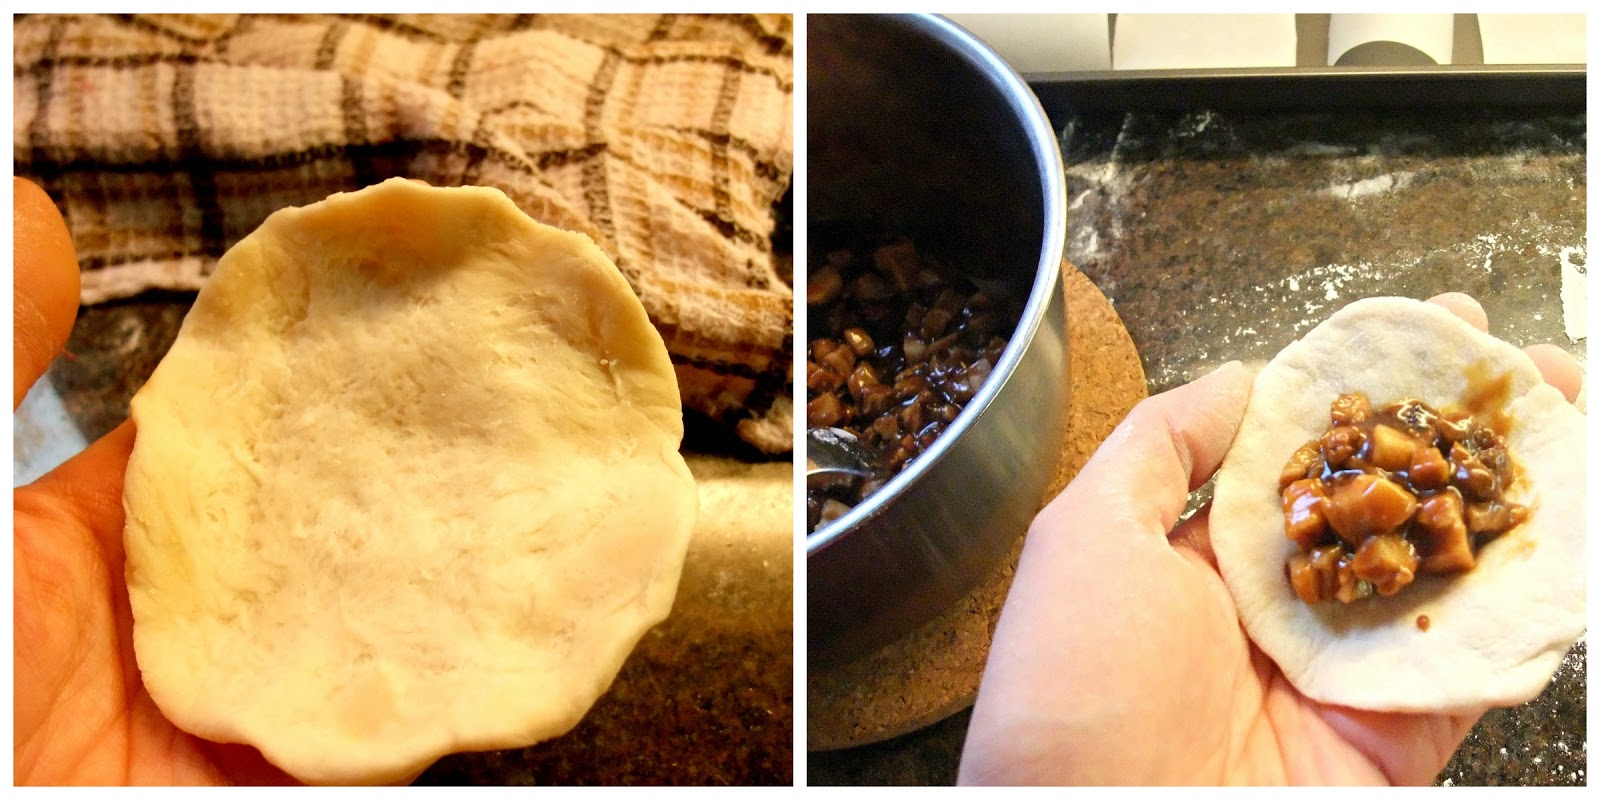
Now we are ready to assemble the buns: Press each piece of dough into a disc about 4-1/2 inches in diameter (it should be thicker in the centre and thinner around the edges). Working with one round at a time, place about one Tbsp. filling in the centre. Pleat right around the edge of the round by fluting and tugging upwards to create a pouch for the filling and more skin to pinch and twist at the top to close. Set the bun on each square parchment paper as they are bring made. Cover with damp cloth to keep buns from drying out.


The best I could do with other hand on camera :) 

Don't worry if it's slightly agape at the top.

Prepare your steamer by placing it on a rack in your skillet/wok; fill with water just under the rack and bring it to a boil. Arrange each bun with parchment paper into a slightly greased steam basket or bamboo steamer leaving 1-1/2 inches in between; close lid. I steamed the buns in three separate batches (be sure the boiling water does not touch the buns during steaming process or it'll wet the bun bottoms) and add water to skillet/wok as necessary. Steam each batch for 13-15 minutes over high heat until piping hot. Best served immediately or the skin will toughen.


WOW BAO-ZERS WOW!


These guys were happy happy campers let me tell ya'! ヾ(o✪‿✪o)シ


Soft, tender, slightly chewy bao giving way to savoury sweet succulent pork. YUM!


Freezing TIP: Allow to cool to room temperature after steaming. Place in plastic freezer bags, seal closed and freeze. They will keep up to two months. To reheat the buns, thaw and allow to come to room temperature, then steam for about five minutes, or until they are very hot.

Now that I've got a solid bao recipe down-- the filling options are limitless... from all kinds of savouries with meat, seafood and veggie or flavoured like curry, five-spice or Korean-style. The most exciting one I've ever tried and still lingers in my food memory was in Yokohama's Chukagai filled with delectable savoury strands of shark-fin-- mmmm. And then there are sweet ones-- with sesame or red bean paste, custard, sweet potato or chestnut.... 

In Yokohama's Chukagai (Chinatown)-- Japan's largest and one of the world's biggest!
My brother and husband stepping aside to savour street bao bao.


Tuesday, February 2, 2016

Chinese Crispy Roast Pork (Siu Yok)...


My favourite of all Chinese deli roasted meats-- Siu Yok Crispy Roast Pork! The Cantonese especially love roast meats called Siu Lap. Originating from the Guangdong province in Southern China, siu lap travelled with the immigrants beyond Hong Kong and is popularly enjoyed nowadays the world over. Go to a Chinatown and you'll find several deli siu lap shops hanging their proud succulent wares in their windows for all to admire and salivate. Chinese new year is around the corner and Chinese-style deli have always graced our family reunion dinner table. I love working with large hunks of meat, and I've roasted a-many in western styles, and I thought-- why not try my hands on Chinese siu yok! Images of huge pigs roasting over pit fires conjure in my mind deterring me from ever attempting it, but believe it or not the results with skin-on pork belly-- crispy crackling-skin and divine roasted meat came straight out of my oven-- and just my small convection oven too :). If you care to try, you may no longer need to trek to Chinatown for your siu yok fix!


$16 for 5 lbs. pork belly including ribs. vs. average $7.99/lb. at the Chinese deli shop.
You do the math :)

My dad learning to roast whole pig back in Hong Kong as a young chef.


Crispy Roast Pork (Siu Yok)

5 lbs. skin-on pork belly with ribs (I like the ribs attached to act as a rack and for more flavour-- I use the bones to make soup later). Or buy a 3 lbs. slab of pork belly sans ribs.
1 tsp. sea salt, for sprinkling
oil for brushing

Marinade:
2 Tbsp. soy sauce
3/4 tsp. Chinese five spice powder
1/4 tsp. ground white pepper
1 tsp. sea salt
1/2 tsp. sugar

I go to the butchers at my local Asian supermarket.
Choose a nice skin-on slab with some fat and ample meat. 


Mix all the ingredients for the marinade in a small bowl. Set aside. Scrape the pork's skin surface with a sharp knife to remove the impurities. 


Poke the skin evenly and thoroughly using the pointed tip of a metal skewer (I used my oyster knife :)) You will need something sharp to get through the thick dense skin. This will produce a beehive-like crispy crackling. After, wipe off the skin surface with paper towels.


Turn the meat upside down. Slit the meat part of the pork belly, about 1-inch apart (or follow the ribs bones) and 3/4-inch deep. Using a small brush, brush the marinade on the pork and into the slits careful not getting the skin wet; if so pat dry with paper towels. Flip around and sprinkle the salt evenly on the skin. Marinate the pork for 2-3 hours at room temperature, exposing the skin to allow air-drying.


The salt will make the pork skin sweat. Pat dry with paper towels before roasting.

After marinating, take two aluminium foils and wrap the pork belly exposing only the pork skin. Heat the oven to 400F and roast for 1-1/2 hours. NOTE: If using 3 lb. pork belly sans ribs roast for 1 hour. Always cook pork until temperature in centre reaches 160F. 


Take it out and brush the skin surface with a little oil. Sprinkle a little more salt on the skin and turn the oven setting to broil. Put the pork belly back into the oven and broil the skin about 3-5 minutes, watching after two minutes to make sure it doesn't get burnt.

I use my convection oven-- it fits just perfectly!

Oh my God-- Crackling!!!


I did it!!!! Wearing a proud smile and appetizing eyes!! ᕦʕ ⊙ ◡ ⊙ ʔᕤ


Transfer the pork belly out of the oven, and let cool for about ten minutes to let the juices redistribute. Remove the ribs (roast further to gnaw off the meat or save for soup on another day). Cut the pork belly into pieces and serve right away.


Crispy roast pork tastes divine served dipped into hoisin or plum sauces.


My biggest Chinese deli meat roasting challenge is coming yet-- whole roasted duck!! Can't wait!