
Happy Mid-Autumn Festival! Also known as the Moon Cake, Harvest Moon or Lantern Festival, it has been an important annual festival for over 3500 years celebrated by the Chinese and Vietnamese. The harvest is praised and the full bright moon worshipped as a symbol of peace, prosperity, and family reunion; moon cakes typically filled with red bean or lotus paste are eaten and exchanged as gifts. Aside from ubiquitous moon cakes, the Chinese also eat a myriad of auspicious foods to pay homage. One such ingredient is taro root, round resembling the full moon. This lavender speckled root has a host of health benefits and is a beloved ingredient in Chinese cooking. I've made Pan-Fried Taro Cakes- one of my mom's specialty, cooking with her a mid-autumn occasion years ago. This year the special day lands on my Monday Chinese cooking class, and I thought we could start it by enjoying with steamed buns filled with taro paste and a cup of hot water/tea :). The seniors liked it, and I'll be buying them again (frozen section). Toting back the piece of fresh taro that was passed around, I turned it into the classic taro coconut tapioca dessert often served at Chinese restaurants after a meal. How easy it is to make from home...? Just four ingredients in a pot, and you have a comforting delicious and nutritious sweet soup to savour, served warm or cold.

Purple tinted buns with centres filled of soft taro paste.
 |
| Photo Credit Right: Ilene Huynh |
Makes 8 to 10 servings
4 cups water
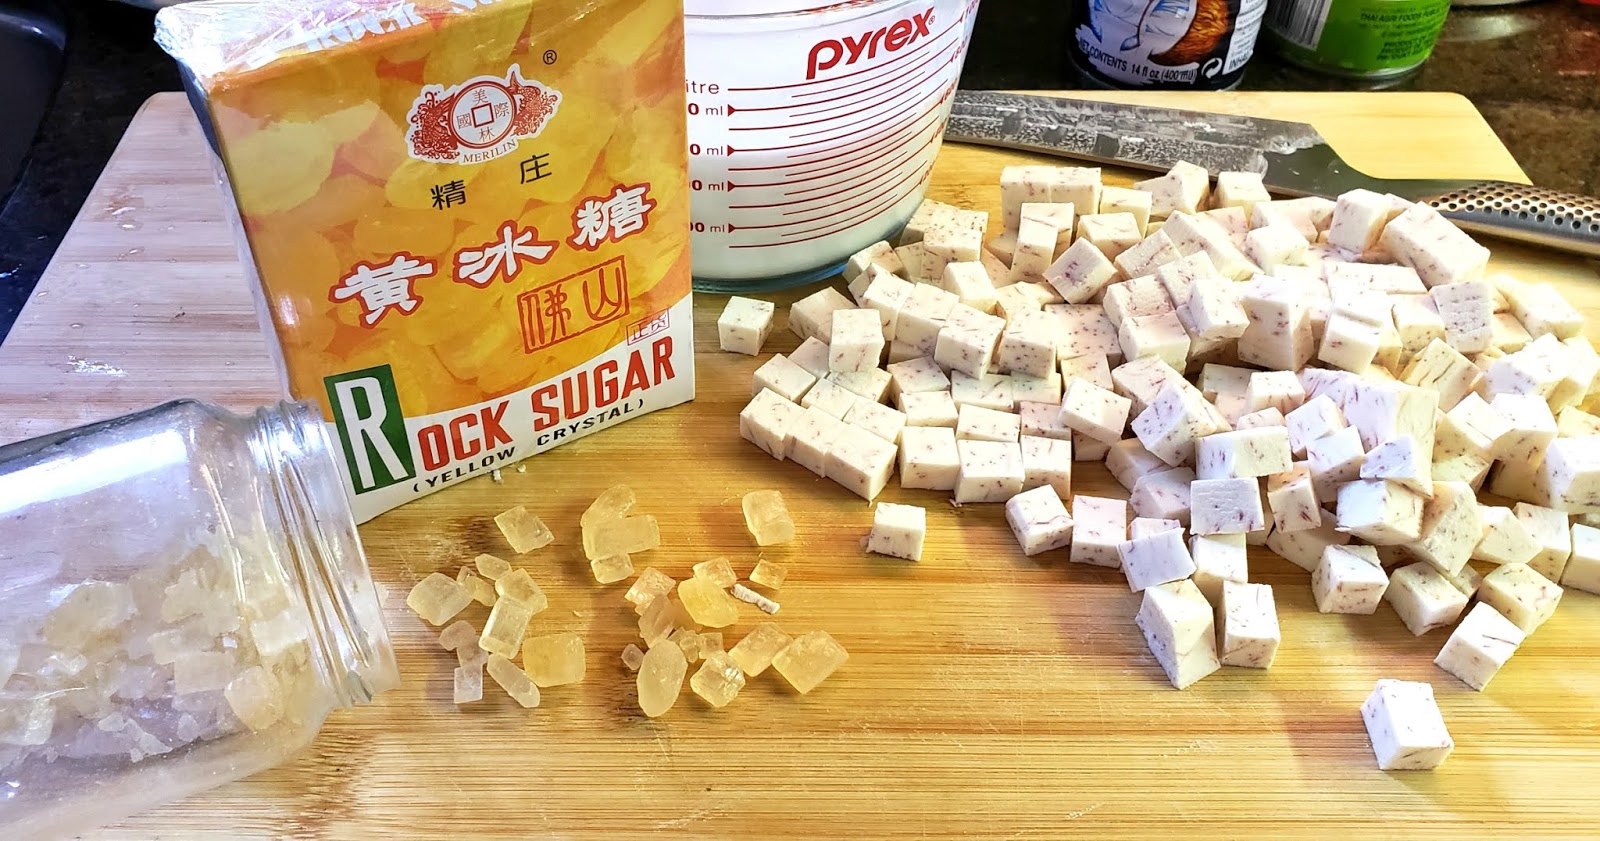
1 cup dried tapioca pearls (look for the packages in Asian supermarkets)
4 cups water
3 cups raw taro root, peeled and cut into 1/2-inch cubes
2 cans (400 mL) coconut milk (I like brands Aroy-D and Savoy)
1/2 cup rock sugar
NOTE: Chinese usually cook with rock sugar to sweeten their dessert-style soups. Rock sugar or rock candy is crystallized sugar, tastes milder than granular sugar and yields better cooking results. You can substitute with golden sugar, but start with 1/4 cup.
 |
| I prefer white pearls but the store only had green which is fine. |
 |
| Slice the peeled taro in half, cut into pieces, strips then 1/2-inch cubes. |
 |
| Left: Not Done, Right: Done |

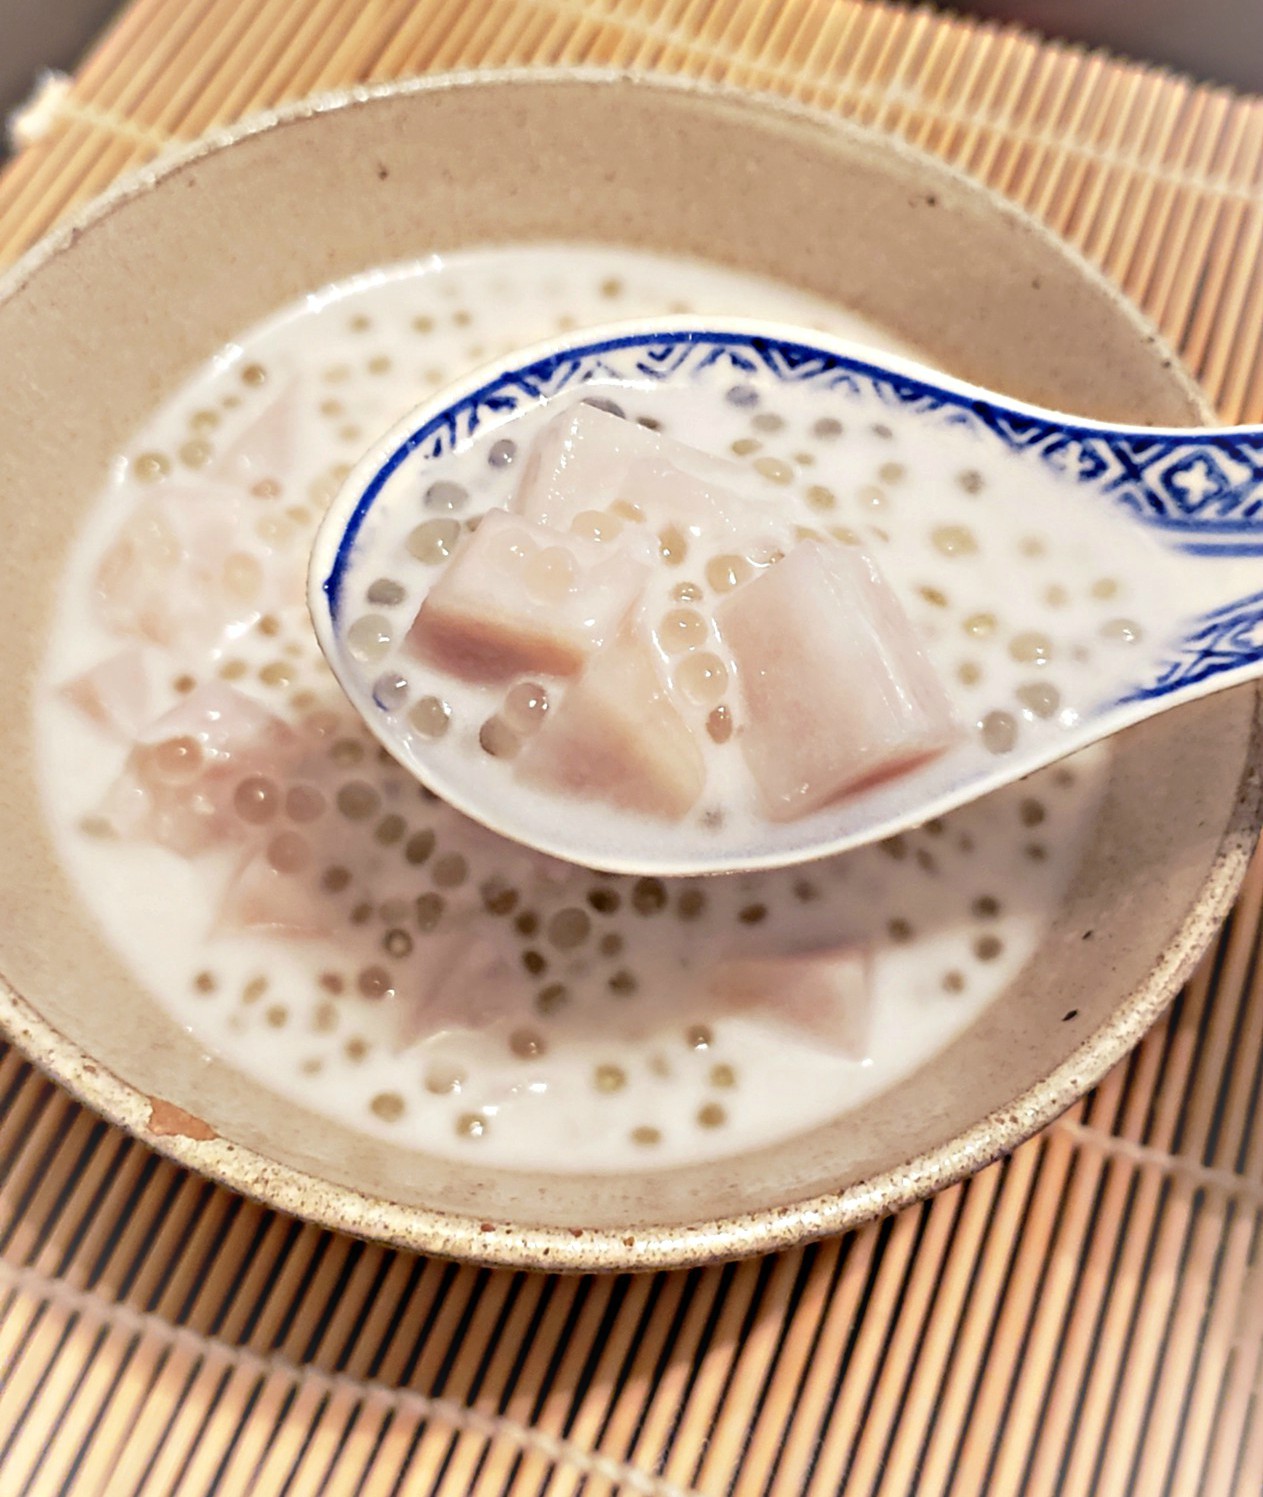
Bring four cups of water to a boil in a large saucepan and stir in the taro root. Reduce the heat to medium-low, and simmer the taro until soft, about 10 minutes. Add coconut milk and rock sugar, stirring to dissolve the sugar, and simmer for 10 more minutes to blend the coconut milk and taro. Gently stir in the cooked tapioca pearls until well combined. Taste to adjust sugar if desired.
Serve warm, or chilled. If serving cold, let cool completely first before storing in fridge. TIP: I put the pot outside on my patio in cold weather or near the a/c vent to chill faster. Do not cool in fridge as it will bring up the fridge's temperature, and can make other foods unsafe.
NOTE: I always heat up canned coconut milk before using. Although coconut milk is cooked during the canning process, I think it's a safer measure to heat it up thoroughly before using-- you don't know how long it has been canned.
 |
| My 9-year old Sébastien loves to get hands-on to help me cook. |
As the tapioca sits in the warm liquid or overnight cold in fridge, the tapioca pearls will swell and double its size. You may need to add some cold water to give the soup better viscosity. Adjust with dissolved sugar if desired.

Creamy, smooth, perfectly sweet taro and nibbles of pearly tapioca makes for a delightful dessert treat.
If you like tapioca dessert, check out my popular Coconut Jackfruit Tapioca soup dotted with chewy palm seeds and fun coloured gels for a textural sweet creamy treat.
Full Recipe:
Taro Coconut Tapioca Soup Dessert
Makes 8 to 10 servings
4 cups water
1 cup dried tapioca pearls (look for the packages in Asian supermarkets)
4 cups water
3 cups raw taro root, peeled and cut into 1/2-inch cubes
2 cans (400 mL) coconut milk (I like brands Aroy-D and Savoy)
1/2 cup rock sugar
NOTE: Chinese usually cook with rock sugar to sweeten their dessert-style soups. Rock sugar or rock candy is crystallized sugar, tastes milder than granular sugar and yields better cooking results. You can substitute with golden sugar, but start with 1/4 cup.
Bring a pot of water to a boil; carefully add the tapioca, and cook on medium heat until the pearls are translucent with a tiny bead of white in its centres. (Overcooking will cause the pearls to go mushy and sticky). Stir occasionally to prevent clumping and sticking. When done, rinse with cold water and drain thoroughly until no starch is felt on the pearls.
Bring four cups of water to a boil in a large saucepan and stir in the taro root. Reduce the heat to medium-low, and simmer the taro until soft, about 10 minutes. Add coconut milk and rock sugar, stirring to dissolve the sugar, and simmer for 10 more minutes to blend the coconut milk and taro. Gently stir in the cooked tapioca pearls until well combined. Taste to adjust sugar if desired.
Serve warm, or chilled. If serving cold, let cool completely first before storing in fridge. TIP: I put the pot outside on my patio in cold weather or near the a/c vent to chill faster. Do not cool in fridge as it will bring up the fridge's temperature, and can make other foods unsafe.
NOTE: I always heat up canned coconut milk before using. Although coconut milk is cooked during the canning process, I think it's a safer measure to heat it up thoroughly before using-- you don't know how long it has been canned.


