Showing posts with label Bread. Show all posts

Thursday, October 20, 2022

AmaZing Afghani Cuisine Anyone...?

 
I've been having a love affair with Afghani food 💗🇦🇫... 

You know when you get a whiff or taste of something completely intoxicating and the only way to feed the obsession (literally) is to seek it and gorge on it... I love working with the women at Newcomer Kitchen, cooking all kinds of traditional and cultural dishes to sell to the public. Their dishes always so wonderfully flavourful and appetite whetting 🤤. At the same time, these kitchen experiences are lessons, not so much cooking as they already know how but teaching about costing, budgeting and buying the right amount of groceries so they can generate a profit after operating expenses. We plan a few pieces more and a little extra for a taste test. But that's what I mean... it's just a tasting 🙄. 

So what do you do when that aroma and deliciousness sears into your brain and taste buds after that nibble... you get it out of your system by seeking it out or Making. It. The beauty of having the ladies recipes right at my finger tips... Lucky, lucky me 🍀 

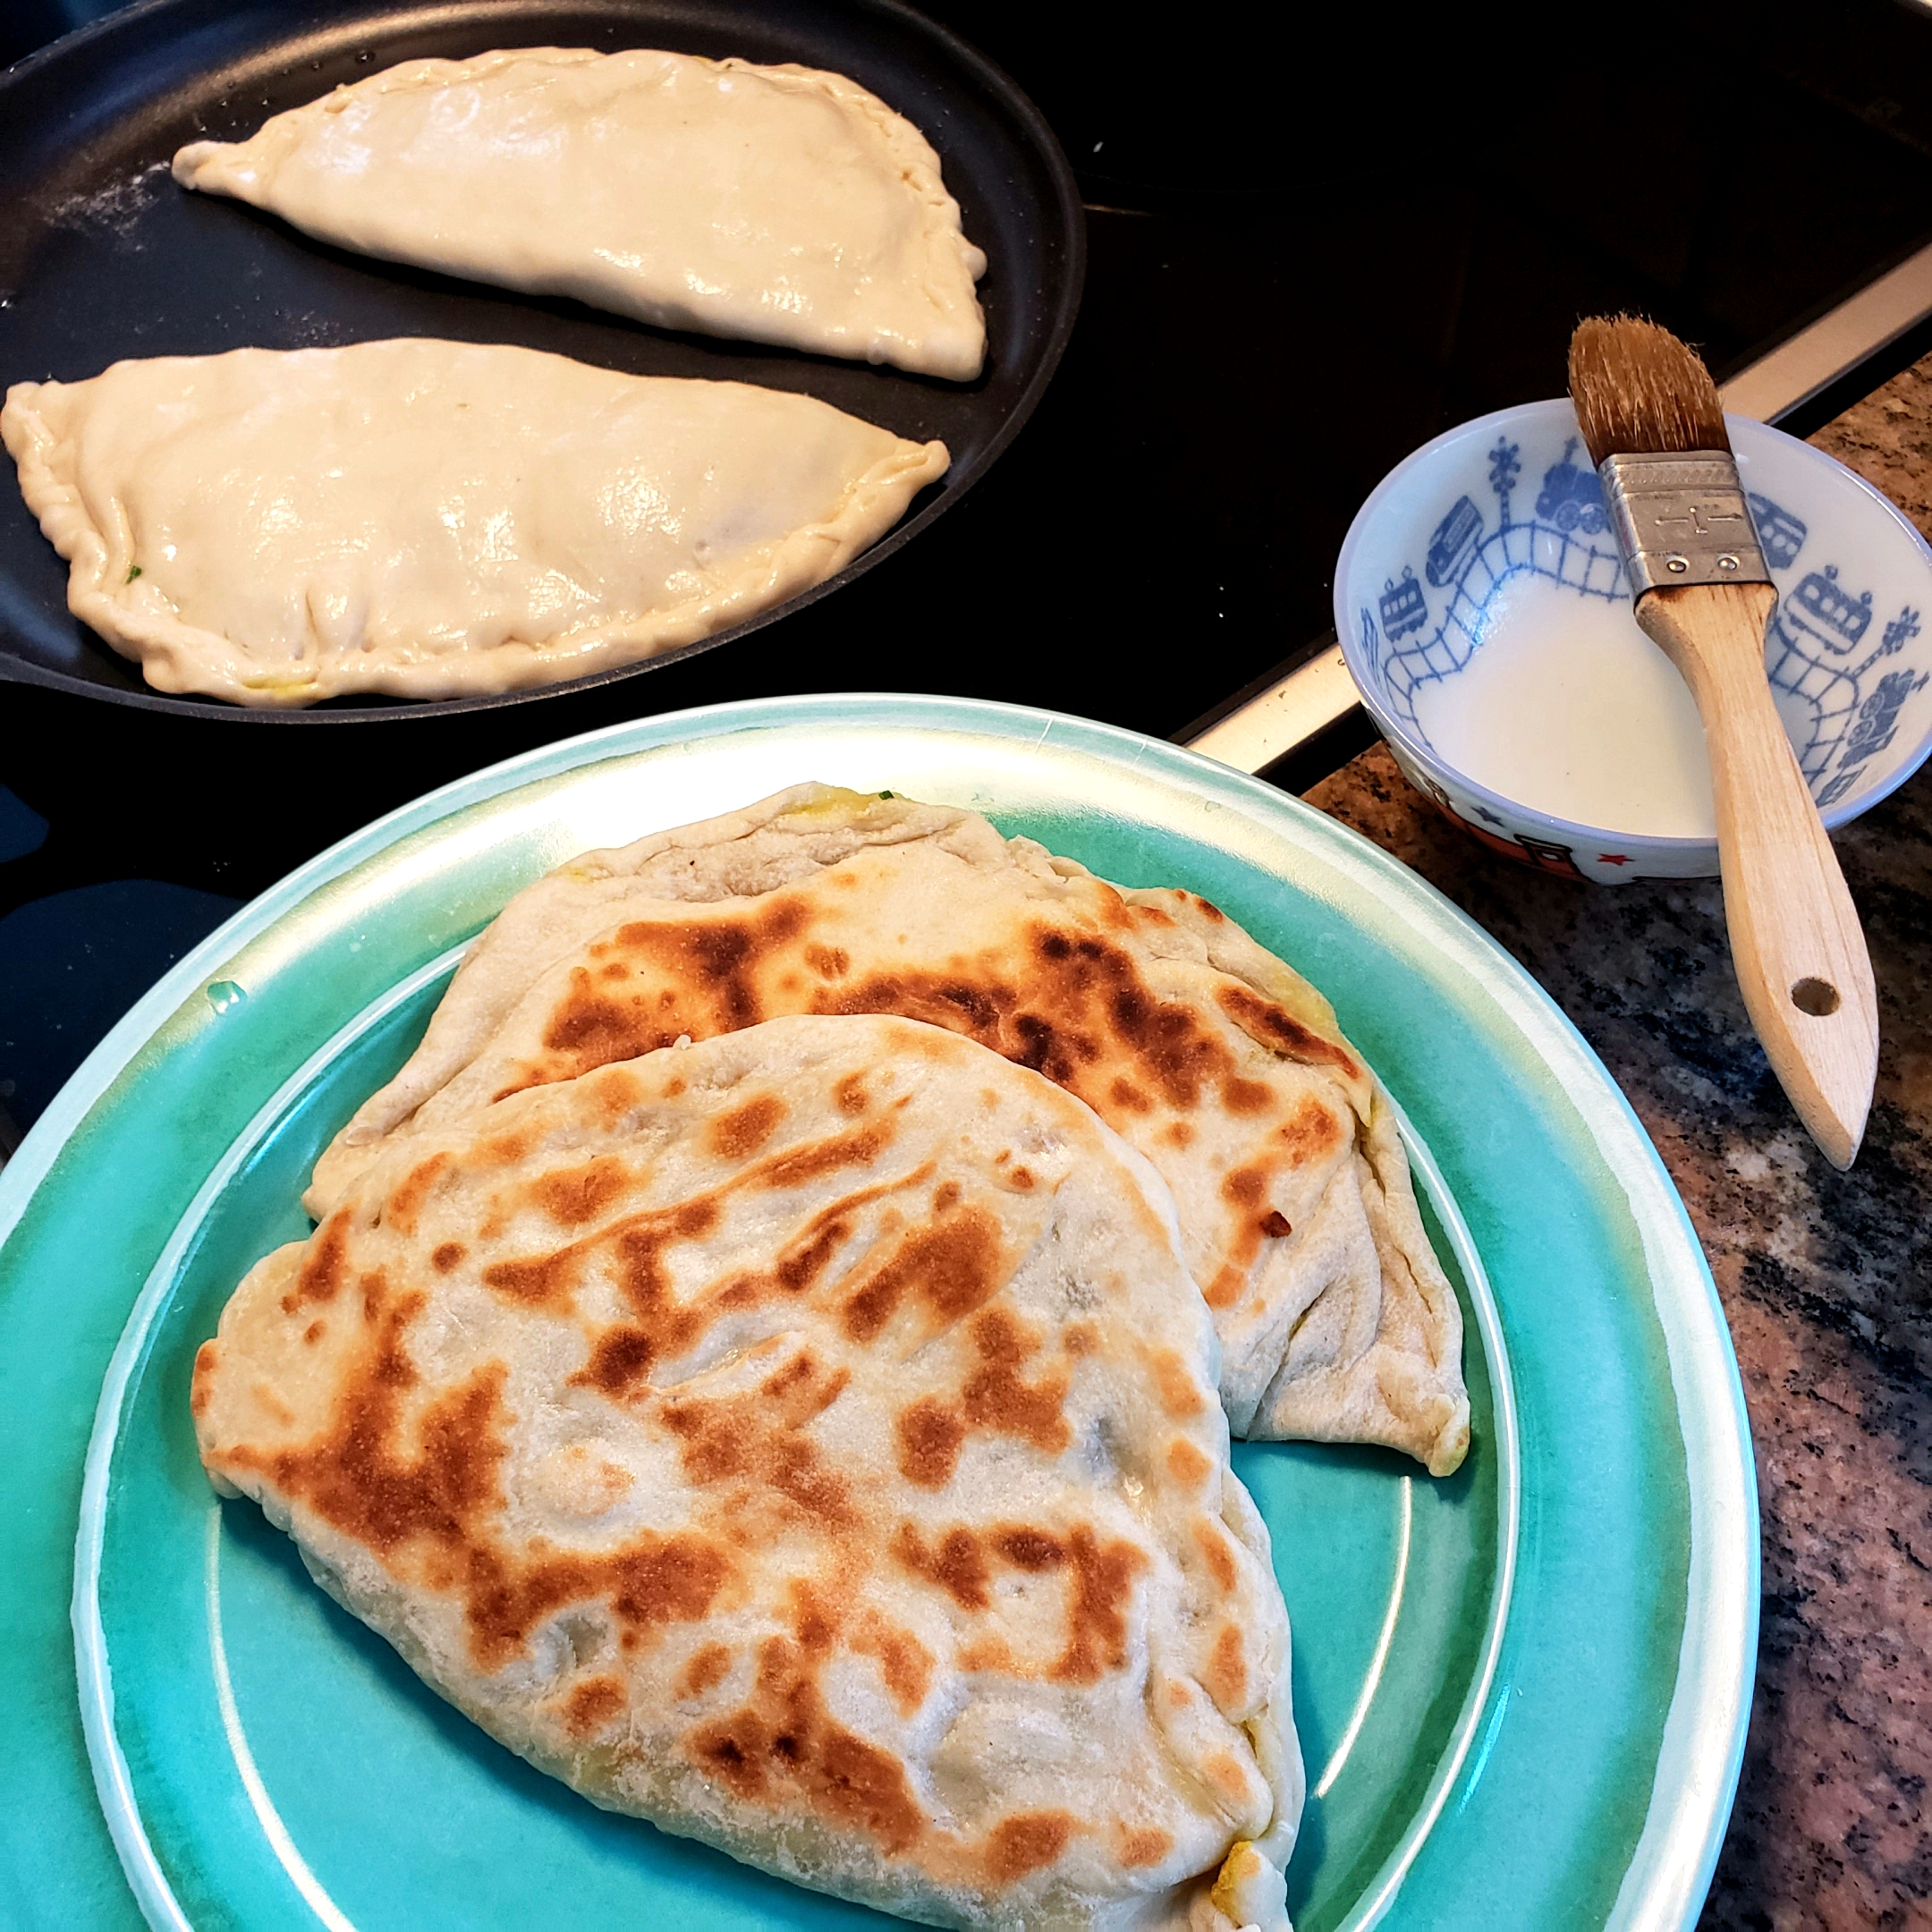
This brings me to making Afghani bolani... Homemade flatbreads stuffed with potatoes, green onion, cilantro, and green chilies then shallow fried to crispy, golden brown gorgeousness!  I've had these in Afghani restaurants but never tried making it. I had the pleasure of seeing it prepared by my student Sonita in the last term. See her recipe:

My family loved theeese!!! 


Selling yummy bolani on a rainy day at Leslieville Farmer's Market in May.


Vegetable Bolani (بولانی)
A famous fried or oven-baked folded dough wrap filled with mixed vegetables/meat and spices.

Makes about 10 bolani

Prep Time: 30 minutes 

Cook Time: 5 minutes each


1 kg all purpose flour

1 tsp. salt

2 cups water 

1 tsp. Oil

Filling:

1 kg potato, large grated raw or cooked, mashed

1 large onion, chopped

1 large bunch cilantro, leaves only, chopped

1 tsp. ground red chili pepper

1 tsp. salt

¼ tsp. black pepper powder


For the batter: In a medium size bowl, add the flour, salt, water and oil. Mix well and knead until the dough comes together. Let it sit for 10 minutes.


Mix vegetables together in a bowl. Add ground chili, salt and pepper. Mix well.


Divide dough into balls about palm-size. Roll out about 8” wide and ½” thick. Spread the vegetables on half of the flattened dough. Fold the bolani in half and crimp the seam to seal. Repeat. 


In a medium fry pan, add 1 tsp. Oil and pan-fry two bolani at a time. On low-medium heat, cook both sides until crispy and golden brown, about 3 to 5 minutes.


Bolani is traditionally served with hot sauce or yogurt and mint dip on the side. I served mine with a cilantro chutney made by finely chopping cilantro, garlic and mixing with vinegar and a bit of water, salt and pepper for a tangy garlicky zip!


This week, two Afghani ladies from my daytime program at Newcomer Kitchen whipped up warm spinach and red beans dip, juicy steamed beef dumplings (mantu) dressed with split peas, garlic yogurt and cilantro and Afghani chicken cofta as part of a mixed cultural menu for a catering gig- an engineering firm held at CSI Annex. A group that champions social networking by supporting grassroot organizations and program innovations like us. We all have a role in co-creating community 🤗!


Afghani warm spinach and red beans dip

Afghani Mantu Beef


My student with her delicious baked juicy chicken cofta.


Oh and Afghani traditional pulao- warm spiced rice with fried carrots, raisins, pistachios and almonds is crazy yum (as part of our Prepared Meals takeout menu the module before)! 


It began with grocery shopping at Iqbal's (a giant reputable South Asian and Middle Eastern grocers ❤) in Thorncliffe Park, I picked up the family kabab combo w/rice and naan from Madina Naan & Kabab- a gem of an Afghani lunch take-out nestled in a butcher shop (written up by foodie extraordinaire Suresh Doss). Omg, their fresh naaan.... 💗

Takeout Menu from Madina Naan & Kabab


And lastly, labour-intensive wholesome sweet paste (samanak) made from germinated young wheatgrass which you grow for a week then cook for 15 hours with flour, which is prepared for new year- a healthy gift from my student! Like I said... lucky, lucky me 🤗!

Afghani Samanak


Sharing one more post... What a successful event we had with our Newcomer Kitchen evening program students' catering finger foods at a Meet and Greet event for the city's immigration settlement and community outreach workers alongside our graduates!

Some of our past alumni students have gone on to own a food business. Notably, Lola (beside me right in group photo) @flawlesscuisine.ca (www.shopfreshprep.ca) cooks up Authentic African Flavours in sauces and dishes, Just like mama makes it. Other ladies, prepare their cultural foods for food events and have ideas in the pipelines. Another venture in our horizon is to expand to further support their dreams into fruition! 🌷


Newcomer Kitchen is a Not-For-Profit social enterprise established in 2016. Our mission is to provide social and economic opportunity for newcomer women interested in starting their own food businesses. Women are offered authentic work experiences and are the recipients of the revenues earned from the events.


And with that my ladies graduates including the evening group. Congrats ladies on all the great work 💐!!!


A new term begins again next week! My group has 6 Indian women and I know it will be a blast 💥!


Tuesday, August 4, 2020

Better Burgers From The Global Kitchen Community...


WHO is the Global Kitchen Community Burger Meester?

Photo Credits: From top left clockwise- Chef Damien, Lindsey Shifley,
Thomas Stahlmann, BestRecipeBox.com, Lara Butteriss and Jaroslav Guzanic 

Reunited with fellow ambassadors from the voluntary global foundation Food Revolution which I was a proud member of for four years- check here for more. This time around, our much smaller motivated group came together to create a Global Kitchen Community comprising of chefs, nutritionists, and real food & health enthusiasts on a mission to help our local communities get affordable, accessible, delicious and family-friendly meals on their tables 🥘🍲🥣🥗.

We dish out recipe challenges to inspire cooking together, sharing and drawing on each other's specialties and strengths to adapt our collective resources to our community outreach goals 💟.

Global Connection.
Local Execution.
Food For Everyone!

Thank you Chef Damien from the Netherlands who has been tirelessly working to feed the homeless for bringing us together again 🥰. 


Our first group challenge: better burger!


I got the idea of a messy beef burger thinking back of salisbury steaks in mushrooms gravy I made months ago that easily goes from skillet to a bun (for a saucy Salisbury Steak Burger) and serve with your favourite toppings. The sad fact is that I haven't a chance to make it again in burger form with my head and heart entrenched in my recent home things. Alas, my home sold but I am past the July end submission deadline. In exchange of lateness, I will share our talented group's burger efforts. Be prepared to have your taste buds transported below. I chose the best on-line photo with credit to showcase my idea.

To meet the participation criteria, I have simplified my recent Savoury Mushroom Salisbury Steaks post to make it more affordable with less ingredients priced accordingly to my local lower-end grocery store. The key to the savoury flavour boost is a part pkg. of onion soup mix in the burger and gravy.


Savoury Mushroom Salisbury Steaks

For 6, priced per portion at $2.33 Cdn or 1.48 euros

Savoury Mushroom Salisbury Steak Burgers
Makes 6 Patties

For the patties:
1-1/2 lb. lean ground beef
1 egg
2 cloves garlic, minced
1 medium onion, finely chopped
1/4 package (40 g) of onion soup mix
Salt and ground black pepper
1/2 cup dry bread crumbs

For the sauce:
1 lb. mushroom, sliced
1 package of gravy mix powder or a can of prepared gravy, brown or mushroom flavour
1 Tbsp. onion soup mix
Add in to taste: Dijon mustard and/or ketchup

Heat 1 Tbsp. oil in medium hot fry pan or skillet and cook meat patties four minutes each side or until nicely brown. Remove patties aside. Drain excess oil. In the same skillet, sauté mushrooms for a few minutes then stir in gravy powder (add water according to pkg. instructions) or prepared gravy and stir. Add 1 Tbsp. onion soup mix and ketchup and Dijon mustard if desired to preferred taste.

Add beef patties to the skillet and continue to simmer for 15 to 20 minutes spooning sauce over meat patties occasionally. Serve salisbury steak and mushroom gravy on a burger or kaiser bun with your fave toppings.

Photo Credit: BestRecipeBox.com

Here is a handful of our group's burger submissions that is surecto whet appetites!

From top left clockwise: Chef Damien's hearty Santorini Adani Burger is dressed with creamy feta yogurt and topped with roasted red peppers, black olives and dill inspired by his favourite travel destination Greece and love of Greek Food.

Lindsey Shifley from Illinois, U.S. created this burger with her special sauce, gruyere cheese garnished with beautiful purple basil.

Special Sauce:
2 Tbsp Mayo
1.5 tsp mustard 
1.5 tsp ketchup
1 tsp basil paste 
1 tsp garlic paste
1 tsp banana pepper juice
Salt & pepper to taste

Thomas Stahlmann from Germany created his Balkan burger with layers and layers of flavour. From his seasoned meat patties to marinated salad mix, crunchy coleslaw and kajmac-creme and luti sauce (spicy chili sauce with onion cubes).

My versatile comfort Savoury Mushrooms Salisbury Steak Burger with photo credit to BestRecipeBox.com.

Lara Butteriss from London showcases her Hamburger di Nonna inspired by her grandma's meatball recipe with a twist- adding boiled potato to the meat mixture and topping with rocket and Dolcelatte cheese on a brioche bun.

Jaroslav Guzanic in Miami, US created his Parmigiana-Style burger inspired by the fond summer memories of his trips to Italy. Oregano and rosemary spices grace his burgers along with olive tapenade, homemade marinara sauce, eggplant, cheese and fresh basil pesto.


In addition, a big deal actually... Chef Damien has been working hard to create and has finished his Magnificent Mince cookbook with 120 fully tested 'simple' recipes (with ground meats), all costed using Aldi/ LidL catalogue (a popular economical grocery store in Europe and US) with minimal equipment needed.

The goal of the book is very much in line with the mission of our Global Kitchen Community 'To empower people to eat better' with fully costed, simple recipes, with ingredients from a budget supermarket and the book is absolutely free and open sourced. Grab the fabulous pdf e-cookbook on DamienChef.com.

A great example of his affordable delish creation is Moroccan Meatball Shakshouka.

Friday, May 22, 2020

Make It A Fun Family-Friendly Charcuterie Board...


Happy FriYay! Changing things up with a family-friendly charcuterie board...

Keeping this post simple and savoury with the photos to speak for itself. Jambon, sausages, pate, olives, pickles, bread, crackers, cheese, veggies and grapes 🧀🍞🍇 Oh My... it's so much fun building with the kids and watching our masterpiece come to fruition with all the colours, shapes and textures! What an entertaining, different fun way to eat with the family. A little bit of this. A little bit of that. Like our own little party and with sparkling grape juice 🥂. And just in case we were still hungry 🥴, I made some homestyle Polish cabbage rolls too... laaaa 🎶. Have a great weekend my friends!


Homestyle Polish Cabbage Rolls


Friday, March 11, 2016

Amish Friendship Bread (Cont'd)-- Bake Day...


If I could rename this week in my world, it would definitely be called Friendship Week.♪٩(✿′ᗜ‵✿)۶♪  I could say this entire week has been a true testament of friendships. From expressing love & care to my dear friends, to friends pulling for me on a whim and seeing a friend in need and dropping everything without questions and go. Yes, I may have had my mind set or day planned on accomplishing some things, but to me, being there for a friend is always BY far the greater accomplishment! ♪(・∀・*)乂(*・∀・)ノAnd to end this high week on an even higher note-- baking Amish Friendship Bread after a ten-day do and wait process (see my post for more). Amish friendship bread is your basic sweetened quick-bread. What makes it unique is the cup of starter you add to the batter, which adds leavening and a bit of sourdough tang to the final bread. It is like a chain letter but a recipe that also creates starter kits you pass on to friends-- a recipe that keeps giving and spreading the love :). 

This was a perfect recipe to get my kids hands-on, making sure I spread out the ingredients, bowls and tools to give them lots of room to get right into it. I have to admit, I have a low threshold when it comes to mess and spillage, but when I organize properly with that anticipation in mind, I am able to relax and enjoy the experience with them more. Here is a photo gallery of my kids in action to coordinate the recipe steps, however I have included just the recipe text at the bottom of this post, so you can copy and paste onto a document and use it to pass on to friends.


Amish Friendship Bread

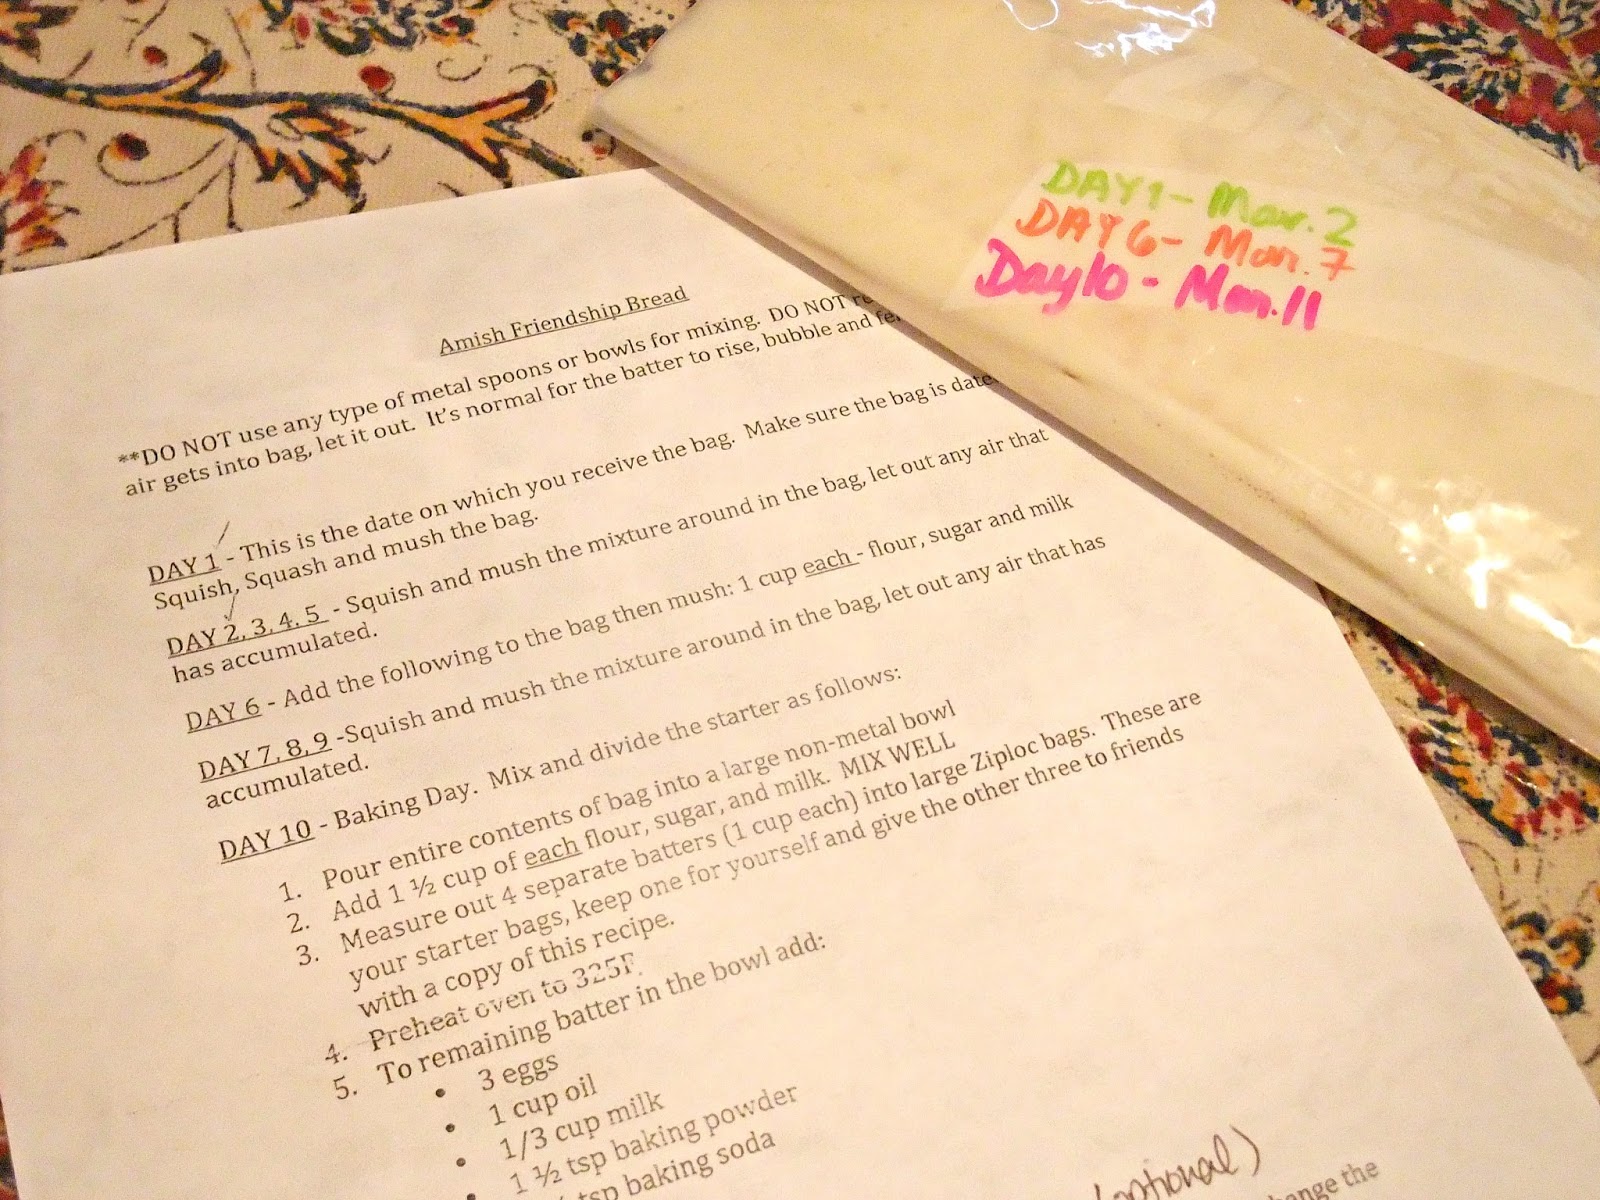
** DO NOT use any type of metal spoons or bowls for mixing. DO NOT refrigerate. If air gets into the bag, let it out.  It is normal for the batter to rise, bubble, and ferment.

Day 1: Do nothing. This is the date on which you receive the bag. Squish-squash-mush the bag. Make sure the bag is dated!


Days 2, 3, 4, 5: Squish-squash-mush the bag and let any air out.

Squish and Squash and let the air out of the bag!

Day 6: Add to the bag 1 cup flour, 1 cup sugar, 1 cup milk. Squish-squash-mush the bag.


Days 7, 8, 9: Squish-squash-mush the bag

Day 10: BAKING DAY! Mix and divide the starter as follows:


1. Pour entire contents of bag into large non-metal bowl.  


2. Add: 1-1/2 cup flour, 1-1/2 cup sugar, 1-1/2 cup milk. Mix Well.
3. Measure out 4 separate batches of the starter batter, 1 cup each, into four separate large ziplock bags. Keep one for yourself and give the other three to friends along with a copy of this recipe/instructions.

Three starter kits dropped off to three lovely neighbours :)

4. Pre-heat oven to 325F;
5. To the remaining batter in the bowl, add:
   - 3 eggs
   - 1 cup canola oil
   - 1/3 cup milk
   - 2 tsp. cinnamon
   - 1/2 tsp. vanilla
   - 1-1/2 tsp. baking powder
   - 1-1/2 tsp. baking soda
   - 1/2 tsp. salt
   - 2 cups flour
   - OPTIONAL: 1 large box instant vanilla pudding (or 2 small boxes)


Variation-- Add 1 cup chopped nuts, chocolate chips or raisins. You can also exchange the vanilla Pudding for chocolate pudding.

6. In a separate bowl, mix together
   - 1/4 cup sugar
   - 1/2 tsp. cinnamon

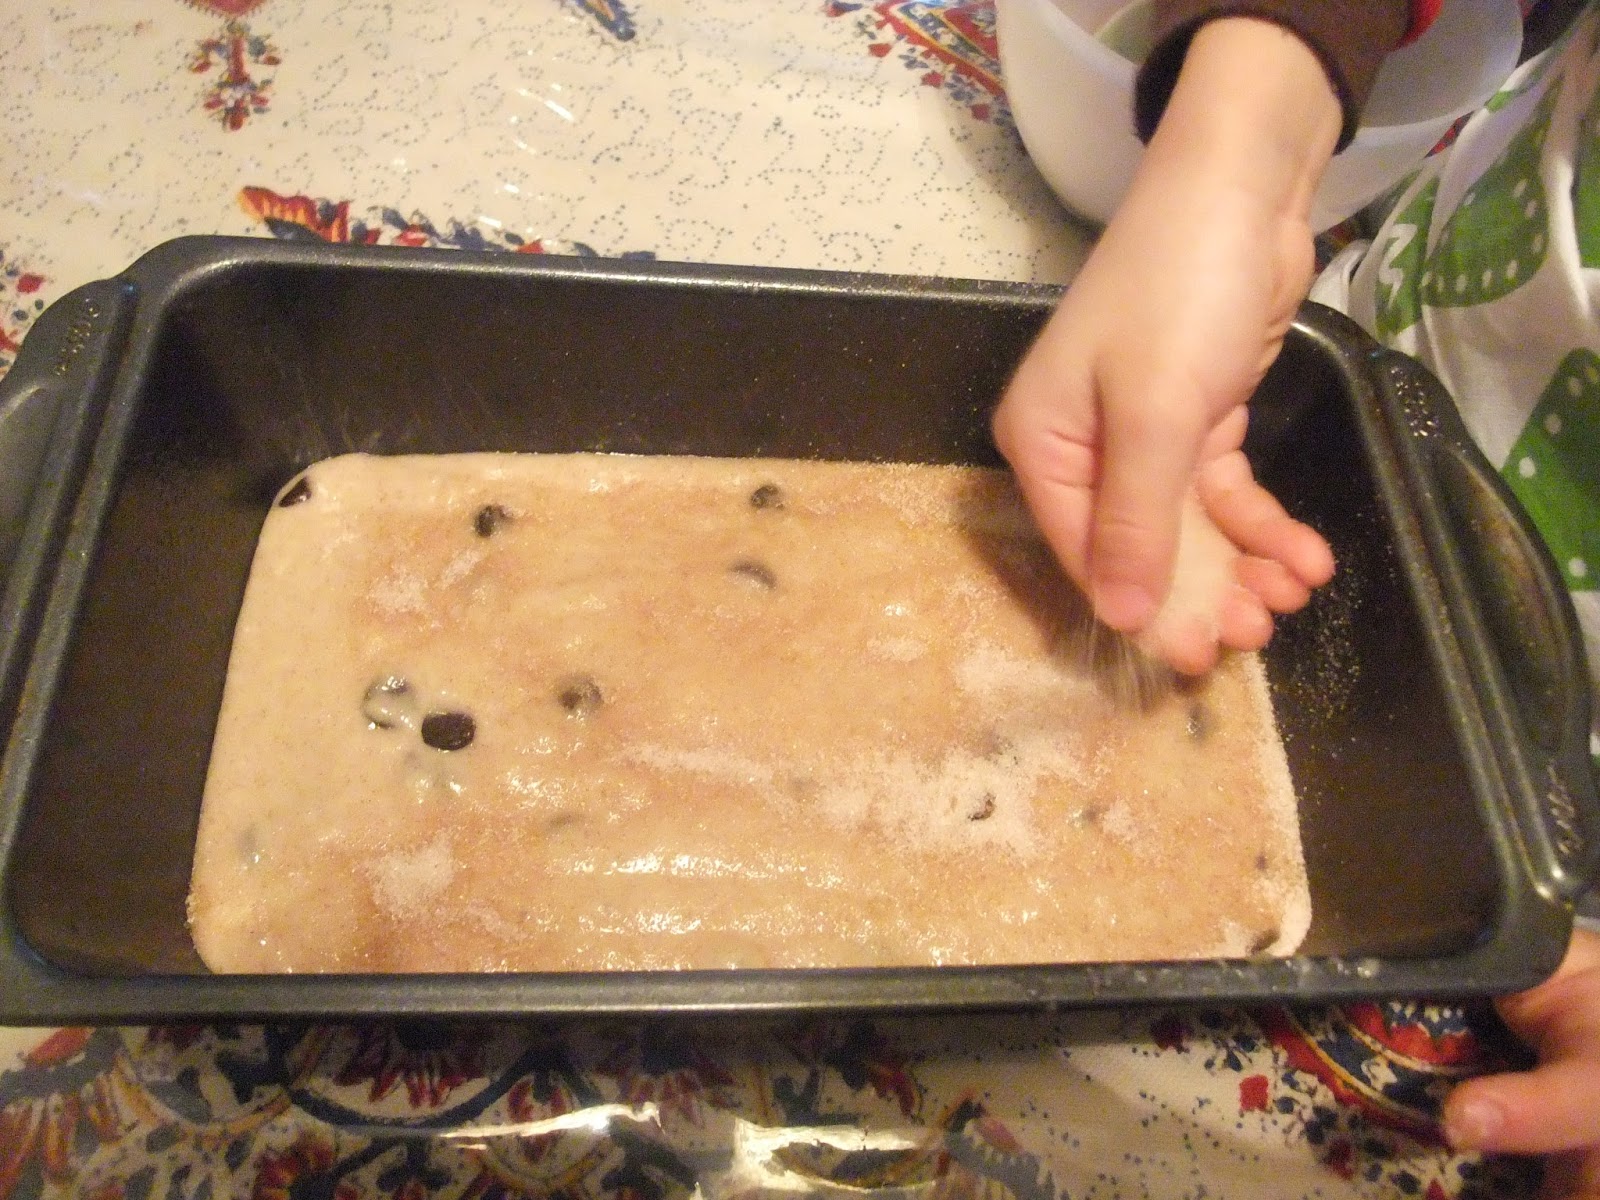
Grease or butter 2-- 8" x 4" loaf pans. Dust the greased pans with half the cinnamon/sugar mixture. Pour batter evenly into the pans and sprinkle the top with remaining sugar mixture.

We made one plain loaf and the other with chocolate chips.


Bake for 1 hour. Cool until bread loosens from sides of pan and turn out to serving dish.


Slightly dense with a semi-dry texture, the flavour of cinnamon really makes this a satisfying bread. Perfect with a cup of coffee or tea.


NOTE: If the bag has not been passed on to a friend on the 10th day, be certain to tell recipient which day the bag is at when given to them. If you keep a starter bag for yourself, you will be baking every 10 days.

Here is the recipe on it's own for you to copy and paste:

-------------------------------------------

Amish Friendship Bread

** DO NOT use any type of metal spoons or bowls for mixing. DO NOT refrigerate. If air gets into the bag, let it out.  It is normal for the batter to rise, bubble, and ferment.

Day 1: Do nothing. This is the date on which you receive the bag. Squish-squash-mush the bag. Make sure the bag is dated!


Days 2, 3, 4, 5Squish-squash-mush the bag

Day 6: Add to the bag 1 cup flour, 1 cup sugar, 1 cup milk. Squish-squash-mush the bag.

Days 7, 8, 9: Squish-squash-mush the bag

Day 10: BAKING DAY! Mix and divide the starter as follows:

1. Pour entire contents of bag into large non-metal bowl  
2. Add: 1-1/2 cup flour, 1-1/2 cup sugar, 1-1/2 cup milk. Mix Well.
3. Measure out 4 separate batches of the starter batter, 1 cup each, into four separate large ziplock bags. Keep one for yourself and give the other three to friends along with a copy of this recipe/instructions.
4. Pre-heat oven to 325 F;
5. To the remaining batter in the bowl, add:
   - 3 eggs
   - 1 cup canola oil
   - 1/3 cup milk
   - 2 tsp. cinnamon
   - 1/2 tsp. vanilla
   - 1-1/2 tsp. baking powder
   - 1-1/2 tsp. baking soda
   - 1/2 tsp. salt
   - 2 cups flour
   - OPTIONAL: 1 large box instant vanilla pudding (or 2 small boxes)

Variation-- Add 1 cup chopped nuts, chocolate chips or raisins. You can also exchange the vanilla Pudding for chocolate pudding.

6. In a separate bowl, mix together
   - 1/4 cup sugar
   - 1/2 tsp. cinnamon

Grease or butter 2-- 8" x 4" loaf pans. Dust the greased pans with half the cinnamon/sugar mixture. Pour batter evenly into the pans and sprinkle the top with remaining sugar mixture. Bake for 1 hour. Cool until bread loosens from sides of pan and turn out to serving dish.


Wednesday, March 9, 2016

Amish Friendship Bread...


I've never been into chain letters but chain recipes- one that keeps giving-- is a different story! I received this in my son's school cubby from another mom with a recipe for Amish Friendship Bread and a starter kit. A 10-day do and wait process that yields a cake-like Amish cinnamon bread (most popular) but can have nuts, raisins and chocolate chips added. A common practice makes a recipe batch, keeping one cup to start a new cycle, and giving the remaining three cups separated to three friends. The process of sharing the starter makes it somewhat like a chain letter. Can't wait to adapt to our version with the kids and taste the results of our efforts! 


We're on Day 8 today with results being shared with you this Friday-- Baking Day! Yay!

Squishing and mushing is all part of this 10-day fun bread-making process!


Friday, February 5, 2016

Steamed Roast Pork Buns (Char Siu Bao)...


Leftovers from my exciting first-ever home roasting of Crispy Roast Pork Siu Yok the other day turned into another proud session with steaming Char Siu Bao or should I say Siu Yok Bao :)-- everyone's top dim sum favourite! One I've been meaning to attempt but didn't get overly inspired until making my own siu yok got me thinking creative with the leftovers. These delectable filled buns soften and open like flowers as they steam and my kids adore them! Their history dates back to when ovens were rare in China and most foods, including these buns were cooked in steamers over the fire. My filling is brownish in colour due to using roast pork siu yok, double soy and oyster sauces as opposed to what you eat at most dim sum joints, with a red centre barbecue glazed pork char siu filling and perhaps a few drops of red food colouring :P. These didn't turn out to be fluffy snow mountain-white pull-apart ones like in the steam baskets at restaurants, as I learned afterwards it is due to using cornstarch in the dough-- one part to two parts all-purpose flour.  That will be the revision in my next bao-making attempt and perhaps another tablespoon of sugar to further sweeten the buns (it's all part of the recipe development process- tweaking and testing until you get results just right for you and your family's preference). However, this dough was utterly A.M.A.Z.I.N.G and versatile-- slightly chewy and denser (reminiscent of other kinds of Asian baos), but nevertheless delishush!! So wearing my happy pappy smile, let's take it away... Bao Wow Wow!


Steamed Roast Pork Buns (Char Siu Bao)
Makes about 20 baos

For the dough:
3-1/2 cups all-purpose flour
1 tsp. active dry yeast
1/4 cup warm water
2 Tbsp. sugar
1/2 tsp. oil
1 tsp. baking powder (this will be added after the dough had a chance to rise for two hours)

For the filling:
1/2 cup water
1-1/2 tsp. all-purpose flour
1-1/2 tsp. tapioca starch
1 Tbsp. light soy sauce
2 tsp. dark soy sauce
1-1/2 Tbsp. sugar
1-1/2 Tbsp. oyster sauce
1 tsp. sesame oil
1/2 lb. Chinese roast pork or barbecued pork, deli shop-bought or try my homemade crispy roast pork siu yok, cut into 1/4-inch dice
2 Tbsp. chopped green onion (optional)


To make the dough: Place the flour in a large mixing bowl. In a separate small bowl, combine the yeast with warm water. In a small saucepan over medium heat, warm the milk; remove from heat and add the sugar; stir to dissolve. Stir in the yeast mixture into the milk. Slowly stir the milk mixture into the flour and add oil to form a soft, firm dough. In the bowl, knead the dough for ten minutes until smooth and elastic; cover with a damp cloth and let rise in a warm place for two hours, until doubled in size. 

Use Your Mixer: In the bowl of an electric mixer fitted with a dough hook attachment turn on to the lowest setting and let it go until a smooth dough ball is formed. 


Knead in bowl until smooth and cover with damp cloth.

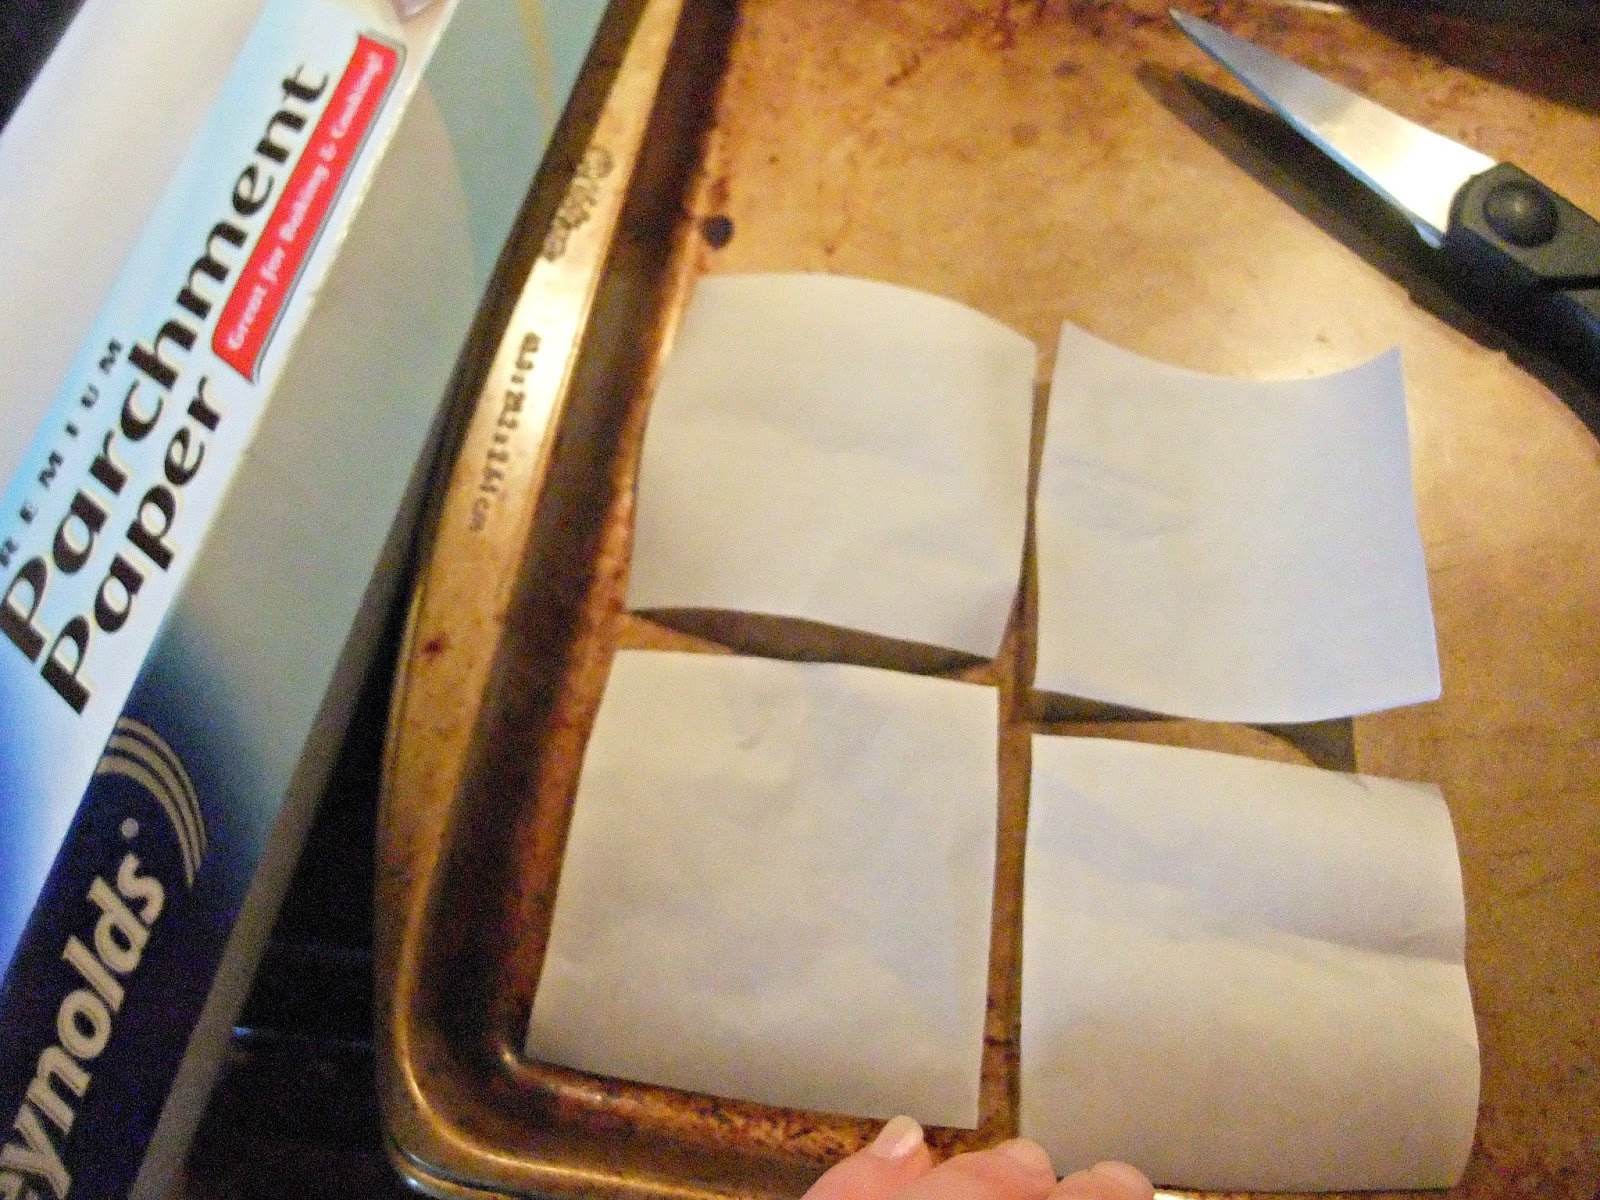
In the meantime, get a large piece of parchment paper and cut it into 20 4x4 inch squares, or you could set out 20 paper muffin liners and flatten them out side-by-side on a baking sheet. 


While the dough is rising, make the meat filling. In a saucepan combine the water, flour and tapioca starch. Stir to dissolve. Add the soy sauces, sugar, oyster sauce and sesame oil. Heat and stir until the mixture thickens. Add the cubes of roast pork and onions (if using) mix well. Let the filling cool. TIP: If you are making the filling ahead of time, cover and refrigerate to prevent it from drying out.


After your dough has rested and risen, punch down the dough and turn it onto a lightly floured surface. Add the baking powder to the dough and knead for about 10 minutes, until the dough is smooth; sprinkle with flour from time to time while kneading (talk about using your muscles). If you are using a mixer, turn it on to the lowest setting. If the dough looks dry or you're having trouble incorporating the baking powder, add 1 to 2 teaspoons water. Roll the dough into a long sausage 1-1/2 inches in diameter. Cut into 20 pieces. 


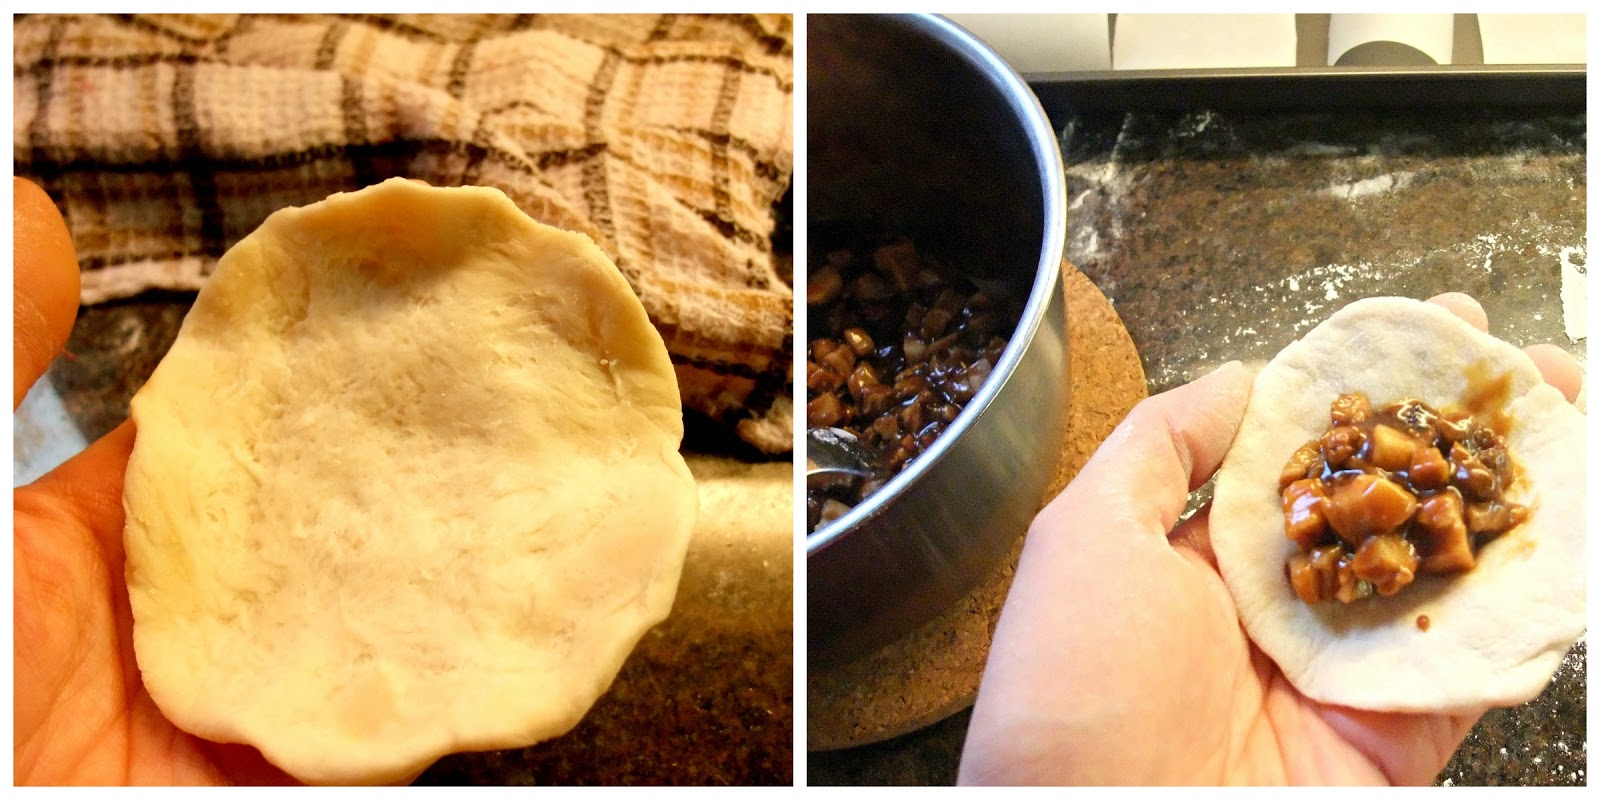
Now we are ready to assemble the buns: Press each piece of dough into a disc about 4-1/2 inches in diameter (it should be thicker in the centre and thinner around the edges). Working with one round at a time, place about one Tbsp. filling in the centre. Pleat right around the edge of the round by fluting and tugging upwards to create a pouch for the filling and more skin to pinch and twist at the top to close. Set the bun on each square parchment paper as they are bring made. Cover with damp cloth to keep buns from drying out.


The best I could do with other hand on camera :) 

Don't worry if it's slightly agape at the top.

Prepare your steamer by placing it on a rack in your skillet/wok; fill with water just under the rack and bring it to a boil. Arrange each bun with parchment paper into a slightly greased steam basket or bamboo steamer leaving 1-1/2 inches in between; close lid. I steamed the buns in three separate batches (be sure the boiling water does not touch the buns during steaming process or it'll wet the bun bottoms) and add water to skillet/wok as necessary. Steam each batch for 13-15 minutes over high heat until piping hot. Best served immediately or the skin will toughen.


WOW BAO-ZERS WOW!


These guys were happy happy campers let me tell ya'! ヾ(o✪‿✪o)シ


Soft, tender, slightly chewy bao giving way to savoury sweet succulent pork. YUM!


Freezing TIP: Allow to cool to room temperature after steaming. Place in plastic freezer bags, seal closed and freeze. They will keep up to two months. To reheat the buns, thaw and allow to come to room temperature, then steam for about five minutes, or until they are very hot.

Now that I've got a solid bao recipe down-- the filling options are limitless... from all kinds of savouries with meat, seafood and veggie or flavoured like curry, five-spice or Korean-style. The most exciting one I've ever tried and still lingers in my food memory was in Yokohama's Chukagai filled with delectable savoury strands of shark-fin-- mmmm. And then there are sweet ones-- with sesame or red bean paste, custard, sweet potato or chestnut.... 

In Yokohama's Chukagai (Chinatown)-- Japan's largest and one of the world's biggest!
My brother and husband stepping aside to savour street bao bao.