Sunday, June 8, 2014

"Sui Gow" Dumplings in Soup...


Cantonese-style "Sui Gow" (水饺) are large boiled Chinese soup dumplings that literally translates to "water dumplings". These are different from wontons which are wrapped smaller and while there are many versions out there, the classic wontons are made of just chopped shrimps. I grew up on wontons filled with mainly minced pork, shrimp, black mushroom fungus and chives and they remain my all-time-favourite. However, I also thoroughly enjoy their larger heartier cousin and my version of "sui gow" are made with mainly shrimp, minced pork, black mushroom fungus and bamboo shoots; the exceptional filling was inspired by a bowl I had at a mom and pop noodle joint which has sadly closed. I love making a big batch-- to eat some for the day and have extras frozen for later meals. Always a delightful treat to have frozen dumplings ready at your whim!

Siu gow dumplings served with a fave companion fish paste dumplings!


Sui Gow Dumplings
Makes about 70 dumplings

1 lb. lean ground pork
1 tsp. salt 
1/4 tsp. ground white pepper
1 tsp. fish or chicken seasoning powder
1 tsp. soy sauce
1/2 tsp. sesame oil
1 Tbsp. cooking wine
1-1/2 packages 500 g raw shrimp, shelled, cleaned, rinsed and patted dry 
1/3 cup dried black mushroom fungus slice, rehydrated in water for 1 hour, drained and chopped
1/2 cup of chopped bamboo shoots

1 Tbsp. cornstarch
1 package of wonton wrappers (I like the Hung Wang brand)

Season ground pork in a large bowl with salt, pepper, seasoning powder, soy sauce, sesame oil and cooking wine; incorporate well. 


As an alternative, you can also add Chinese chives (here I used mellow yellow chives) or instead of bamboo shoots. 

I like to add sliced shiitake mushrooms in the soup broth.


Coarsely chop the shrimps. Take half and mince well with a sharp knife. Add the minced shrimp to the pork and mix well with a pair of chopsticks, raking the meat mixture back and forth for several minutes to create a sticky blended mixture. Add the cornstarch, remaining chopped shrimps, mushroom fungus and bamboo shoots and continue to rake the mixture until well distributed. Wrap and chill at least one hour for flavours to meld.


Raking creates stickiness that delivers a tasty bounce in the dumplings!

Assemble dumplings right before cooking. Wet the top triangle of the wrapper with your finger tip dipped in water. Spoon 1-1/2 Tbsp. filling in centre of wonton wrapper. Wrap the bottom triangle upwards to encase the filling and pinch at seams to seal. Repeat with the remaining wrappers and filling. Cook immediately and freeze the remainder (see tip). Do not refrigerate or they will get moist and stick to the plate.


I like to seal the bottom just under the rim to create more loose skin.

FREEZING TIP: Lay the dumplings slightly overlapping if there are many on a baking tray and freeze for 20 minutes; this will prevent sticking. Then, place a plastic wrap on the bottom of a Tupperware or reusable plastic container. Lay the dumplings in a single layer. Then, cover with plastic wrap to add a second layer. Place another plastic wrap before closing tightly  with lid. Can be frozen for two months if properly sealed.


Bring a large pot of water to a rolling boil. Add 2 tsp. chicken seasoning to flavour the dumplings during cooking. Carefully add the dumplings and cook for three to four minutes or until they are all floating. Remove with a large slotted spoon or strainer.


An easy chicken broth was made by boiling then simmering a cornish hen in a
pot of water for 1-1/2 hours. Skim the surface for scum and excess oil. Season.

Serve with soup, noodles and cooked greens. And of course top with chopped cilantro, green onions and red vinegar for dumpling dipping. A little chili oil drizzled on top adds pizzazz!  

Comfort food at it's heavenly best!

Check out my related recipes: How to Make Delicious Wontons, My Heaven In a Bowl.... Wonton Noodle Soup, and Try Turkey Broth Instead.


Saturday, June 7, 2014

Perfect Potluck... Greek Quinoa Salad


My kids' end-of-year school concert last night. I committed to contributing a salad for the post concert eats and there was no doubt in my mind, this was the perfect crowd-pleaser salad to make with it's healthful ingredients and tasty flavours! A large fresh bed of both romaine and mixed greens topped with textured nutty grains of quinoa and a medley of crunchy colourful vegetables dressed with garlicky lemony dill.  And I was right, it was cleaned out! I reduced the recipe to make for a reasonable serving.

Photo update from my sons` birthday picnic!
Greek Dill Quinoa Salad
Makes 8 servings

3 cups hot, low-sodium chicken broth or vegetable broth
1-1/2 cups quinoa, rinsed
1/4 cup fresh dill, chopped
3 cloves garlic, minced
3/4 cup extra-virgin olive oil
1/3 cup lemon juice
1/2 tsp. kosher or sea salt, more to taste
ground pepper to taste 
6 cups mixed salad greens 
3 cups romaine lettuce, cut into bite-size pieces or omit salad greens and use 9 cups romaine
1 cup grape or cherry tomatoes, halved
1 small English cucumber, sliced and quartered
1 small red onion, halved and very thinly sliced
1/2 cup whole pitted kalamata or black olives
sprigs of fresh dill for garnish


Heat the broth in a large saucepan placed over high heat. When it has just come to the boil, add the quinoa and stir well. Allow to return to the boil, then immediately reduce heat to medium-low and simmer for 15 to 20 minutes or until liquid has been absorbed. When cooked, transfer mixture to a large, shallow bowl to cool. Combine the dill, garlic, olive oil, lemon juice, salt and pepper in a small bowl. Whisk to blend well. Taste and adjust seasoning if necessary.


Layer the mixed greens then romaine lettuce on a serving platter. Drizzle with half the dressing.


Place all the vegetables in a large bowl; toss with the quinoa and remaining vinaigrette. Layer on top of the greens. Garnish with fresh dill and serve. TIP: If desired, crumble feta cheese over top. Presentation Suggestions: Eliminate the greens completely if desired. Or present the salad in layers. The greens on the bottom, layered with just quinoa, then topped with the dressed mixture of vegetables. It looks stunning this way too!


Deeeelicious-o! 

Quinoa is protein-rich and a highly regarded superfood! It takes on surrounding flavours very well and a smart healthy replacement to carbs in your meals. For alternative quinoa salads, try a sweet version: Simple Cranberry Quinoa Salad or savoury with Mexican flavours: Black Bean Quinoa Salad. 


Thursday, June 5, 2014

Halfway Homemade... Japanese Curry in A Hurry...


It seems that everyone in Japan loves curry? But it doesn't sound exactly Japanese... what's up with Japanese-style curry? When the English version was introduced to the country, it was more of a soup meant to be sopped up with bread. The Japanese adapted it to their taste by thickening it so it could be easily eaten with rice and added familiar ingredients to make it more homey- their classic curry pronounced as karé contains onion, carrots and potatoes and often apples for sweetness. It's a favourite eaten in school cafeterias, restaurants and home kitchens! It's also popular in mine! My kids love the classic curry especially the crunchy apples, and there are some fantastic tasting Japanese brands of curry sauce that meets your meal preparations halfway, but not halfway delicious. Glico and S&B brands package curry sauce in a dry block format for convenient use. They can easily be found in most Asian supermarkets. You can choose the degree of spiciness from mild, medium to spicy. Serve it with toasted French baguette, ladled over steamed rice or noodles-- Japanese udon works really well!


Follow the simple directions on the back of package for a nice batch of curry. I serve 4-6 using half the package- usually four curry blocks. For the ingredients, choose 1 lb. of meat, cut into bite-size pieces; 2 cloves garlic, minced; 1/2 to 1 medium onion; 1-2 carrots; 2-3 potatoes, and other favourite vegetables or fruit all cut into bite-size pieces.

I used chicken thighs, sweet potato and two apples.

I love that these blocks already contain thickeners.

In a large skillet, stir fry onions and garlic with 1 Tbsp. oil. Add the meat, and cook for two to three minutes until almost done, then add the remaining vegetables. Add two cups of water and bring to a boil. Cook covered on medium low for 15 minutes or until tender. 

Remove from heat and break one block of curry sauce into skillet to serve four. Each package comes with two blocks. Stir until completely melted. Add the apples. Cover and set aside for ten minutes before serving.


Add apples at the end to maintain their crunch! Cantaloupe and honeydew melon works too!


Toast Vietnamese bread or French baguette for some heavenly sopping!


Or serve over short-grain steamed rice which is the traditional Japanese way....


Add sambal oelek or other chili sauce to give it some kick!

For fun form rice balls into a cute caricature with nori for facial features and ketchup for cheeks courtesy of my sis-in-law Yoko!

Credit: Dan Ng

If you've never tried Japanese curry, give it a whirl. It’s thicker and has a milder flavour than its Indian counterpart, and the real secret is … using a curry sauce from a box! Japanese people like to make a lot of dishes from scratch; however, when it comes to curry, there are not too many people that do. Add a simple green salad, and you have a tasty complete meal for your family! OISHI!!


Wednesday, June 4, 2014

Korean Assorted Lettuce Wraps


We love Korean food in this household, and Korean BBQ do-it-yourself wraps have been an occasional meal of choice for weekends. Now that summer is finally here, these mouthwatering packages of grilled seasoned meats- often any kind of well-marbled beef and lean pork belly, a bit of steamed rice, garlic and jalapeno slices, with a helping of savoury tangy onion mixture served with sesame oil dominate our cravings! Ssam (쌈) means “wrapped” in Korean. Ssambap (쌈밥) means rice wrapped in lettuce or other veggies with some other protein such as fish, bulgogi, kalbi, etc. Typically, the popular lettuce type used for wrapping is red lettuce leaf. I also throw in perilla leaves for a second variety. When I came across these beautifully arranged packages of assorted leaves displayed in the fresh meat aisle in the Galleria Korean supermarket, I was estatic! They were absolutely gorgeous and I was hungry to serve them at the next round of Korean bbqing.


That's seven varieties of leaves! 

Some leaves were crunchy, while others tender, but their natural tastes subdued when the layered ingredients of complex flavours were encased. My kids didn't protest at the selection. It's a great way to engage them in new varieties of different colours and textures with foods they love already!  


Tuesday, June 3, 2014

What the Whelk...?


Whelks are large sea snails and growing in popularity as upscale food- some prominent food sources are calling it the next oyster served straight up with just a splash of lemon juice. I came across whelks for the first time in Korean supermarkets. They are readily sold in cans dressed with a sweet savoury oyster sauce, and cooked in prepared packages, freshly gouged in the seafood section. I grabbed a fresh package and two things came top of mind- deep-fried fritters, like conch fritters (mmm.. I still remember them from Bahamas way back when..), and boiled and sliced to top a nice green salad. I did both and the results were deliciously wonderful! My kids went gaga over the fritters and knowing they were made with snails presented something exotic, wierd and cool for them.


Credit: Marilynn K. Yee/The New York Times

Whelk Fritters
Makes about 15 fritters

1 lb. fresh whelks, coarsely diced
1/2 small onion, diced
2 cloves garlic, minced
1 green onion, sliced
2 cups canola or vegetable oil for frying
3/4 cup all-purpose flour
1/2 cup milk
1 large egg
salt and pepper to taste
cayenne pepper for heat or use paprika for colour


Place whelk, onions and garlic into a bowl. Prepare batter by mixing flour, milk, egg and seasoning in another bowl. Add the whelk mixture into the batter and stir well.


Prepare the oil for deep-frying. Pour oil into a saucepan and turn the heat to medium-high. The oil is ready when a skewer is placed in the centre and small bubbles easily form around it. Carefully drop spoonfuls of whelk and batter into the hot oil. Fry until both sides are golden brown about five to seven minutes. Let drain on paper towel-lined tray before serving.


Serve with a dipping sauce made with 3 Tbsp. mayonnaise, 1 Tbsp. ketchup, juice of half a lime, salt and pepper to taste and a dash of hot sauce or cayenne pepper.


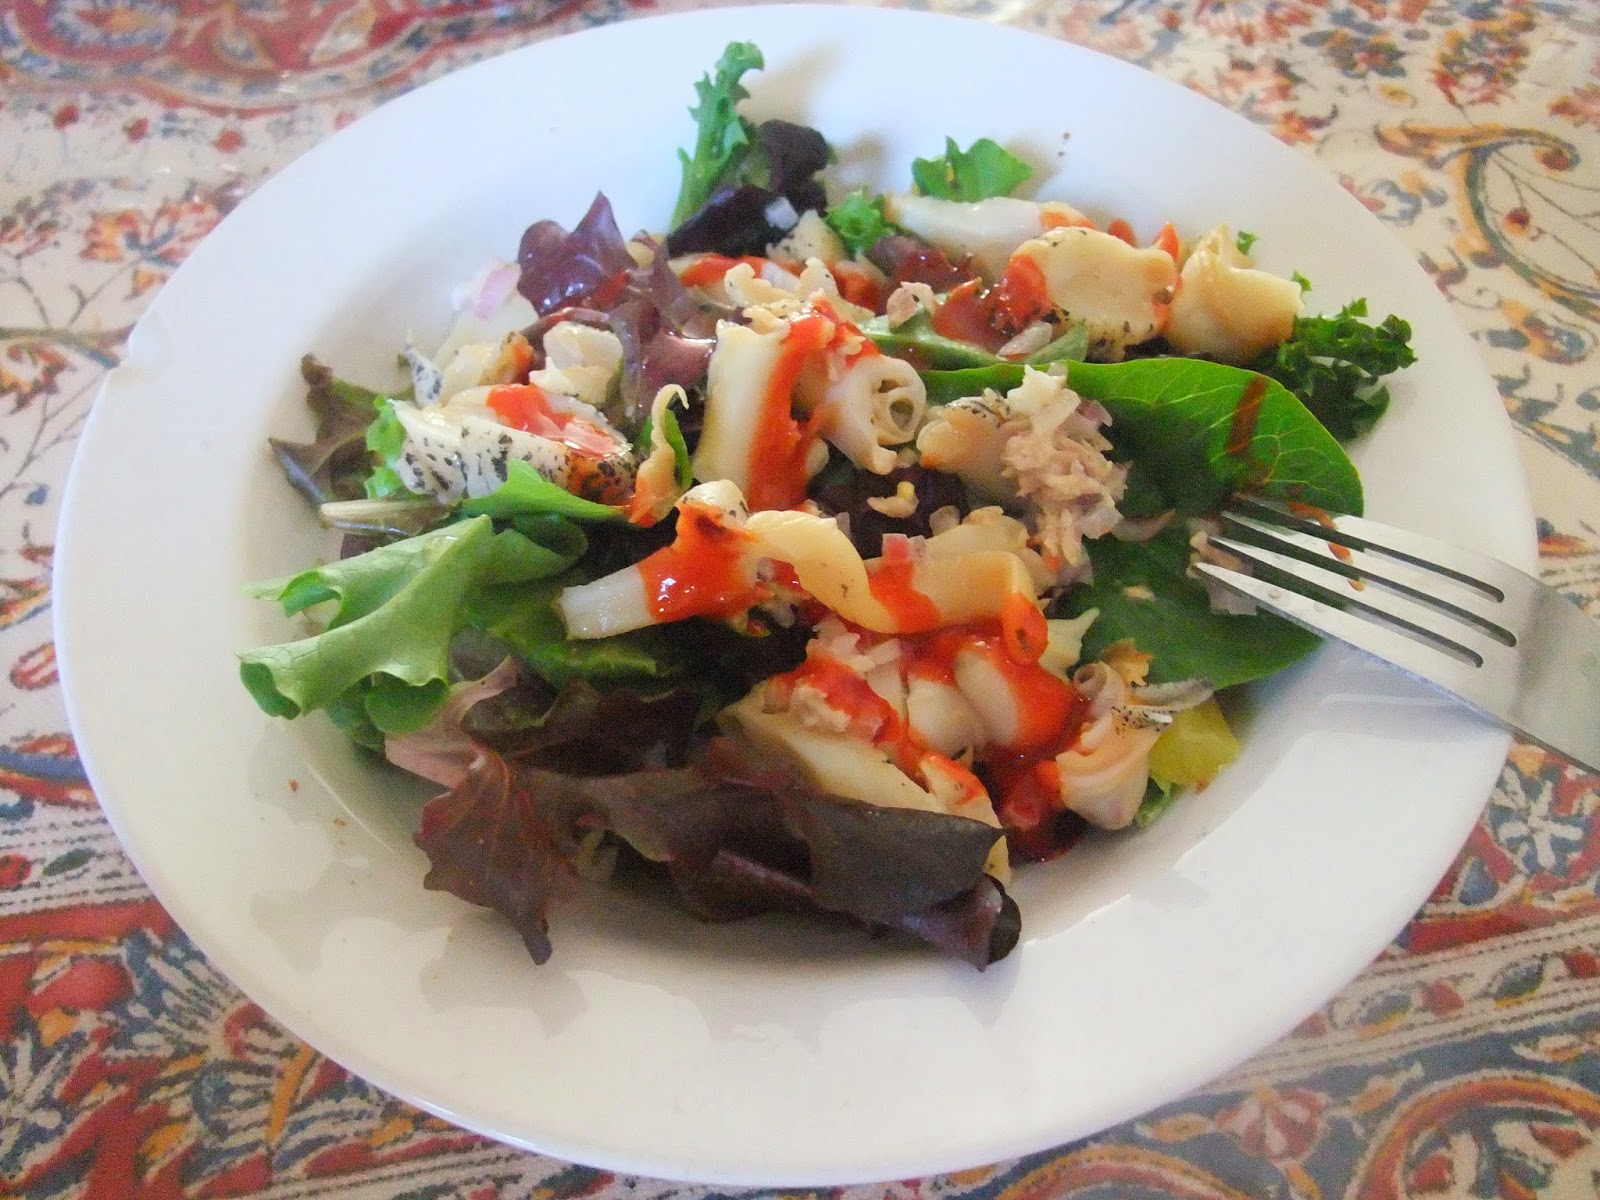
The healthier non-fried option, but no less tasty is whelk on green salad. Simply boil whelks for four minutes if they don't already come cooked, slice them up, then top on green salad with some chopped onion.  Toss with a simple dressing of light soy sauce, rice vinegar, lemon juice, salt and pepper, sesame oil and a drizzling of gochujang!

Slightly chewy tender morsels of whelk tastes sea-delicious on a bed of refreshing greens!


Monday, June 2, 2014

Lemon Cream Scones with Currants...


Scones, scones, who loves scones? I do, I do, we do! Back in my days in the Kraft Kitchens, batches of scones were often whipped up to serve during a breakfast meeting or in celebration of an occasion. Sometimes they were plain with lemon curd or clotted cream served on the side, and then there were these moist but slightly crumbly cranberry ones... were they ever good! Not an interested baker back then, I would admire my baking peers at it in the kitchens and savour the delectable bites each time goods emerged hot from the oven. Since having kids, I've developed a growing passion for baking, and when I perfected this version of scones, was I ever over the moon. These are my absolute favourite and my kids love them-- or scroll down for a chocolate chip version (equally delicious)!


Lemon Cream Scones with Currants
Makes 8 scones

3/4 cup plus 1 Tbsp. cold 35% heavy cream (I know, but cream makes the scones real tender)
1 large egg
1/4 tsp. lemon oil or 1 Tbsp. lemon zest
2 cups all-purpose flour (spooned and levelled), plus more for work surface
1/4 cup granulated sugar
2 tsp. baking powder
1/2 tsp. salt
1/3 cup cold unsalted butter, cut into small pieces and place in freezer for five to 10 minutes.
2/3 cup dried black currants
Coarse or sanding sugar


1)  Preheat oven to 400 degrees (I like to use the convection oven as the batch of scones don't take much space and to save energy). Whisk together 3/4 cup cream and egg, then lemon oil or zest. In a large bowl, whisk together flour, granulated sugar, baking powder, and salt.

Purchase lemon oil at specialty food or 
baking stores. 


2) Cut cold butter into flour mixture until it resembles coarse meal, with a few pea-size pieces of butter remaining. Stir in currants. With a fork, stir in cream mixture until just combined. TIP: Cold butter makes the scones flaky!     

I use my fingers to break down the butter.

Only a few pea size butter pieces should remain.


The dough should be crumbly; do not overwork.

3) Transfer dough to a lightly floured work surface and pat into a 6-inch circle. Cut into eight wedges and transfer to a parchment-lined baking sheet. Brush tops with cream and sprinkle with sugar, if desired. Bake until golden, 16 to 18 minutes, rotating sheet halfway through.


Let cool slightly on a rack and serve warm!

A perfect breakfast treat with my morning cuppa'!

Or change it up-- remove the lemon essence and add 2/3 cup of chocolate chips along with the black currants for another reason for your children to adore you in the morning. It works for me every time :)


Sunday, June 1, 2014

Mini Roasted Marshmallow "Camp-out"...


Meeting my old friend's sweet seven year old daughter Olivia for the first time was sheer joy; her slight shyness was easily quelled with a little friendly gathering roasting mini marshmallows over a tiny tea light flame, patio-style... I mean give kids, marshmallows and fire... and you've got a recipe for fun!

Two to three mini marshmallows on a stick.
Slow and easy, not too close...

Sébastien don't like 'em burnt offerings!
Nice slow roasting Étienne!


Let the good times roll! Me and Matias with chef David and Olivia...