Monday, September 22, 2014

Jamaican Me Hungry with Those Beef Patties...


I remember my first time baking homemade Jamaican beef patties.... I had quit my job, the twins were one-and-a-half and home with me, and I was pregnant with my third. I was craving beef patties but couldn't get out on a whim to buy some, so I decided to make them. In fact, I think that was a turning point in how and what I cooked... I couldn't get out to eat my favourite restaurant foods and snacks, so I researched them to death and made them myself to share with my loved ones. Jamaican patties were for many years, my high school lunch on the run- cheap and cheerful! It's no wonder I think about eating them all the time. Layers of crispy dough encase richly spiced meat that is also found on any corner in every town in Jamaica. Although, it takes some time to fill and wrap, the steps are simple and keeping some uncooked in the freezer makes it easy for a quick 15-minute bake-off for a snack or quick lunch. Just turn on some vibing reggae music and groove the time away. This recipe was adapted from "Lucinda's Authentic Jamaican Kitchen," by Lucinda Scala Quinn. I made a large batch so I could divide it up and make both mild and spicy versions to suit my kids, and our penchant for hot!

Jamaican Beef Patties 
Makes 18 regular or 36 small patties (1/2 all the ingredients to make 1/2 the batch)

Pastry:
5 cups all-purpose flour
1 tsp. salt
1/2 tsp. baking powder
1/4 cup curry powder
1 cup cold butter (adding this cold will help create a flaky pastry)
1-3/4 cups ice-cold water (as per above)

For the Filling:
2 lbs. ground beef
2 onions, finely chopped
5 green onions, finely chopped
2 cloves garlic, minced
2 scotch bonnets, finely chopped or a few dashes of scotch bonnet hot sauce at the end 
2 tsp. dried thyme or 4 fresh sprigs
1/4 cup oil
5 tsp. curry powder
1 tsp. salt
1 Tbsp. liquid beef concentrate
1 tsp. freshly ground black pepper
4 cups water
1 cup bread crumbs
1 egg, beaten with 1 tsp. water

To make the pastry, combine the flour, salt, baking powder and curry powder in a large mixing bowl. Cut the cold butter into small pieces and add to the bowl. Work quickly using your fingertips to squeeze the butter and toss the flour to resemble peas then add the water. With floured hands, mix and squeeze the dough until it forms a ball. Knead it twice to fully combine (less kneading the more layers thus flakier the crust). 


Divide the dough into four pieces and flatten each into a thick pancake. Wrap and chill for at least 15 minutes. TIP: The dough will keep refrigerated for five days. Just remove 30 minutes before using.
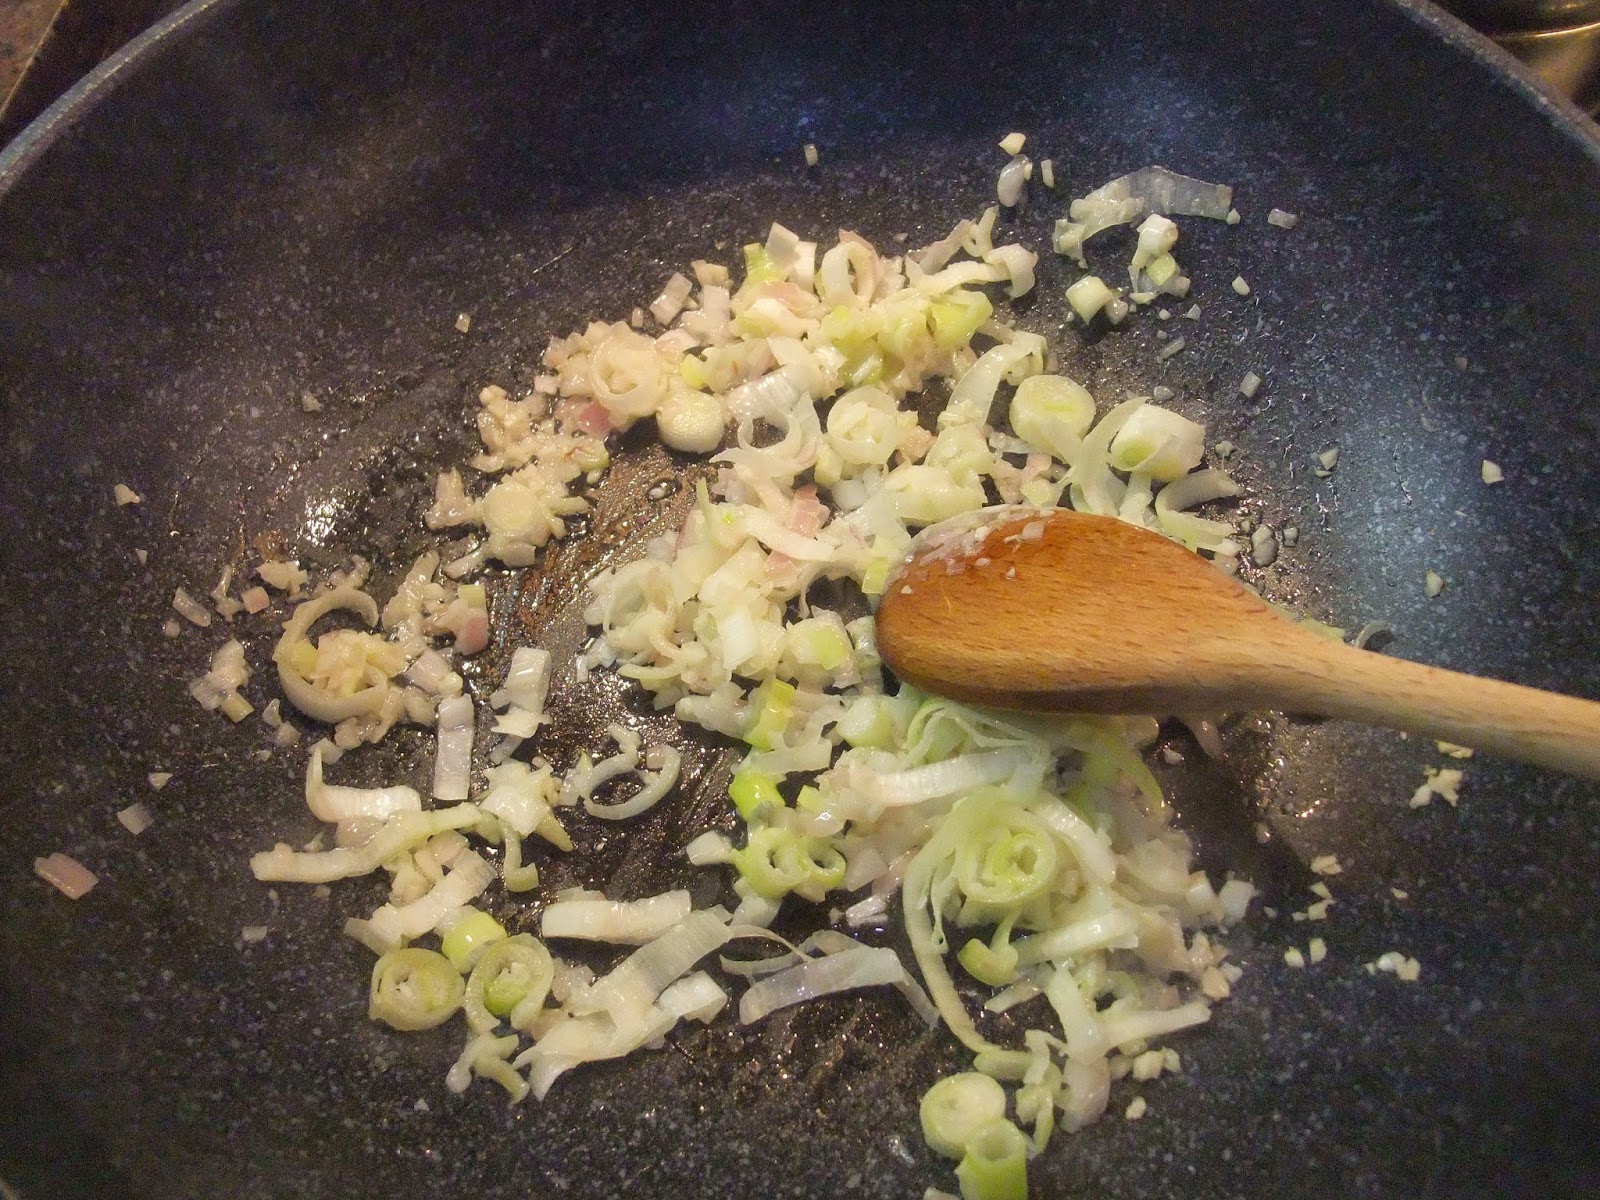
For the filling, mix together the beef, onions, garlic, fresh scotch peppers if using and thyme in a large bowl. In a large skillet, heat the oil over high heat and add the beef mixture when very hot. Fry until the meat is brown and the moisture is evaporated. Add the curry powder, salt, black pepper, liquid beef concentrate and scotch bonnet hot sauce if using,  stirring constantly over high heat, allowing a crust to form on the bottom. Add the water, stirring the mixture and scraping the bottom to incorporate the browned crust. Add he bread crumbs and stir.  The consistency should be like a thick stew. Add more water as needed. Cover, reduce to simmer and cook for 15 minutes. Set aside to cool.


To break up ground meat, I pound with a whisk to mince it.


Cook's NOTE: I made a big batch so I could make ample mild and spicy patties. Just remove half the beef mixture into a bowl before adding the hot sauce to the remainder.
Mild and spicy beef mixtures cooling and waiting to be used as filling.

Preheat the oven to 400F. Cut each piece of the dough into six pieces for regular size patties, or nine for appetizer portions. Using a rolling pin on a floured surface, roll out each piece into a rectangular shape with rounded edges. 


Spread two large spoonfuls (or one large spoonful for appetizer size) of the cooled mixture over one side of the dough, leaving a 3/4-inch border on the outer edge. Rim the edge with water on your finger. 


Fold the other side of the dough over, and roll and crimp the edges. Press a fork around the edge to seal.


Place extra patties in a parchment paper-lined box for freezing. Bake at 400F for about 20 minutes from frozen or until cooked.

Brush each patty with egg wash and bake for 20 minutes, or until patties begin to turn a golden brown colour.


YUMMY! Hot-out-of-the-oven goodness! Really scrumptious!


Oh, and how to differentiate the spicy ones from the mild... dot red food colouring with a q-tip.


If you like Jamaican cuisine, give Jamaican-style oxtails a try, either over the stove or in a slow-cooker and pair it with a beautiful and all the delicious Caribbean fruit flavours in Papaya Mango Black Bean Salad!


Sunday, September 21, 2014

Vietnamese Chicken Curry...


I never really appreciated Vietnamese chicken curry until I had it prepared by my husband's family in Montreal. Long before we had children, our bi-annual six hour drive to visit, often arriving in the middle of the night, was almost always greeted at the door with the beautiful wafting aroma of curry. Although the curry paste contains many pungent flavourings, the result is a delicate, mild rustic dish, comforting and delicious with cooked noodles or toasted-until-crusty Vietnamese bread. I finally asked for a recipe and have been making it for a casual dinner or as a special occasion, such as my husband's birthday. I also referred to an amazing Vietmanese cookbook called "Little Vietnam", written by chef Nhut Huynh which I highly recommend for Vietnamese home cooking. His curry paste recipe which I recited here is to-die-for!

It is an integral part of Vietnamese cooking to cook meat on the bone, so stripping the bones is part of the ritual of eating. Since the meat is fall-off-the-bone tender, it is easy to pop the piece of meat in your mouth, bones and all, and remove a perfectly stripped bone. Just make sure you put a big empty bowl in the middle of the table to collect them all!

Vietnamese Chicken Curry
Makes 6 servings

3 lb. chicken drumsticks or a whole 3 lb. chicken, cut into eight pieces
5 Tbsp. curry paste 
2 Tbsp. fish sauce
1/4 cup sugar
2 Tbsp. oil
2 cans (400 mL) young coconut juice
2 cups chicken stock
1 lb. potatoes, cut into 1-1/2 inch pieces
1 stalk lemongrass, bruised (optional)
green onions, sliced and cilantro, chopped and lemon wedges for garnish
steamed rice, cooked vermicelli noodles or bread rolls to serve 

Curry Paste (Makes one cup)- a lot of ingredients and may seem time-consuming but trust me it's worth making!
2/3 cup oil
1 onion, chopped
5 Tbsp. frozen thawed or fresh lemongrass, finely chopped, tender inner part of bottom third only
2 Tbsp. chopped ginger
2 Tbsp. chopped galangal
2 cloves garlic, chopped
1/2 cup water
1 Tbsp. ground cumin
1 Tbsp. ground coriander
2 Tbsp. turmeric
3 tsp. salt
10 dried chilies, soaked in boiling water for 10 minutes, drained and chopped (optional)
1 cup cilantro stems and root, well cleaned and chopped (about two bunches)

Heat 2 Tbsp. of oil in saucepan over medium heat. Add onion, lemongrass, ginger, galangal and garlic and stir constantly for one minute. Reduce the heat to medium and add water, a Tbsp. at a time until all the water is used. Remove from heat and add the cumin, coriander, turmeric and salt. Transfer to a food processor along with the remaining oil, chilies (if using) and cilantro roots and process to form a coarse paste.

TIP: Leftover paste keeps well in the fridge in an airtight container covered with a thin layer of oil for up to two months.


Mix the chicken pieces with curry paste, fish sauce and sugar in a large bowl, turning to coat the chicken completely. Leave to marinate in the fridge for at least 30 minutes or overnight in fridge. 


Heat the oil in a large pot or skillet over high-heat, then add the chicken and marinade and cook for three minutes or until lightly browned. Add the coconut juice, chicken stock, then bring to a boil. Reduce the heat to low and simmer, covered for 30 minutes.


Add the potatoes and lemongrass and cook for a further 20 to 25 minutes or until the potatoes are cooked and the chicken is tender.


Serve the garnishes of green onions, cilantro, lime wedges and sambal oelek (Vietnamese chili sauce) at the table. 


I love dipping the chicken meat in a sauce made of fresh lime juice, salt and black pepper. Something my husband got me into. The tangy salty flavour really complements the tender chicken. Serve chicken and potatoes in a little curry broth with a chunk of crusty bread to sop...


Or as a soup with thick vermicelli rice noodles...


Eat it however you like... it's so-O darn good any which way you serve it...


Friday, September 19, 2014

Mmm... I Love Mussels...


So glad to be feeling better, and didn't waste any time to start eating anything I want again :). And tonight, I want mussels!! As an appetizer or main, this fabulous classic recipe is seriously one of the quickest and overly delicious shellfish dishes ever to make! Bring a jazzed up wine-based broth to a boil, add mussels and cover; and cook until they open... That's it, that's all.. now let's eat!

Mussels in White Wine and Garlic

3 lbs. live mussels
1 Tbsp. butter
1 Tbsp. olive oil
1 shallot, finely chopped
2 garlic cloves, finely chopped 

1 leek, white parts only, chopped
1 cup dry white wine
1/4 cup fresh herbs, such as flat-leaf parsley, chervil or dill, chopped 
ground black pepper to taste
lemon wedges for splashing
Cook's NOTE: I find the resulting cooking broth very flavourful and perfectly salted by the mussel's natural juices. Add salt at the very end if needed after tasting the broth first.

Rinse and scrub mussels under cold running water. Using your fingers or a paring knife, remove beards (strings that hang from the mussels' shells), and discard. 
TIP: Any open mussels that do not close when you press their shells a few times are dead, and you should discard them. Choose wisely if you can buy them separately at the store.

Scrubbing shells well with a brush. Had to take photo with other hand here :)


In a skillet or large stockpot set over medium heat, sauté shallots, garlic and leeks in butter and oil for two minutes until fragrant. Add wine and simmer five minutes, then add mussels.


Cover, and increase heat to high. Cook until all mussels are open, about five minutes. Stir in herbs and remove from heat. Place onto serving dish, or individual bowls. Grind a little black pepper and splash with lemon juice. Serve immediately. 


Serve with hunky pieces of bread to sop and mop up the wonderful savoury cooking juices. We also had some soft cheese, foie gras pâté and spinach salad to round out dinner.. even a bottle of white to make it a gourmet affair with good food and good wine. TIP: My Montreal ex-colleague showed me this cool eating trick. Save one mussel shell after eating its meat, and use it as a pincer to pick out and devour the rest of your mussels. Enjoy!


Wednesday, September 17, 2014

Ginseng Yogurt Juice...


Was I ever happy to see a few healthy ginseng roots leftover in the fridge from making Korean Ginseng Chicken Soup (Samgyetang) several times the last two weeks. It reminded me to make this ginseng yogurt juice, a quick healthy, energy-boosting drink I so crave and my body needs having been under the weather for some time- a recipe I was curious about and had tagged in a Korean magazine. In Korea, ginseng (insam) has long been treated as a rare but excellent medicinal food, so much that some say, "it is the best gift that God has given man," with its rejuvenating properties valued as a booster for the immune system and a source of energy and vitality. The best grade is fresh cream-coloured wild ginseng roots; it has a deep mystic fragrance that tastes bitter at first, but after, the lingering taste in the mouth is sweet; ginseng is commonly blended for drinks and used for cooking.

Ginseng Yogurt Juice
Makes one serving

1 root ginseng, stem removed, rinsed well and thinly sliced
1 cup milk
2 Tbsp. honey
1/3 cup plain yogurt

Blend well in a blender to finely grind the ginseng or you will taste the particulates or gritty texture. TIP: You can pour it through a strainer before drinking it!


Lightly frothy, smooth, slightly sweet with a pleasant hint of fragrant bitterness from the ginseng. Refreshing, easy to drink and delicious! It got me through a busy morning and I'm feeling better already. Will definitely make again if I ever need a sustainable pick-me-up beverage!


Tuesday, September 16, 2014

Pork Bone Congee with Black and Salted Eggs


With the abrupt change to cool weather and back-to-school interactions, we all had our share of sickness in this household. My second son just went back to school after being at home for three days, and I am still nursing on and off headaches and an underlying feeling of unwellness for two weeks. This calls for simple, uncomplicated comfort food such as congee rice porridge "jook"; it has always been my go-to meal to make when anyone is under the weather, and something most Chinese kids grew up on eating for the same reason or for breakfast. You can cook it plain with water and serve a few salty side dishes to eat with it, or concoct a variety of porridges adding meat, vegetables, mushrooms, herbs or eggs. I've always loved the classic flavour combination of pork, salted duck eggs and a thousand year old black eggs. A bit of saltiness, some creaminess from the contrasting egg duo and overall savoury meaty porridge makes for nourishing eats and a satiated feeling of being on the road to recovery.

I had read that if you want to make home-made porridge that is shiny, the secret is to use a variety of rice for their unique textures. A guideline to the rice and their ratios are…
Glutinous or sweet rice gives the porridge the stickiness texture. (1 part)
Jasmine medium grain rice gives the porridge “volume”. (2 part)
Japanese or Korean short grain rice gives the porridge the shiny and glossy texture. (1 part)


Pork Bone Congee with Black and Salted Eggs
Makes 6-8 servings

2 lbs. pork neck bones
2 slices ginger
2 cups rice (refer to rice ratio in above for glutinous/jasmine/
Japanese rice), rinsed 
12 cups water
2 salted duck eggs, cooked in boiling water for 15 minutes
2 thousand-year old eggs
1 green onion, finely chopped
ground white pepper, salt & sesame oil to taste

After rinsing rise, soak the rice with water to cover for one hour if you have the time. If you don’t, don't bother and skip this step. 

Bring a pot of water to a boil; add a tsp. of salt and two slices of ginger. Add the pork neck bones. Bring the water back to a boil for two to three minutes, then drain it over a strainer. Rinse the bones under cold running water and wash between the crevices to rid gelatinous fat and any grit. Discard the ginger slices. Rinse the pot, add water and bring it back to a boil with the blanched bones. Cover and reduce heat to medium-low to cook for 1-1/2 hours.


Drain rice, then add in pot and cook under medium-low heat undisturbed. TIP: Having the heat on to high or stirring the pot too early will result in rice sticking to the bottom and burning. Meanwhile, prepare the eggs. Cut the thousand-year old egg in half, then quarters. Set aside. Cut the salted duck eggs carefully to remove the cooked yolks and place into a bowl, and cut the egg white into small pieces. TIP: The egg yolks does not need to be cooked again, and will be eaten served on the congee. 


After 1/2 hour give the rice a stir and add the chopped eggs. Stir well to incorporate and let cook on a simmer for another twenty minutes.


When the porridge is done, add salt, and sesame oil to taste. You can leave the meat on the bones and add those to your serving bowl, or pick out the meat and top it on the porridge which is easier to eat for the kids!


At the table, set ground white pepper, sliced green onions, shredded ginger, preserved spicy radish and the salted duck yolks to serve yourself. Here's to getting better!!!


Give this porridge a try with the combo of three rice-- you will see and taste the difference and never make rice porridge any other way again!  *(*´∀`*)☆


Sunday, September 14, 2014

Korean Spicy Soft Tofu Stew (Sundubu-Jjigae)


Eating Korean soft tofu stew always brought warmth to my thoughts and soul. So incredibly delicious, super hearty and nourishing! In Toronto, we have a few acclaimed sundubu houses and Korean restaurants serving this popular stew. This soup also illustrates the Korean penchant for combining some beef with seafood to strengthen the broth and provide another texture. So perfect to get your body in gear for the cooler weather to come!

Korean Spicy Soft Tofu Stew (Sundubu-Jjigae) 

Makes 2 servings

10 dried anchovies, head and intestines removed (pull black gut straight out)
1 piece dried kelp

1/2 onion
5 garlic cloves
5 shiitake mushrooms
2 Tbsp. seasoned soy bean paste (deonjang)
a few thin slices of beef NOTE: Freeze meat in plastic wrap for 30 minutes before thinly slicing.
1 to 2 green onions, cut into 2-inch pieces
2-5 Tbsp. of hot pepper flakes
1 cup of mixed seafood and 4 shrimps
2 Tbsp. fish sauce
1 pkg. (1 lb. or 454 g) soft or silken tofu, quartered 
1 jalapeno pepper, sliced
1 or 2 eggs
sliced green onions to garnish


Pour five cups of water into a pot and add dried anchovies. Add kelp, onion, garlic and shiitake mushrooms; boil it over high heat for 10 minutes. Lower heat to medium and cook for 15 minutes; then add the bean paste and simmer for five minutes more. Set aside the stock and take out the mushrooms and chop into small pieces.


Heat your earthen ware (or ceramic pot) on the stove and put 2 tsp. of oil. Add the chopped shiitake mushrooms and stir it; then add the beef and green onions and cook while stirring for 1 minute. Add 2 Tbsp. of hot pepper flakes and keep stirring for 1 minute.  *tip: 2 Tbsp.- mild; 3 Tbsp.-medium; 4 Tbsp.- hot ! 

Carefully pour some stock to cover 3/4 of pot as it will be sizzling. Add mixed seafood and shrimps. Add fish sauce. 


.


Place tofu in the pot and break them up into a few pieces with a spoon. When it boils, adjust seasoning, add chopped green onions and jalapeno slices. Crack egg(s) and drizzle some sesame oil before serving. Serve with steam rice and a side of kimchi.
\


For more Korean food, select Korean as a label from the food categories on the right hand column. Enjoy!!