Sunday, January 21, 2018

Five Spice Salt and Pepper Squid Tentacles...


As a dim sum aficionado, pretty much everything appeals to me, and the splendid array is vast and glorious. We try to make it to a dim sum house every so often, but when we haven't for a while I'll think about tinkering with some dishes I'm craving from home. Well, tonight it was fried squid tentacles... Oh yes, the one specialty dish that my kids must ask for when we step foot into such eatery, and one I am more than happy to oblige. You can simply do it basic with salt and pepper, but I like to add five spice powder for savoury-sweet depth. Golden fried until fragrant and twisted like fingers beckoning, one crispy slightly chewy bite will awaken your euphoric senses and ask for more. I had just fried up a bunch of egg rolls so my frying oil was darker than I wanted resulting in brown rather than golden brown squid. The delicious taste more than made up for the aesthetics, and that's a very good thing :D


Five Spice Salt and Pepper Squid Tentacles

500g squid tentacles, fresh or frozen, thawed

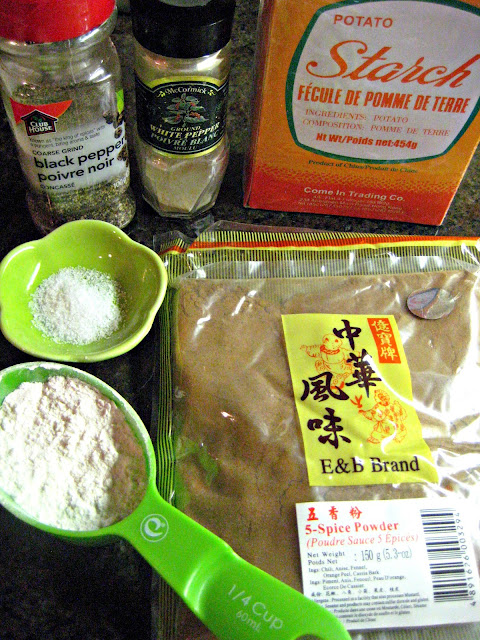
1/4 cup all purpose flour
1/4 cup potato starch (this makes the food crispy)
1/4 tsp. ground black pepper
1/4 tsp. ground white pepper
1 tsp. Chinese five spice
1/2 tsp. sea or kosher salt, and more at the end as a finishing salt
2 cloves garlic, minced
2 green onions, sliced
lime wedge
Oil for frying

Rinse the squid and slightly pat dry. Remove the head area and any hard cartilage. Slice between the tentacles.


Combine flour, starch, both peppers, and salt in a bowl. Add squid tentacles a few at a time and coat with dry ingredients. Place separately on a plate. If you toss them all together in the flour mix they tend to stick together and you lose some of the coating.


I double coated for added crispiness- let them sit after the first coat for ten minutes
(they'll get a bit moist) and then recoat a second time.

Heat oil in a sauce pan until hot. Cooking in batches, deep-fry squid for about 30 seconds until golden brown and crispy. Remove onto a paper-towel lined plate to drain excess oil. You can cook the minced garlic in the oil by putting it on a strainer ladle and dip into hot oil for ten seconds. Remove and drain.


Place tentacles on a plate and top with garlic and green onions; sprinkle with a bit more salt. Garnish with a lime wedge.


Fragrant, crispy, savoury and delicious! What's not to love?


Ok kids, stop playing with your food...


If you are a dim sum fan like me, check out my post The Splendour of Dim Sum Delicacies for a run down of the favourites and how to try your hands at some from home.


Thursday, January 11, 2018

Crunchy Chicken Rice Paper Spring Rolls (Chả giò)...


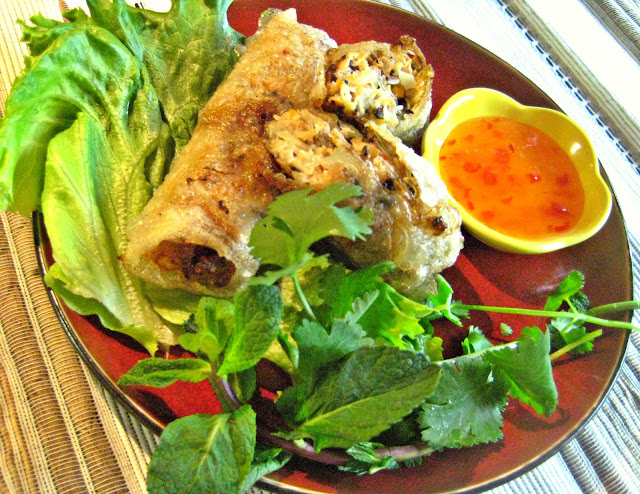
I scream, you scream, we all scream for spring rolls!!! Ok it doesn't have the same ring, but it definitely stirs up the same mouth-watering effect :). I make Chinese spring rolls, pan-fried stuffed beancurd rolls and my dad's egg rolls, but the Vietnamese-kind is my first. It's such a popular appetizer eating out at a Vietnamese pho restaurant, with just one delectable bite you'll know why. What makes chả giò so unique and also challenging to make is the ultra crunchy skin- softened delicate rice paper that serves as the wrapper and gets ridiculously crisp-crackly when deep-fried. Inside, the meat and finely chopped vegetables create a harmonious flavour combination with a textural character. Of course, there is also a deelish vegetarian option using taro to replace the meat. Serve with a Thai-style chili plum sauce or its usual partner nuoc mam, and a Vietnamese herb salad to cut the oil, and to balance the heavy with the light. I'm trying my hands on a chicken version and I'd be lying if I said it was an easy process. It is certainly labour-intensive with the multiple fine chopping, meticulous wrapping preparations and batch-frying. Could this inherently be the reason why I waited so long? Seeing my family devour them, the effort was well-paid off and it'll be indeed added to my friendly repertoire of deep-fried home-style Asian rolls.


Crunchy Chicken Rice Paper Spring Rolls (Chả giò) (adapted from Helene An's An: to eat)
Makes 25 spring rolls


2-1/2 lbs. of ground chicken meat
2 medium white onions, minced
2 large carrots, finely chopped
1 small jicama, julienned into long strips (for crispy texture)
8 dried shiitake mushrooms*, hydrated and minced
1-1/2 cups dried wood ear mushrooms*, hydrated and minced

1 pkg. 50 g transparent vermicelli cellophane noodles, cooked (snip with scissor a few times)
2 Tbsp. oyster sauce
1 Tbsp. fish sauce
2 tsp. sugar
1 tsp. sesame oil
1 tsp. sea salt
1 tsp. freshly ground black pepper
25 sheets medium-sized rice paper
3 cups cooking oil like canola or peanut
* hydrate mushrooms by soaking in water to cover an extra 2-inches for at least two hours or overnight.

For the herb platter:
green leafy lettuce or bibb lettuce
fresh basil leaves
fresh cilantro 
fresh mint
Thai-style chili plum sauce or/
(Nước mắm cham) (Makes 3/4 cup):

Dissolve 1/4 cup granulated sugar in 1/3 cup boiling water. Mix in 2 Tbsp. fish sauce and 2-3 Tbsp. white vinegar and leave to cool. To season, add 2 finely chopped garlic and Vietnamese garlic chili sauce (sambal oelek) to taste. 


Making Vietnamese spring rolls is a work-out for your hand and knife skills... There's a lot of slicing, slivering, dicing and mincing! We're only making enough for 25, imagine the labour going into just these appetizers at a bustling Vietnamese joint? Then there's the wrapping and deep-frying too! Whew! 


In a large bowl, mix the chicken with the onions, carrots, jicama and mushrooms.  Add the noodles and mix well. Add the oyster sauce, fish sauce, sugar, sesame oil, salt and pepper. Mix well.


Get your wrapping station ready. Set up a shallow dish filled with warm water, a flat surface area for wrapping (I use a cutting board) , and a large plate or several to contain the finished rolls. 


Dip the rice paper by horizontally sliding the rice paper into the water and rotate so the entire paper has been quickly soaked. Place onto the flat surface.

I toggled between wrapping on the board and on a plate to make it go faster.

Let the paper dry slightly (it will begin shrivelling at the rim). You will need it pliable for wrapping. Put 2 Tbsp. of the meat mixture in a horizontal line about one-third of the way up the wrapper from the bottom, leaving a finger-width border on either side. Fold the bottom of the wrapper over the meat and start rolling upward, making sure to tuck in the sides as you go. Don't roll too tightly or the wrapper may tear. TIP: Roll each spring roll back and forth under your palm on the counter to release the air bubbles inside (this prevents bubbles from forming on the skin). Place the roll on a plate and repeat with remaining wrappers and meat filling.


Voila!


Holy rolls!!


Heat the oil in a deep skillet/wok or pot over medium heat. Line a baking sheet with paper towels. Once the oil is hot, place three to five rolls at a time and cook them until their outsides turn golden brown, about seven to ten minutes. Using a slotted spoon or skimmer, transfer the cooked rolls to the baking sheet to drain. Repeat with remaining rolls.


Sometimes you will get many uglies before you get to the pertties... A few rolls split during the frying process and cooked up burnt on the wounded areas. Here are some TIPS for crispier spring rolls with an even golden-brown colour.

Cook's Notes: If the skin is too wet, it can cause a tear when it hits the fryer. Also if the paper doesn't wrap around the contents twice, it will be too thin skinned to bare contact with the heat and will split as a result. Have a skimmer on hand to scoop up spilled debris.

Use coconut water instead of water to wet the rice paper. The sugar content caramelizes under high oil temps that browns the rolls nicely. Add a few drops of fresh lime juice to the frying oil before it is heated to make the rolls crispier.


Serve the spring rolls hot along with the herb platter and dipping sauce. 

My herb platter consisted of mint and cilantro. Usually Thai basil would be in too.
Tear a piece of green leafy lettuce to wrap a roll and add a bit of onions.

Crunchy exterior giving way to a moist and textural interior with juicy chicken, crispy jicama and fun threads of noodles.


Go on son, enjoy the crisp-crackly goodness paired with some green!


For a much lighter and refreshing fare that is popularily called summer rolls, try the traditional rice paper roll filled with shrimps, pork and a bouquet of fresh Vietnamese herbs. 

Fresh Shrimp and Pork Salad Rolls


Sunday, January 7, 2018

Steamed Chinese Rice Rolls...


Breakfast at my house has always been things like pancakes and fruit, oatmeal, French toast, eggs, bacon and toast, and the occasional smoked salmon on bagels which we all adore. Very western items which I don't stray far from although I am very Chinese. Until the morning I couldn't resist steaming a package of springy-to-the touch fresh rice rolls I got at the supermarket instead of making a lunch stir-fry, it quickly dawned on me how come we haven't been savouring this dim sum favourite... like all the time?! Better late than never right? In Asia, rice is eaten religiously as the first meal of the day-- eaten with fish and side dishes (in Japan), cooked up into congee (rice porridge), in soups with rice noodles (like Vietnamese pho) and this very simple steamed rice roll made from rice flour (popular in Hong Kong as a snack and at Chinese dim sum). The rice rolls are usually filled with shrimp, beef or BBQ pork. You may have to dine out to enjoy these specialties but you can also make a very simple and cheap version at home. 

Prepared rice rolls come plain or with dried shrimps embedded. All you do is steam them and serve with sweet soy sauce and a bevy of toppings you like. We've had it a few times now and we're hooked! Seems like a breakfast for champions to me cause I certainly feel like a champ after my kids eagerly polished them off... like hot cakes! :D 


Steamed Chinese Rice Rolls
Makes 4 servings

1 pkg. (550 g) fresh rice rolls (in or near the refrigerated section of an Asian supermarket- if super fresh you can find them on a table nearby)
1/4 cup sweet soy sauce (I use Pearl River Bridge's seasoned soy sauce for seafood) or make your own mixture with 2 Tbsp. soy sauce, 1 Tbsp. Chinese cooking wine, 1 Tbsp. water, and 1 tsp. brown sugar.
2 green onions, chopped
1/4 cup oil
cilantro, stems removed and leaves chopped
hot sauce (I like brand Koon Yicks chilli sauce)
preserved pickled radish (sold in jars)
Serve with cooked Chinese greens (such as yu choy or snow pea leaves)

This is a reason to bust out your Chinese bamboo steam basket or use a regular steamer basket. I suggest placing a piece of parchment paper for easy clean-up. Cut a piece of parchment paper into a circle the size of the steamer bottom. Place it in and poke holes to let the steam escape inside to cook the rice rolls.

Trace a circle to fit the steamer.

Cut rolls in half (this will help with placement and easy eating). Separate each rice roll and place side-by-side and in layers in the steamer. The bit of oil coating on the rolls will prevent them from sticking to each other.


Cover the lid. Place over pot filled with 1/3 water, big enough to anchor the steamer basket. Steam should not rise out on the sides, and pot should not be too small, otherwise condensation from the steaming will cause water to leak out on sides of pot. Bring water to boil and let steam for 10 to 15 minutes without lifting the lid.


Meanwhile, prepare your toppings and vegetable dish (optional). For a quick Chinese greens stir-fry such as snow pea leaves, bring a skillet with a little oil to medium-high heat, add the greens with 2 Tbsp water. Cover and let steam for a few minutes until crisp-tender about two to three minutes. Remove lid. Add one chopped garlic and stir-fry for one minute. Season with salt to taste.


Stir-fry green onions in oil for 30 seconds until fragrant for a delicious aromatic topping.


The rice rolls can be served straight in its steamer basket on a plate along with the toppings and condiments.


Happy campers! Who wants more slurpy rice rolls?


Add a dollop of cooked onion oil and a drizzle of sweet soy sauce. Hot sauce adds piquancy and preserved radish adds savoury crunch! Sweet, savoury, spicy and crunchy all rolled into one lovely Chinese morning breakfast! Jo Sun :)!


Nummy!! Ho Ho Sic!


Monday, January 1, 2018

Pan-Seared Lemon Butter Sea Scallops...


Love me 'em scallops but always order them off restaurant menus and don't cook them at home. Maybe it's the fine line to overcooking, but being attentive to the short searing time, they really are so darn easy to do!!! Just a simple shake of salt and pepper on both sides, seared in butter over a hot pan and you are in tender sea-bite oceanic heaven. To jazz it up, you can simply whip up a lemon butter sauce to spoon over. It took treating ourselves with my annual end-of-year Loblaws grocery points with something different and gourmet, to get a bag of jumbos to serve with grilled steaks surf and turf-style! Glad I did, cause we loved them juicy succulence, bringing the elegance of restaurant-dining home. 


To start off our low-key family New Year's Eve dinner, hubby and I shared a platter of malpeques!


Of course, he shucked while I watched and salivated waiting, sipping a glass of wine :)


Pan-Seared Lemon Butter Sea Scallops
Makes about 20 scallops to serve 4 to 6 

1 pkg. 400g frozen jumbo sea scallops, thawed overnight in fridge
Kosher or sea salt and freshly ground black pepper
1 Tbsp. unsalted butter

For the lemon butter sauce:
2 Tbsp. unsalted butter
2 cloves garlic, minced
1/4 cup white wine

juice of 1/2 lemon
Kosher salt and freshly ground black pepper, to taste
1 Tbsp. chopped fresh parsley or basil leaves (optional)

Lay thawed scallops on paper-lined towels on a plate and pat dry. Season scallops with salt and pepper to taste. 

Shelled malpeques along scallops ready for cooking.


Melt one Tbsp. butter in a large skillet/pan (not non-stick) over medium high heat. Working in batches, add scallops to the skillet in a single layer and cook, flipping once, until golden brown and translucent in the centre, about two minutes per side. Remove scallops aside and keep warm.


To make the lemon butter sauce, melt two Tbsp. butter in the skillet over medium heat. Add garlic and cook, stirring frequently, until fragrant, about one minute. Stir in white wine and lemon juice and let simmer to deglaze the bits off the skillet; season with salt and pepper, to taste. Serve scallops immediately with lemon butter sauce, garnished with parsley or basil, if desired.


Surf and Turf-- got the fatty bits, ends and bones after dissecting the steaks for the kids. Just the way I like it...

Some turf parts got cooked well...oh well. But medium-rare is best!

Cheers Y'All! 

Feeling like grown-ups with bottled Mexican cola and ginger beer.


Wishing you all a HapPy NeW YeAR from our family to yours!

In much warmer times.... (Playa Del Carmen, Mexico last year )

We are always taking care of others and doing things to make people happy, but remember you need to take care of yourself #1 and make time for your own passions. I am ever grateful for another year of sharing food discoveries with you all and achieving my personal fitness goals with yoga and now kick-boxing too! Let's keep shining and reaching for the sky! Here's to continual growth, improvement & fun in 2018!  ♪٩(✿′ᗜ‵✿)۶♪   
#livethelifeyoulovelovethelifeyoulive


For a Killer Kick-A$$ Combo.. Namaste with a POW POW!! 
Come and get me 2018... I'm ready for you!!!