Monday, September 24, 2018

Taro Coconut Tapioca Soup Dessert...


Happy Mid-Autumn Festival! Also known as the Moon Cake, Harvest Moon or Lantern Festival, it has been an important annual festival for over 3500 years celebrated by the Chinese and Vietnamese. The harvest is praised and the full bright moon worshipped as a symbol of peace, prosperity, and family reunion; moon cakes typically filled with red bean or lotus paste are eaten and exchanged as gifts. Aside from ubiquitous moon cakes, the Chinese also eat a myriad of auspicious foods to pay homage. One such ingredient is taro root, round resembling the full moon. This lavender speckled root has a host of health benefits and is a beloved ingredient in Chinese cooking. I've made Pan-Fried Taro Cakes- one of my mom's specialty, cooking with her a mid-autumn occasion years ago. This year the special day lands on my Monday Chinese cooking class, and I thought we could start it by enjoying with steamed buns filled with taro paste and a cup of hot water/tea :). The seniors liked it, and I'll be buying them again (frozen section). Toting back the piece of fresh taro that was passed around, I turned it into the classic taro coconut tapioca dessert often served at Chinese restaurants after a meal. How easy it is to make from home...? Just four ingredients in a pot, and you have a comforting delicious and nutritious sweet soup to savour, served warm or cold.


Purple tinted buns with centres filled of soft taro paste.

Photo Credit Right: Ilene Huynh

Taro Coconut Tapioca Soup Dessert
Makes 8 to 10 servings

4 cups water
1 cup dried tapioca pearls (look for the packages in Asian supermarkets)
4 cups water
3 cups raw taro root, peeled and cut into 1/2-inch cubes

2 cans (400 mL) coconut milk (I like brands Aroy-D and Savoy)
1/2 cup rock sugar 


NOTE: Chinese usually cook with rock sugar to sweeten their dessert-style soups. Rock sugar or rock candy is crystallized sugar, tastes milder than granular sugar and yields better cooking results. You can substitute with golden sugar, but start with 1/4 cup. 

I prefer white pearls but the store only had green which is fine.

Slice the peeled taro in half, cut into pieces, strips then 1/2-inch cubes. 


Bring a pot of water to a boil; carefully add the tapioca, and cook on medium heat until the pearls are translucent with a tiny bead of white in its centres. (Overcooking will cause the pearls to go mushy and sticky). Stir occasionally to prevent clumping and sticking. When done, rinse with cold water and drain thoroughly until no starch is felt on the pearls.

Left: Not Done, Right: Done


Bring four cups of water to a boil in a large saucepan and stir in the taro root. Reduce the heat to medium-low, and simmer the taro until soft, about 10 minutes. Add coconut milk and rock sugar, stirring to dissolve the sugar, and simmer for 10 more minutes to blend the coconut milk and taro. Gently stir in the cooked tapioca pearls until well combined. Taste to adjust sugar if desired. 

Serve warm, or chilled. If serving cold, let cool completely first before storing in fridge. TIP: I put the pot outside on my patio in cold weather or near the a/c vent to chill faster. Do not cool in fridge as it will bring up the fridge's temperature, and can make other foods unsafe. 

NOTE: I always heat up canned coconut milk before using. Although coconut milk is cooked during the canning process, I think it's a safer measure to heat it up thoroughly before using-- you don't know how long it has been canned.
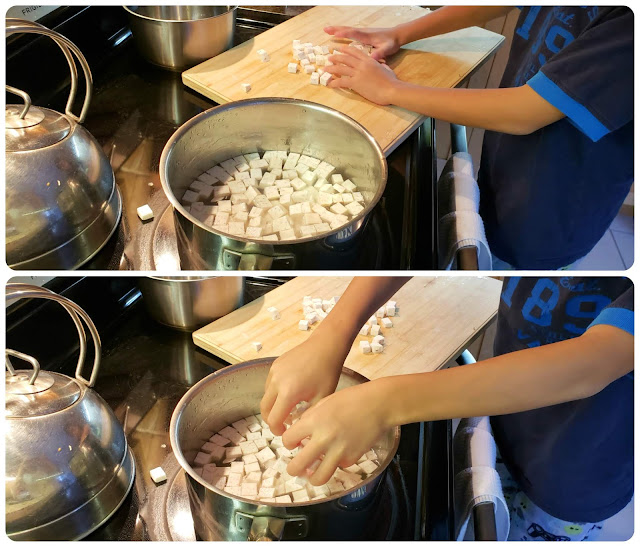

My 9-year old Sébastien loves to get hands-on to help me cook.

As the tapioca sits in the warm liquid or overnight cold in fridge, the tapioca pearls will swell and double its size. You may need to add some cold water to give the soup better viscosity. Adjust with dissolved sugar if desired.


Creamy, smooth, perfectly sweet taro and nibbles of pearly tapioca makes for a delightful dessert treat.


If you like tapioca dessert, check out my popular Coconut Jackfruit Tapioca soup dotted with chewy palm seeds and fun coloured gels for a textural sweet creamy treat.

Full Recipe:

Taro Coconut Tapioca Soup Dessert
Makes 8 to 10 servings

4 cups water
1 cup dried tapioca pearls (look for the packages in Asian supermarkets)
4 cups water
3 cups raw taro root, peeled and cut into 1/2-inch cubes

2 cans (400 mL) coconut milk (I like brands Aroy-D and Savoy)
1/2 cup rock sugar 


NOTE: Chinese usually cook with rock sugar to sweeten their dessert-style soups. Rock sugar or rock candy is crystallized sugar, tastes milder than granular sugar and yields better cooking results. You can substitute with golden sugar, but start with 1/4 cup. 

Bring a pot of water to a boil; carefully add the tapioca, and cook on medium heat until the pearls are translucent with a tiny bead of white in its centres. (Overcooking will cause the pearls to go mushy and sticky). Stir occasionally to prevent clumping and sticking. When done, rinse with cold water and drain thoroughly until no starch is felt on the pearls.

Bring four cups of water to a boil in a large saucepan and stir in the taro root. Reduce the heat to medium-low, and simmer the taro until soft, about 10 minutes. Add coconut milk and rock sugar, stirring to dissolve the sugar, and simmer for 10 more minutes to blend the coconut milk and taro. Gently stir in the cooked tapioca pearls until well combined. Taste to adjust sugar if desired. 

Serve warm, or chilled. If serving cold, let cool completely first before storing in fridge. TIP: I put the pot outside on my patio in cold weather or near the a/c vent to chill faster. Do not cool in fridge as it will bring up the fridge's temperature, and can make other foods unsafe. 

NOTE: I always heat up canned coconut milk before using. Although coconut milk is cooked during the canning process, I think it's a safer measure to heat it up thoroughly before using-- you don't know how long it has been canned.


Tuesday, September 18, 2018

Mixed Mushrooms Beancurd Rolls (Cold and Pan-Fried)...


High-protein, high-fibre and heart-healthy soybeans, with its many nutritious benefits are remarkably versatile, adapting well to other ingredients and flavours-- so it's up to you to make the culinary best of its many formats and to jolt its potential with deliciousness! With so many people venturing into vegetarian diets and going meat-free occasionally, soy products are a smart and nutritious way to go! 

One of the most delicious ingenious format is bean curd sheets to make my hands-down dim sum favourite, Pan-Fried Stuffed Bean Curd RollsSheets of dried bean curd (yuba) are made from the skin that forms on the surface when soy milk is heated. The skin has no flavour or aroma until they are cooked, and rapidly absorb the flavours of seasonings and other ingredients. They are pliable and great for wrapping, but needs to be cooked before eating. I fill mine with crunchy vegetables such as bamboo shoots, black mushroom fungus, cabbage, bean sprouts and carrots. When pan-fried the tofu skin takes on a crispy aromatic flavour that is savoury with every bite. I've been making this recipe since familiarizing  myself with tofu sheets- for family get-togethers, as a side with a Chinese meal, doling up small batches for friends, and teaching it in my TDSB parent engagement culinary program. I share it as a much healthier version to deep-fried spring rolls because the skin is nutritious and it shallow pan-fries in a lot less oil.

Having a few large bean curd sheets leftover from my brand new role at TDSB Learn4Life teaching my first Chinese cooking class, I wanted to expand my bean curd roll repertoire (I have made a handful of times a tasty ground pork and shrimp mousse filling). Coming across a Cantonese-speaking youtube recipe demo video using mixed mushrooms, I immediately fell in love. There are BIG mushroom lovers in this household :). I like that you can serve these rolls cold or hot, just like they do in the restaurants. Both yields a different taste experience. Shape the cooked filling into large flat logs, steam, let cool completely, then pan-fry if you wish to serve warm. Different than I have been doing wrapping small individual rolls and without steaming. So let the experimentation begin...


My first weekly Chinese Culinary Program with seniors at a community centre in Chinatown.

It is so lovely to see many learners wanting to participate. 

Rolling and Wrapping beautifully! Well done everyone!

Pan-fried numminess!

Today's recipe, I used three kinds of Asian cuisine-style mushrooms- black oyster- they were on sale :), king oyster for heartiness and shiitake for concentrated deep umami flavour. Feel free to swap and add enoki and/or shimeji mushrooms.


Nice long shreds make it easier for wrapping.


Mixed Mushrooms Beancurd Rolls
Makes 3  8" x 3" flat logs

1 package dried bean curd sheets (found in freezer section of Asian supermarket)

6 cups of mixed mushrooms (choose from oyster, king oyster, shiitake (fresh or dried), enoki and shimeji, sliced into long strips or long stalks separated (enoki)
1/2 tsp. sugar
1 Tbsp. soy sauce
a few dashes of salt and ground white pepper
2 Tbsp. cooking oil
1-1/2 tsp. sesame oil, divided

Seasoning mixture for bean curd sheets:
2 cups room temp. water 
2 Tbsp. soy sauce
1 Tbsp. dark soy sauce
1 Tbsp. sugar
1/2 tsp. salt 
a few drips of sesame oil

Heat a wok/skillet on medium high and add the oil. Add the mushrooms and stir for one minute. Add sugar, soy sauce, salt and pepper and 1/2 tsp. sesame oil. Cook until fragrant. Remove onto plate to cool.

Make a seasoning mixture for the tofu sheets. In a medium bowl, add the water, two soy sauces, sugar, salt and sesame oil. Mix well to dissolve sugar and salt.


My nine-year old helping out... He LOVES all kinds of mushrooms!


Cut open package of large bean curd sheets. They should be pliable. Carefully peel back three round sheets so they detach from each other. Place the other sheets back into the bag, seal well and refrigerate. Use within a week otherwise it will lose its pliability. Do not refreeze for optimum performance. 

Using a scissor trim the rim off the round sheets. These hard bit can make the finished roll tough and chewy. Save the rim strips for other use such as soup, congee or Chinese sweet dessert soup in a sealed bag and refrigerate. Cut the sheets in half, so you get two half moons. 


Crumple and submerge two half sheets (two for each log) one at a time into the seasoning liquid. Remove and lightly squeeze out excess. Lay lengthwise with round side facing away onto clean flat surface such as a cutting board. Repeat again with second half and lay directly on top with the round side facing you. Take one third of the cooled mushroom mixture and place it centre lengthwise 1/3 from the bottom in a log fashion. 


Take the inner sheet sides and fold over each other. Take the outer sheet sides and fold them over the top sheet. Fold up from the bottom and roll up and around to encase and compact the roll (not too tight). Repeat with remaining sheets to make three logs. To prevent rolls from ballooning, take a toothpick and poke a few holes into each log on the top.


Lightly grease cooking plate with 1 tsp. sesame oil to prevent tofu skin from sticking. Lay them side by side at least 1/2-inch apart so they do not stick together while steaming. Place onto a rack-lined skillet or pot with 2 inches water, cover and let steam on medium for about eight minutes.

Carefully remove plate from skillet, and transfer each onto a pair of chopsticks layed on top of an angled baking sheet to let air circulate top and bottom for faster cooling. Cool completely, if you want to pan-fry about two hours. I put mine near the air conditioning vent. 


When cooled, cut rolls into bite-size pieces. A nice fresh chewy skin and earthy mushroom taste.


For Pan-frying, pour a thin coat of oil in a skillet/pan and cook logs on medium-high heat for about one minute each side or until golden brown crispy. Remove onto paper towel-lined plate to drain excess oil. Cut slicing down to bite-size pieces. Serve with Thai sweet chili sauce or Worcestershire sauce. 


Serve cold or pan-fried as an appetizer or party offering at any gathering. 


Pan-frying, the tofu skin takes on a crispy aromatic flavour.


Two flavour experiences from One!


Full Recipe:

Mixed Mushrooms Beancurd Rolls
Makes 3  8" x 3" flat logs

1 package dried bean curd sheets (found in freezer section of Asian supermarket)

6 cups of mixed mushrooms (choose from oyster, king oyster, shiitake (fresh or dried), enoki and shimeji, sliced into long strips or long stalks separated (enoki)
1/2 tsp. sugar
1 Tbsp. soy sauce
a few dashes of salt and ground white pepper
2 Tbsp. cooking oil
1-1/2 tsp. sesame oil, divided

Seasoning mixture for bean curd sheets:
2 cups room temp. water 
2 Tbsp. soy sauce
1 Tbsp. dark soy sauce
1 Tbsp. sugar
1/2 tsp. salt 
a few drips of sesame oil

Heat a wok/skillet on medium high and add the oil. Add the mushrooms and stir for one minute. Add sugar, soy sauce, salt and pepper and 1/2 tsp. sesame oil. Cook until fragrant. Remove onto plate to cool.

Make a seasoning mixture for the tofu sheets. In a medium bowl, add the water, two soy sauces, sugar, salt and sesame oil. Mix well to dissolve sugar and salt.

Cut open package of large bean curd sheets. They should be pliable. Carefully peel back three round sheets so they detach from each other. Place the other sheets back into the bag, seal well and refrigerate. Use within a week otherwise it will lose its pliability. Do not refreeze for optimum performance. 

Using a scissor trim the rim off the round sheets. These hard bit can make the finished roll tough and chewy. Save the rim strips for other use such as soup, congee or Chinese sweet dessert soup in a sealed bag and refrigerate. Cut the sheets in half, so you get two half moons. Crumple and submerge two half sheets (two for each log) one at a time into the seasoning liquid. Remove and lightly squeeze out excess. Lay lengthwise with round side facing away onto clean flat surface such as a cutting board. Repeat again with second half and lay on top with the round side facing you. Take one third of the cooled mushroom mixture and place it centre lengthwise 1/3 from the bottom in a log fashion. Take the inner sheet sides and fold over each other. Take the outer sheet sides and fold them over the top sheet. Fold up from the bottom and roll up and around to encase and compact the roll (not too tight). Repeat with remaining sheets to make three logs. To prevent rolls from ballooning, take a toothpick and poke a few holes into each log on the top.

Lightly grease cooking plate with 1 tsp. sesame oil to prevent tofu skin from sticking. Lay them side by side at least 1/2-inch apart so they do not stick together while steaming. Place onto a rack-lined skillet or pot with 2 inches water, cover and let steam on medium for about eight minutes.

Carefully remove plate from skillet, and transfer each onto a pair of chopsticks on top of an angled baking sheet to let air circulate top and bottom for faster cooling. Cool completely, if you want to pan-fry about two hours. I put mine near the air conditioning vent. 

Slice cold into bite-size pieces. For Pan-frying, pour a thin coat of oil in a skillet/pan and cook logs on medium-high heat for about one minute each side or until golden brown crispy. Remove onto paper towel-lined plate to drain excess oil. Cut slicing down to bite-size pieces. Serve with Thai sweet chili sauce or Worcestershire sauce. 


Monday, September 10, 2018

Grilled Beef Brisket and Kimchi Salad...


I love to teach cooking, but when I get the opportunity I like to attend community cooking classes to keep my multi-cultural recipe repertoire fresh and expand my food skills. Last week, Korean Galleria Supermarket hosted their fourth free cooking class since summer. Started in July, they offered the public an hour class every two weeks. At this demo, thin slices of beef brisket were grilled and served warm with a fine sliced matchstick salad of kimchi, mixed peppers, cucumber and Asian pear. The sweet, tart and piquant vinaigrette of honey, lemon juice and Korean hot mustard perked my taste buds begging for more- the combo of flavours and crunchy textures over warm slightly fatty beef was a delight with every bite. Such a simple protein salad that uses superfood kimchi that can be served as part of a weeknight dinner, or as a showstopper entertainment platter. As a culinary instructor, I know I have succeeded when my participants replicate my dishes at home. This certainly was one I couldn't wait to make for my family. And I was right, hubby and kids were WoWed! Thank you (고맙습니다) Chef!


Chef arrived to Canada six months ago and have been cooking and teaching Korean cuisine for a long time. Here she explains her love of natural products such as a pure brew natural soy sauce. If you see the word Jin on Korean soy sauce, stay away because it is a blend.


Her gorgeous presentation of grilled beef rimming the plate and anchored with a mixed kimchi pepper slaw piled high in the centre.


This recipe makes extra vegetable salad you can serve on the side with your meal.

Grilled Beef Brisket and Kimchi Salad
Serves 6 to 8 (as a side)

1 lb. thinly sliced beef brisket (look for a good fat marbling) 
1 Tbsp. soy sauce
1-1/2 Tbsp. mirin (you can substitute with 1-1/2 Tbsp. sake or cooking wine with 1 tsp. sugar)
1 each red, yellow and orange bell pepper, seeded and sliced thinly or into short matchsticks
1 Asian pear, cored and sliced thinly or into short matchsticks
1 cucumber, remove seeded core and sliced thinly or into short matchsticks
1 cup whole kimchi, (Chef suggests old fermented for extra acidity), washed, drained and sliced thinly

Salad Dressing:
1 Tbsp. lemon juice
1 Tbsp. sugar
1 Tbsp. Korean hot mustard (has a wasabi pungent kick to it)
1/2 Tbsp. honey
1 tsp. sea salt
2 Tbsp. water
1 Tbsp. oil (I use sunflower or grapeseed)


Marinate the beef with the soy sauce and mirin mixed together. 
Ladling over top with the beef slices in the tray like this works perfectly for sauce to well-distribute.


Chef prefers old fermented kimchi for its prominent acidic flavour and whole (poggi). I usually buy mat kimchi (which means sliced into pieces). The most popular style used in Korea is whole- it retains optimum flavour until you slice it to use. What a difference the flavour is compared to the regular style kimchi I buy- spicy but deeper and rich in tang. This fermented superfood is crunchy, tangy, spicy, and delicious.


Mix together the salad dressing ingredients, and set aside. If you don't have Korean hot mustard, substitute with wasabi or Dijon mustard. Chef suggests rinsing the whole kimchi to remove the spicy marinade and to bring out its acidic flavour and crunch. Squeeze excess liquid before slicing.

Removing the inner lining of bell peppers produces a cleaner and prettier presentation.

Mix the peppers, kimchi, cucumber and Asian pear slices/matchsticks in a bowl. Drizzle in the salad dressing.


Grill or pan-fry the beef slices on both sides in a hot pan until caramelized and cooked, about one minute per side. Layer around the perimeter of your serving platter and pile the salad mixture in the centre.


Love that sweet, tangy and piquant vinaigrette slathering the beef!


This was my second cooking class at Galleria. More kimchi... at my first we made Paek Kimchi (white cabbage kimchi). Scientific studies indicate that kimchi is incredibly nutritious- a source of protein and vitamins A and B- and is low in calories. It is also a digestive, due to its fibrous texture and lactic acid content. The elaborate Korean way of pickling can be made simpler by preserving vegetables in heavily salted water without spices such as soy sauce, fish sauce, fermented red pepper or bean paste. One such pickle is White Cabbage Kimchi (Paek Kimchi) made the same as regular whole cabbage kimchi but without the hot red pepper powder, resulting in a pale colour with seasoning toned down providing a more delicate flavour. This kind of kimchi may be a good introduction for the curious to the vast world of kimchi.

Wednesday, September 5, 2018

Take Care of Self Awareness Month...


Kids are back to school, and the two weeks that I had off from my summer culinary teachings seem to blink by. It was busy right off the bat with our annual family long road trip to our friends' cottage in Myrtle Beach, and the last week unpacking, tidying and readying for back to routine that involved my project to paint and refurnish the kids' bedroom. I longed for some me time, real me time to quiet the busyness, reflect and get back to doing my own things again. And that's not being bad...

It so happens September is Self–Care Awareness Month... How timely? I remember during university days, September always felt like a crisp new year, a fresh start, a time to renew and improve- to better ourselves. We reminisce as parents as this time of year rolls around, but it should be a reminder that taking care of ourselves should be first and foremost! In our everyday lives, we tend to put others and other things before our own needs, and at the end of the day we wonder why we feel depleted. Put your own self on a pedestal. We need to Stop Neglecting and Start Nourishing! And it goes beyond just the occasional massage or daily walk. 

True self-care is not self-centred nor selfish; it is simply keeping yourself the focus of your own life. It's being mindful and attentive to your feelings, communicating what you want and saying yes or no, free of any guilt. For me, taking care of me means nourishing my mind, body and soul! I feed My Mind with meditation, positive affirmations, quality conversations and constant learning and discovery. I feed My Body, with real home-cooked meals and regular workouts. Practising a combination of yoga disciplines, pilates and kickboxing keeps me invigorated and challenges my limits to surpass my fitness goals with flexibility, balance and strength. Be like Steel Noodle. Cooking regularly and eating right with a variety of foods help maintains my health and ideal weight. Be like a Lean Mean Machine. To round me out, I feed My Soul. I feed my essence by actively doing the things I love, fuelling the fire in my belly with passions and projects. Mine is literally belly-feeding- lucky me lol. It wasn't always easy. I had to let go of a lot of self-doubt and a lot of guilt. Gradually, I knew putting myself first was essential- it made me happier and more nurturing. I became to love ME- wierd, warts and all. I Owned It and Became Cool with Everything I Am. In turn, I naturally passed that love & joy to my family, friends and my work. This 360 self-care is nourishing yourself in a way that helps you blossom in the direction you want to go. You are worth the effort!!!

Shred those excuses and make this month about YOU! If you are about taking care of everyone else, take care of YOU first and you'll be a better version of yourself to give it back. Start by being K.I.N.D to yourself! 
#SelfCareAwarenessMonth #selflove #selfcarechallenge #evolvetolive

This month I will focus on gaining better form in my yoga and kickboxing practices. 
I hope my fitness goals find you some inspiration along the way... 🙏

 Getting in the flexing action at the Canfitpro World Fitness Expo! 

It's not about landing the perfect pose,
But a pose in progression...
I'm working to lengthen and elevate my standing extended hand-to-big-toe pose while staying grounded. This strengthens the legs and ankles and improves sense of balance. Linear alignment is big for me, so hope to get to the point where striking the pose achieves those lines without too much thought and a mirror. #strengthwithlimber

Beginner's Tip: You can hold this pose longer by supporting the raised-leg foot on the top edge of a chair back (padded with a blanket). Set the chair an inch or two from a wall and press your raised heel firmly to the wall. Tugging at a yoga strap around the ankle works great to inch the leg higher. 🤗

In Port Perry

Expressing the GoDDeSS in the Goddess pose amongst others under the glory of the sun. Every sunset is an opportunity to reset. "Each morning we are born again. What we do today is what matters most"-- Buddha 

The best time of our lives is right now....
not what was then, or what's down the road...
It's today! #makingthemostofrightnow


Beautiful sun set at Port Perry #cottagelife

Lengthen to Strengthen. #alwaysbeaworkinprogress #linearalignment


You can't work out on one side... Without working out the other.

Studies show using the opposite side of your body in new attempts creates a balance in the usage of your whole brain. Try to begin movements with your non-dominant side. I am a rightey so I work my left side harder. Stretch a little further, lift a little higher, bend a little deeper on that stiffer side. Overtime, you will be helping your body become more balanced, stronger and minimize injuries associated with asymmetric overuse. #bodysymmetry #bodyequilibrium


Myrtle Beach

Bounded Extended Side Angle Pose.

This is one of my favourite stretches. To do this straighten the lower arm and reach the hand to the floor. Wrap the top arm around the back and the lower arm under the bent knee to grasp hands. This is a variation to the Extended Side Angle (one arm up) which opens the side of the body from the feet to the fingers, energizing the body and strengthening the legs. Repeat on other side. Always look up which helps with linear alignment (pretend you are flat back against a wall) & opens your heart filled with gratitude to the universe above. #universealignment


Heart-Opening Sitting Backbend with Eagle Arms.

It's easy for me to dip all the way flat back while on bended knee or grab my ankles (camel pose) than to hold this suspended pose. Working on deepening the curve of my back so my arms are more vertical than horizontal. Have to have a lot of practice and patience, but seeing my flexibility and core strength improve over time. Backbends are great for strengthening and energizing the body. These poses help keep our spines healthy, and also stretch the hip flexors, chest and shoulders. #ibendsoidontbreak


Photo Credit: Lisa Eats

I wasn't kidding. Here's The Camel Pose. #ibendsoidontbreak


Doing my final thang on the wall before my boyz room gets the azure sea paint treatment. Working on gracing the new walls with a work-in-progress handstand. #poseinprogress


Started one of my fitness week moving mountains, then building one (with a friend), and ending the week strong by BEING a mountain 🗻. Sunday sparring with my black belt tae kwon doe buds David. #badassarywithaheartofanangel #fitandfierceover40 #pushyourlimits


Upping and extending my squatting game with this stylin' lol railing perch pose after an early a$$ kicking workout! 💪 We were burpee squatting and partner drilling with goose walk squats around the studio! 🥊 #havefun #lifestooshort 


Feeling blessed to realize my full potential and what more I can do, answering to a career change calling eons ago! Seek and you shall find. Give and you shall receive. Believe it! Achieve it! #thankyouuniverse✨🙏 
#goodvibrations #justflowingnow #magicinthemaking #builditandtheywillcome #patienceandperserverancepayoff #witnessingmagicallthetime #feelingatonewiththeuniverse


Nourish your Mind, Body and Soul! We have this one life to give it our all! It's about time right? #betterlatethannever

#SelfCareAwarenessMonth #selflove #selfcarechallenge #evolvetolive