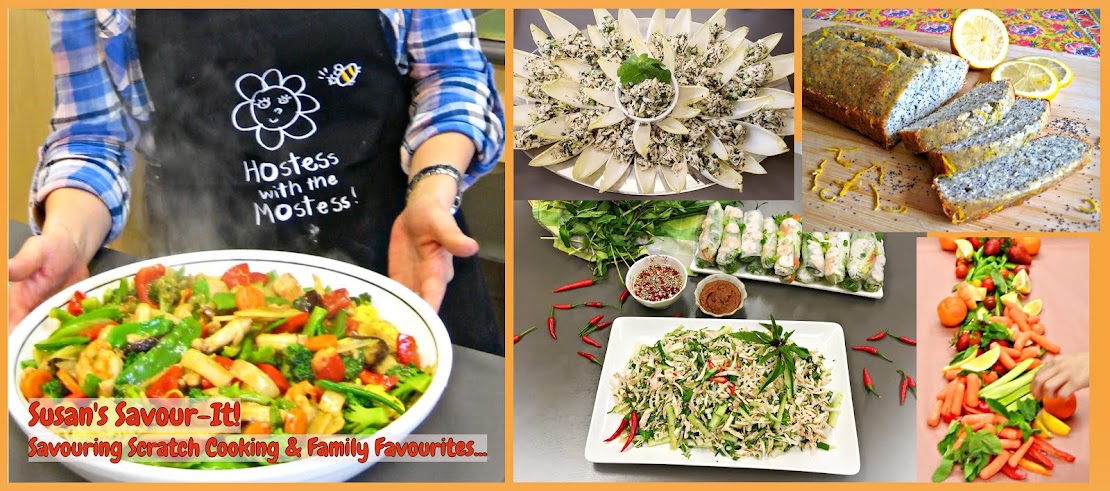
Monday, April 30, 2018

Cooking Up Lemony Goodness...


Lemons ๐Ÿ‹ evoke freshness and awakens the senses, and it's a rejuvenating flavour to invite in Spring. Even though it was cold and damp during this community kitchen cooking session, it sure felt and smelled like spring indoors with the bounty of bright yellow lemony goodness in both savoury and sweet offerings. On the menu, Greek Quinoa Salad with a lemony dill vinaigrette and Flaky Scones with Lemon Curd. We cooked and baked to our hearts' content with the busy buzz of conversations and laughter. Ahhh :D... exactly the way I dreamed our gatherings to be. Many of the moms have two or more children, and these mornings give them a little time for themselves, to socialize and learn to cook something new. To hear they look forward to this day every week, and their heart-felt gratitude for our program, it truly makes my heart sing--  I just want our sessions to go on forever! With the warmer weather we will be coupling culinary with a nice walk afterwards. A time to further digest, get some fresh air and exercise, and to get to know one another better. 


A large fresh bed of both romaine and mixed greens is topped with textured nutty grains of quinoa and a medley of crunchy colourful vegetables dressed with garlicky lemony dill. This is the perfect crowd-pleaser or potluck picnic salad to make with it's healthful Mediterranean ingredients and tasty flavours! Always a hit at my gatherings.


Greek Dill Quinoa Salad 
Makes 8 servings

3 cups hot, low-sodium chicken broth or vegetable broth
1-1/2 cups quinoa, rinsed
1/4 cup fresh dill, chopped
3 cloves garlic, minced
3/4 cup extra-virgin olive oil
1/3 cup lemon juice
1/2 tsp. kosher or sea salt, more to taste
ground pepper to taste
6 cups mixed salad greens
3 cups romaine lettuce, cut into bite-size pieces
1 cup grape or cherry tomatoes, halved
1 small English cucumber, sliced and quartered
1 small red onion, halved and very thinly sliced
1/2 cup whole pitted kalamata or black olives
sprigs of fresh dill for garnish

Heat the broth in a large saucepan placed over high heat. When it has just come to the boil, add the quinoa and stir well. Allow to return to the boil, then immediately reduce heat to medium-low and simmer for 15 to 20 minutes or until liquid has been absorbed. When cooked, transfer mixture to a large, shallow bowl to cool. Combine the dill, garlic, olive oil, lemon juice, salt and pepper in a small bowl. Whisk to blend well. Taste and adjust seasoning if necessary.

Layer the mixed greens then romaine lettuce on a serving platter. Drizzle with half the dressing. Place all the vegetables in a large bowl; toss with the quinoa and remaining vinaigrette. Layer on top of the greens. Garnish with fresh dill and serve.


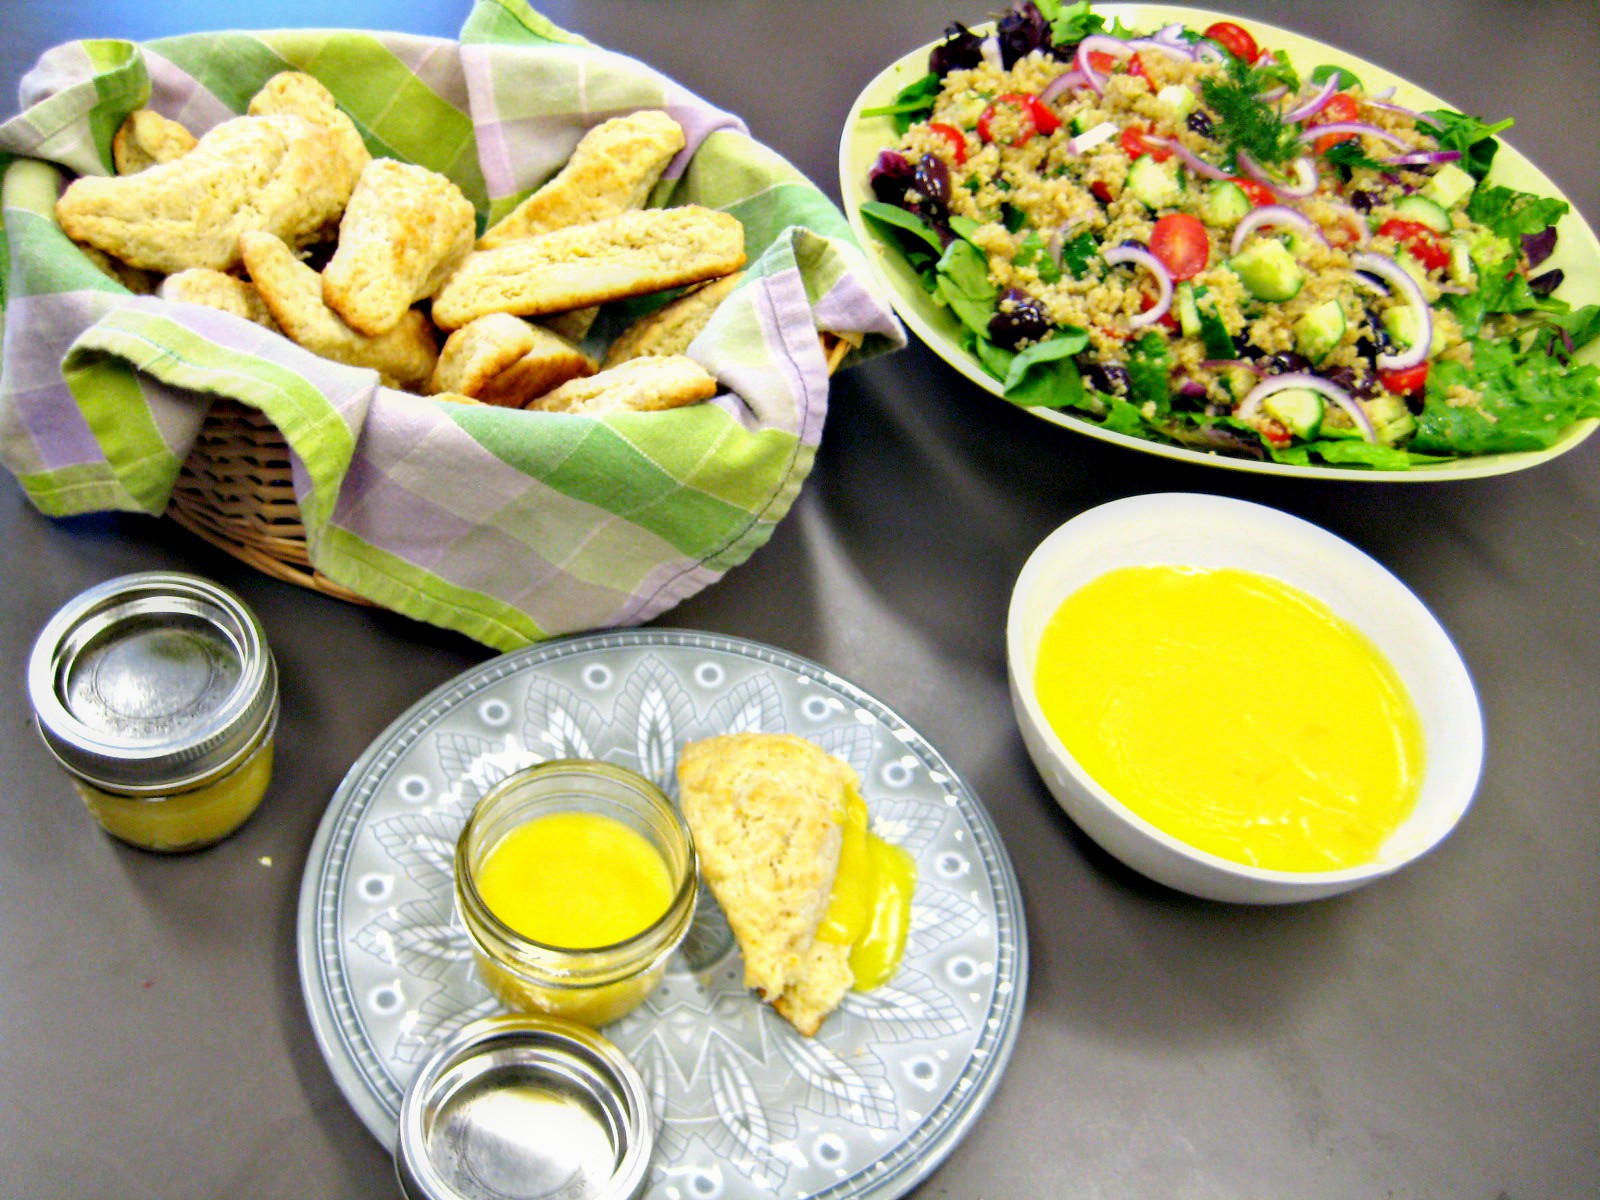
Just look at the beautiful vibrant colours and textures... 

Greek Dill Quinoa Salad

On the other side, we had the preparations of scones going on...


Tall, brown-golden, crunchy, layered and slightly chewy, the key to super flaky scones is super cold butter and folding the dough as many times possible to trap the bits of butter and create the multi-layers without over-handling. These are seriously the best scones ever!!

Basic Best-Ever Flaky Scones (Baker and Scone recipe)
Makes 16 scones

3-¼ cups all-purpose flour
2 Tbsp. baking powder
1/2 cup unsalted butter (chill in freezer for 10-15 minutes)
1/2 cup sugar
¼ tsp. salt
1 cup half and half cream
1/3 cup buttermilk (make your own by mixing 1/3 cup milk and 1 Tbsp. white vinegar)
2 tsp. vanilla
1 lemon, zested
turbinado sugar for sprinkling
serve with lemon curd

Preheat oven to 415F. Combine in a large bowl - flour, baking powder, sugar and salt. Zest lemon directly into a bowl. Stir with a whisk to evenly incorporate. Grate the cold butter into the flour mixture. Toss in the butter well.

Mix cream and buttermilk together, and add vanilla. Add the cream mixture to flour mixture and knead very gently just until dough holds together. Pat out onto counter dusted with flour and fold over, then gently knead and repeat a few times. Cut into half, then each into 8s, and place spaced on baking sheet lined with parchment paper. Brush tops with cream and sprinkle with sugar. Bake for 16-18 minutes. TIP: For a crustier top crust, broil on high for one minute to brown-golden.


Kneading and folding for extra flakiness. Photo Credit: Fathima


How can we have a batch of scones without lemon curd? This homemade recipe is super easy and creates such a luscious perky lemon filling with just the right balanced tart to sweetness- it really is impossible to resist! They are perfect little jars to gift and can be refrigerated for up to five days.

Homemade Lemon Curd (adapted from Chatelaine)
Makes about 2 cups (double the ingredients for double the batch size)

3/4 cup granulated sugar
1/3 cup unsalted butter, at room temperature
2 eggs, at room temperature
3 egg yolks, at room temperature
1/8 tsp. salt
2/3 cup lemon juice (juice from about 3-4 lemons)

Beat sugar with butter, eggs, yolks and salt in a medium saucepan with an electric mixer on high, until creamy, about one minute. Beat in lemon juice. (Mixture may curdle but will smooth out during cooking.) Set saucepan over medium-high. Cook, whisking constantly, until curd is thickened and smooth. It should coat the back of a spoon, about three to five minutes.


We doubled the lemon curd recipe to fill little mason jars for each mom to take home. 


These ladies loved the perky lemon freshness. Each bite was met with ooohs, ahhhs and mmmms...


Beyond delicious, lemons really wakens up all the senses ๐Ÿ‹๐Ÿ‹๐Ÿ‹.


Mom Fathima made up these exact gorgeous delectable scones to serve with our take-home community kitchen-made lemon curd. These kind of sharing forward makes me so-O happy :D. Thank you so much for sending and sharing!

Photo Credit: Fathima

Photo Credit: Fathima

Mom Athira makes the Greek Dill Quinoa, and her family loved it! Beautiful and trรจs colourful. YAY!

Photo Credit: Athira

More lemony goodness, cause you know I had to make something for my family too... I love this Luscious Lemon Poppy Seed Loaf-- the tangy citrus syrup that seeps into this pretty loaf creates a seductively divine taste. It's delicious served with a pot of tea and to give as a hostess gift! To me, this is one of those baked goods you savour slowly, letting your mind drift while enjoying life's simple pleasures ๐Ÿ‹...

Luscious Poppy Seed Loaf

Next up, we are heading back to my Chinese roots with chicken fried rice and Cantonese chow mein. And weather permitting, we are taking that happy stroll...


Thursday, April 26, 2018

Chinese Hot and Sour Soup, Beancurd Rolls and Fish Congee...


At last week's community kitchen culinary session, I was so excited to share and cook some of my all-time absolute favourite recipes from my Chinese heritage-- those I loved growing up in my family household, namely Pan-Fried Vegetarian Stuffed Beancurd RollsChinese Hot and Sour Soup and Fish Congee!


Pan-fried stuffed bean curd rolls are hands-down my favourite thing to nosh on at Chinese dim sum. They are so good I can crave it all parts of the day. They are filled with crunchy vegetables such as shredded cabbage or bean sprouts, bamboo shoots, black mushroom fungus and carrots, and when pan-fried the tofu skin takes on a crispy aromatic flavour that is savoury with every bite served with a dip of Worcestershire sauce or Thai chili plum sauce.

Pan-Fried Stuffed Vegetarian Beancurd Rolls
Makes about 12 rolls

3 cups shredded cabbage or bean sprouts, blanched
1 garlic, minced
1 large carrot, peeled into strips with a vegetable peeler
8 dried shiitake mushrooms, rehydrated in water for at least four hours, rinsed, drained and thinly sliced
1 cup black mushroom fungus strips, rehydrated in water for two hours, rinsed and drained
1 cup can bamboo shoots, well-drained
3 Tbsp. canola oil, divided
sugar, salt and ground white pepper
1/3 cup water
1 tsp. chicken seasoning powder
1 Tbsp. oyster sauce
2 tsp. cornstarch dissolved in 1 Tbsp. water (make twice- once to thicken the vegetable mixture, and another bowl to use to seal the seams of the wrapped rolls)
1 package dried bean curd sheets, found in freezer section
Worcestershire sauce and/or Thai chili plum sauce for dipping

Heat 1 Tbsp. oil in a skillet/wok over medium-high heat. Add half of the garlic and sautรฉ with the shiitake mushrooms until fragrant about one minute. Season with a little salt, ground white pepper and sugar. Toss. Add remaining garlic ,cabbage, carrots, mushroom fungus and bamboo shoots. Stir-fry for two minutes with salt, pepper. Add water, chicken seasoning powder and toss for one minute, cover for two. Taste and adjust seasoning- you can add 1 Tbsp. oyster sauce for a rich flavour. Stir cornstarch mixture into the vegetables. Let heat through to thicken and remove onto a plate to cool before wrapping.


For step-by-step photos on how to wrap and roll see my post.


Prepare the bean curd sheets by cutting into twelve ample-sized pieces for wrapping. Mix 2 tsp. cornstarch with 1 Tbsp. water to use to seal the seams. I add a few drops of soy sauce.

Place 2 Tbsp. of filling on the bottom of the skin. Fold up to encase the filling and fold in the sides. Dip your index finger in the cornstarch mixture and run it across the upper seam; tuck the filling in the wrap with the top of your fingers and roll up to seal.

Heat 2 Tbsp. of oil in a pan over medium heat, pan fry both sides with the seam side down first until golden brown about four minutes each. Sprinkle a little water half way through when cooking both sides to ensure wrapper cooks or else it will be tough and chewy. Drain the rolls on a paper towel-lined plate to soak up any excess oil. 


Pan-Fried Vegetarian Stuffed Beancurd Rolls


Hot and sour has always been one of my all-time favourite comfort soups- a tasty harmony created from spicy and sour notes. My father and his brother owned a Canadian Chinese take-out restaurant when I was in my teens and my uncle made the best version of this soup ever! Every time, I made it over the years for friends, family and colleagues, it has never been short of rave reviews. The delicious secret... toban djan- a specialized Szechuan sauce blending chillies and fermented beans, and adding two vinegars-- rice vinegar for tang and chinkiang black vinegar for sweet (I discovered this addition years later and it takes on such a nice flavour). Put them together-- wham bam boom for your taste buds.

Chinese Hot and Sour Soup
Makes 4 Servings

5 cups of chicken broth or homemade stock by cooking chicken bones
1/4 cup dried black mushroom fungus strips, hydrated in water for at least two hours, drained
6 dried shiitake mushrooms, hydrated in water for at least four hours, drained, sliced into strips
1/3 cup can bamboo shoot strips, well-drained
1-2 Tbsp. toban djan (chili bean sauce)- the brand I use is Lee Kum Kee
1 Tbsp. each rice vinegar and black vinegar (Chinkiang vinegar)
2 tsp. soy sauce
250 g soft tofu, cut into cubes (if possible strain for half hour to extract water; drain-- this will give the tofu more flavour and not dilute your broth)
1 large egg, beaten
1 Tbsp. cornstarch, mixed with 2 Tbsp. water
1 tsp. toasted sesame oil
sliced green onions and cilantro leaves for garnish
NOTE: Add chopped chicken or pork if desired (optional)

Bring the broth to a boil in a medium sauce pot; add both mushrooms and bamboo shoots. Cook for two minutes then add the seasoning: toban djan, both vinegars and soy sauce. Return soup to a boil then add the tofu and cook for two minutes. Add the cornstarch and stir to thicken soup. Remove from heat. Slowly drizzle egg into the broth in a thin steady stream. Let egg set for 15 seconds, then stir gently to incorporate. Season to adjust flavours to taste and drizzle with sesame oil.

TIP: Make it a meal with udon or another thick Asian noodle to complement the hearty soup base.


Simple, uncomplicated comfort food such as congee rice porridge "jook"; has always been my go-to meal to make when anyone is under the weather, and something most Chinese kids grew up on eating for the same reason or for breakfast. You can cook it plain with water and serve a few salty side dishes to eat with it, or concoct a variety of rice porridges by adding meat, vegetables, mushrooms, herbs or eggs. I've always loved the classic flavour combination of pork, salted duck eggs and a thousand year old black eggs. But for something different in this session, we made fish congee-- super simple by making a stock with dried anchovies, then cooking the rice in it and adding basa fish pieces at the end.

Fish Congee (Rice Porridge)
Makes 4 to 6 servings

1-1/2 cups uncooked short-grain rice
12 to 15 dried anchovies (in frozen fish section of an Asian supermarket)
2 basa fish fillets, frozen, thawed, patted dry and cut into small pieces
salt to taste
white pepper, ginger sliver, sliced green onions, chopped cilantro for garnish


Wash the rice and soak in water to cover for a half hour. Drain. Add 1 tsp. oil into the rice and mix evenly. (Oil can help the rice cook quicker and also make the congee smoother and softer in texture). Meanwhile, remove and discard the head and gut portion of the anchovies and rinse their bodies to remove excess skin and debris. Place them into a pot of boiling water about 10 cups. Add 1 tsp. salt and cook on medium heat for 20 minutes.

Remove the cooked anchovies, and skim the broth surface. Place rice into the broth. Give it a stir; bring to a boil and immediately reduce to a simmer and cook for 30 minutes, stirring often until the rice becomes very tender. Add the basa fish pieces, stir and simmer for 5-7 minutes. Serve hot with white pepper, ginger slivers, onions and cilantro at the table.


Always a pleasure cooking with you lovely ladies... great conversations and happy eatings at the end.


Mom Athira took home some extra beancurd sheets, and look at these uniform rolls she made with shredded chicken and the same recipe vegetables. She tells me her family adores them. YAY!


Wow... Pan-fried Perfection! From our community kitchen to yours.... thank you Athira! :D


It's all about bright, refreshing lemons to enliven our senses at our next workshop!


Sunday, April 22, 2018

Spicy Thai Dinner with Pad Thai and Tom Yum Goong...


Thai red bird's eye chillies ๐ŸŒถ๐ŸŒถ๐ŸŒถ on the go in a full-on spicy Thai dinner! Pad Thai with chicken and shrimp takes centre stage with encores of Tom Yum Goong (lemongrass shrimp soup) and Hot Fire Morning Glory cooked in bean sauce, garlic and chillies ๐Ÿ”ฅ! These recipes were adapted from Wandee Young's Simply Thai Cooking. An immigrant to Toronto, this remarkable lady was paramount in being the first to seduce Canada with Thai cuisine in 1980 with her famous but long-closed restaurant Young Thailand. And the rest was history with the legions of delicious and regional Thai eateries especially in Toronto that followed over the decades. So happy I had her cookbook on my shelf for years. Adjust the recipe flavours and piquant levels to suit your family's taste buds. kลr hรขi jร -rern aa-hฤƒan (bon appetit!)


Tom Yum Goong is delightfully lively and comforting at the same time. The aromatics and the barely poached shrimps gives this tangy brew an ethereal treat for the senses.

Tom Yum Goong (lemongrass shrimp soup) (adapted from Wandee Yong's Simply Thai Cooking)
Makes 4 to 6 servings

4 cups water
1 stick lemongrass or 2 Tbsp. minced lemongrass (frozen and thawed)
4 kaffir lime leaves (or 2 Tbsp. fresh lime juice)
1 inch galangal root (or ginger root)
2 fresh hot chillies, chopped
1-1/2 tsp. chili paste
3 Tbsp. tamarind paste 
3 Tbsp. fish sauce
1 tsp. sugar
a handful of button mushrooms, quartered
16 large shrimps, shelled and deveined (use the shells for making broth- see tip below)
3 Tbsp. lime juice
green onions and cilantro, chopped 

Roast/toast the shrimp shells first before boiling them to make the broth-- toss with sea salt and black pepper before flipping them in a hot wok with oil to seal the seasonings! Flavour on flavour like my late dear mentor chef Fred always said (RIP). 


The combination of kaffir lime leaves, lemongrass and galangal is intoxicating!

Combine tamarind paste with 1/4 cup warm water in a small bowl and let soak for at least 15 minutes. See more in tamarind preparation in Pad Thai recipe below.

Stir well, and strain out solids and seeds. See more in Pad Thai recipe below.

Heat water in a soup pot to boiling. Smash the lemongrass with the flat of a chef's knife once, and then cut into 1-inch pieces; tear the lime leaves into thirds; and slice the galangal into thin rounds. Crush the fresh chillies and chop. Add lemongrass, galangal and lime leaves into boiling water and cook for one minute. Add strained tamarind paste (without the seeds), fish sauce, sugar and chili paste. Boil for another two minutes. Add mushrooms and boil for two minutes. Add shrimps and lime juice (including the other 2 Tbsp. if you didn't use lime leaves) and lower heat to medium-high. Cook for two minutes, just until the shrimps have turned opaque and springy. 

I used chopped frozen lemongrass placed into a spice ball.


 Serve hot with green onions and cilantro at the table, and a splash of lime juice if desired. 


Restaurant favourite like Pad Thai can only be made with the authentic flavour of tamarind. Pad Thai showcases it's harmony of flavours with sour, spice, salty and sweet! And it is a splendid lesson in how simple and bland rice stick can evolve in its vast symphony of flavours and ingredients. Though daunting at first, it really is relatively easy to concoct. 

Pad Thai (adapted from Wandee Yong's Simply Thai Cooking)
Makes 6 servings

454 g pkg. of Thai rice stick noodles (look for 1/4-inch width)
1/2 cup tamarind paste
1/2 cup water
1/2 lb. (225 g) boneless skinless chicken thighs, cut into bite-size pieces
125 g fried tofu balls, sliced
1/3 cup fish sauce
1/4 cup sugar
1/4 cup lime juice
1/4 cup oil
2 cloves garlic, minced
16 large shrimps, shelled and deveined
3 eggs
2 cups bean sprouts
2 stems green onion, cut into 1-inch pieces
garnish with finely chopped fresh cilantro, sliced green onions, finely chopped Thai chillies and chopped roasted peanuts

Soak noodles in plenty of water for at least one hour. 

Combine tamarind paste with 1/4 cup warm water in a small bowl and let soak for at least 15 minutes. Mash it and push through a strainer set over a bowl. Scrape off the juice that clings to the underside. You will need about 1/2 cup of tamarind juice. Add to fish sauce, sugar and lime juice. Beat to thoroughly mix and reserve. Discard the solids and seeds in strainer. 

I used a mortar and pestle to crush shelled roasted garlic peanuts.
Use a strainer to press out tamarind paste soften in water for maximum juice, 

and to separate from solids and seeds.

Heat oil in wok or skillet until it is about to smoke. Add garlic and stir, letting it cook for about 30 seconds. Add chicken, and stir-fry for one minute. Add tofu and shrimps and stir-fry for one minute more. Break eggs into wok and let them fry without breaking them for about one to two minutes. 

While eggs cook, quickly drain the noodles and then add to wok, giving them a quick fold, stir-frying from the bottom up. Add reserved tamarind and fish sauce mixture and continue stir-frying everything together for two minutes. Your noodles will have subsided to half the volume and soften to al dente. Add bean sprouts and green onion pieces. Stir-fry for 30 seconds and take off heat.


Transfer noodles to a serving dish and sprinkle with roasted peanuts, green onions and cilantro. Splash with lime juice for a little more tang and serve hot with chillies if desired. 


Served as a simple accompaniment to round out the meal- hot-fire morning glory (or ong choy), is a popular stir-fried green vegetable side, super fragrant and delicious wok-tossed with ground bean sauce, garlic and of course spicy chopped chillies๐Ÿ”ฅ. 

Hot Fire Morning Glory

My kids lapping everything up in rapid speed! They're my hungry hippos :D


Friday, April 20, 2018

Hot Fire Morning Glory Thai-Style...


My latest obsession-- Thai red bird eye chillies ๐ŸŒถ๐ŸŒถ! After having a handful left over from my Vietnamese cuisine cooking class, I have been inspired to cook other Southeast Asian dishes-- namely Thai!! Hot-fire morning glory (or ong choy), a popular stir-fried green vegetable side is so super easy, and absolutely fragrantly delicious wok-tossed with ground bean sauce, garlic and of course spicy chopped chillies๐Ÿ”ฅ. More recipes to come from my family night's Thai meal... #myeyesonredbirdeyechillies


Morning glory is labelled as ong choy in Asian supermarkets. You can get the large bunch in light or dark green... I don't notice any difference between their natural flavours. Ubiquitously used in Southeast Asian cooking, these tall stem long leafy greens are chopped in several parts and stir-fried in shrimp paste, fermented beancurd or other spices. 


For this particular Thai version, the ground bean sauce imparts earthy, savoury and slightly sweet flavours to the dish. Such an amazing blend of aromas and tastes alongside garlic and chillies of course.


Hot Fire Morning Glory (adapted by Vatch's Thai Street Food)

2 Tbsp. oil
2 garlic cloves, finely chopped
2-4 small fresh red chillies, finely chopped
1 Tbsp. ground bean sauce
225 g morning glory (ong choy), roughly cut into 2-inch lengths
1/4 cup chicken broth
1 tsp. sugar
1 Tbsp. soy sauce


Heat the oil in a wok or skillet. Add the garlic and chillies and fry until the garlic is golden brown. Add the bean sauce and sugar, stir-fry quickly, and then add the morning glory, stirring once. Pour in the chicken broth and simmer gently until the stems start to soften but stay slightly tender-crisp.

Season with the soy sauce, stir once and place into a serving dish. Enjoy hot.

Blurry focus lol! But look at the garlic sizzle :)

The intermingling of aromatic bean sauce and ingredients in the air is incredible!


Do not overcook or the stems will lose its slight crisp!

So deelish, we had this two nights in a row back by popular demand by my boys :D.


Stay tuned for the rest of my Thai dinner which included Tom Yum Goong (Spicy Lemongrass Shrimp Soup) and Pad Thai made with more piquant love from chillies!