Monday, September 29, 2014

Japanese Onigiri Rice Balls...


How do I begin talking about this beloved delightful snack that's everywhere in Japan- it's like the equivalent of our hamburger! Rice balls or "musubi", literally means "grip" such as holdable rice. We call it triangle rice in my household and my kids love them! In Japan, you can get onigiri filled with anything from grilled salmon, to natto (fermented soy beans) to premium ingredients such as uni (sea urchin) or snow crab... my favourite ones are simply filled with umeboshi (a salted plum preserve). We can get a small variety of onigiri in Toronto mostly in Korean stores, usually filled with tuna mayo, grilled beef or kimchi and they are a welcomed snack any time of day- at least my day. It is very simple to make at home and the best part is that you can fill it with whatever your heart desires.


Onigiri galore in convenient stores and food department stores in Tokyo, Japan. 

Start by preparing the rice. To yield about 10 hearty onigiri, I cook 2-1/2 cups of Korean or Japanese rice (measured with a rice measuring cup) in a rice cooker with 1/4 cup less water than I normally cook it in (you will need to add a vinegar dressing to flavour the rice and you don't want it mushy).

In the meanwhile, prepare your filling variations. I made four types today: 1) chopped ume (plum) pickles; 2) shredded imitation crab mixed with equal parts regular mayo and Japanese mayo; 3) canned tuna, drained and flaked mixed with equal parts regular mayo and Japanese mayo (optional: add a bit of wasabi) and 4) cooked ground beef mixed with chopped kimchi, toasted sesame seeds and a little soy sauce to flavour.


Heat 3 Tbsp. rice vinegar, 1-1/2 Tbsp. sugar and 1/2 tsp. salt in a small pot to dissolve. After the rice finishes cooking, keep the cooker covered and let stand for 10 minutes until the grains are settled. Transfer the rice in a wide bowl (wooden is preferred to eliminate excess moisture from the cooked rice and keeps the grains firm). Use only sideways cutting motion when mixing the vinegar dressing with the rice with a flat spoon and a fan to cool the rice.


Cut strips from nori seaweed sheets to make maki rolls by following the line creases.


Set a bowl with water and a little salt. Moisten your hands thoroughly with the salty water and place a handful of boiled rice onto your palm. Make an indentation at the centre of the rice and tuck in whichever filling you prefer. (Caution not to overfill)


Encircle the rice up with your hand to encase the filling. Use your other hand to help fold the rice over and press so the filling is hidden. (Hard to show this when I have to take a photo too- I should hire an assistant!)


Roll the rice counter clockwise in both hands while maintaining the "L- shape" angle of the right palm to make it into a triangle. TIP: Press too lightly, the rice won't hold and will crumble; press too tightly the rice will turn mushy and the ball will be too hard.


Create different shapes to differentiate the fillings. You can create cylinders, ovals and circles.


Wrap the rice shapes with a nori seaweed strip. Pay attention to the side of the nori sheet- the coarse side should be on the inside with the glossy side out for presentation.

OISHI!!

You can also make onigiri by incorporating a variety of colourful and healthy ingredients with the rice and shaping it that way. Place them in coloured muffin holders for a cute presentation and for portability. This was a recipe I developed for a kid's article in Asian Gourmet Magazine years ago.

Healthy Meals for Kids in Asian Gourmet Magazine Winter 2008 issue 

I picked up 15 sheets for $4.99 at Galleria Korean Supermarket.


You can also buy nori sheet wraps covered in plastic that are designed to keep the nori from touching the rice until you are ready to eat which makes it super convenient to pack and take on the go!
Really easy to use and wrap... I remember the first time I saw this packaging in Japan, I was truly amazed at how smart but simple the concept was. 


Fold in the plastic corners neatly to encase the rice. 


Fold over the flaps and seal with a sticker label provided- you can also use plain sticker labes to mark the filling type.


Numbers 1, 2, 3 instructs you how to dismantle the plastic when you are ready to eat. Pull centre strip down and remove the sides one at a time to reveal the rice. How cool is that?


Tuna mayo onigiri for my oldest and crab mayo onigiri for my youngest! Hey, where's Sebas?


Sunday, September 28, 2014

Homemade Caesar Salad and Pizzas...


My older boys had a pizza lunch last week, only they didn't get to eat any. There must have been a confusion since they already have lunch catered by the associated daycare program next door and those who normally brought lunch were offered a slice or two with a boxed drink. Boy were they upset... so what's a mom to do?... Of course, I swoop in with my red cape and save the day from further moans and groans with the promise of a pizza night, but better... we're all going to make our own. It's been a while since we made personalized pizzas and tonight was the night! 

Studies show when kids get involved with the meal preparations they are more likely to eat it, especially since they get to customize it to their own liking. I just had one criteria... that they each choose a topping that they don't normally add... so Étienne chose red and green peppers, Sébastien chose sundried tomatoes and Matias, broccoli. We needed some greens to round out the pies so a nice Caesar salad was in order... and heck make the dressing too... it's really simple to do and I think tastes better than bottled Caesar dressings. Here's my base recipe my sister's been asking me to post:

Susan's Caesar Salad
Makes 4 servings (about 1/2 cup dressing)

6-8 cups of romaine lettuce or romaine lettuce hearts, washed, drained and chopped into bite-sized pieces
1 garlic clove, mashed
1/4 tsp. anchovy paste, or 1/2 anchovy packed in oil, drained and finely chopped
1/2 tsp. olive oil
1/2 cup mayonnaise (my favourite is Hellmann's- when it's good you don't need to make your own)
1/2 tsp. Dijon mustard
two dashes of Worcestershire sauce
freshly ground black pepper 
a good squeeze of fresh lemon 

Mix well the garlic with anchovy paste in the olive oil with a fork in a small bowl. Add remaining ingredients and mix well. Refrigerate until ready to serve. Then toss with lettuce and adjust seasoning to taste. Offer lemon wedges at the table to splash if you wish.

Jazz It Up TIP: Add Parmesan cheese (I omitted as I don't eat most cheeses), chopped cooked-until-crisp bacon slices and croutons to your liking (I will update later on how to bake up your own croutons using old bread).


Toss the Caesar salad with the dressing right before serving.


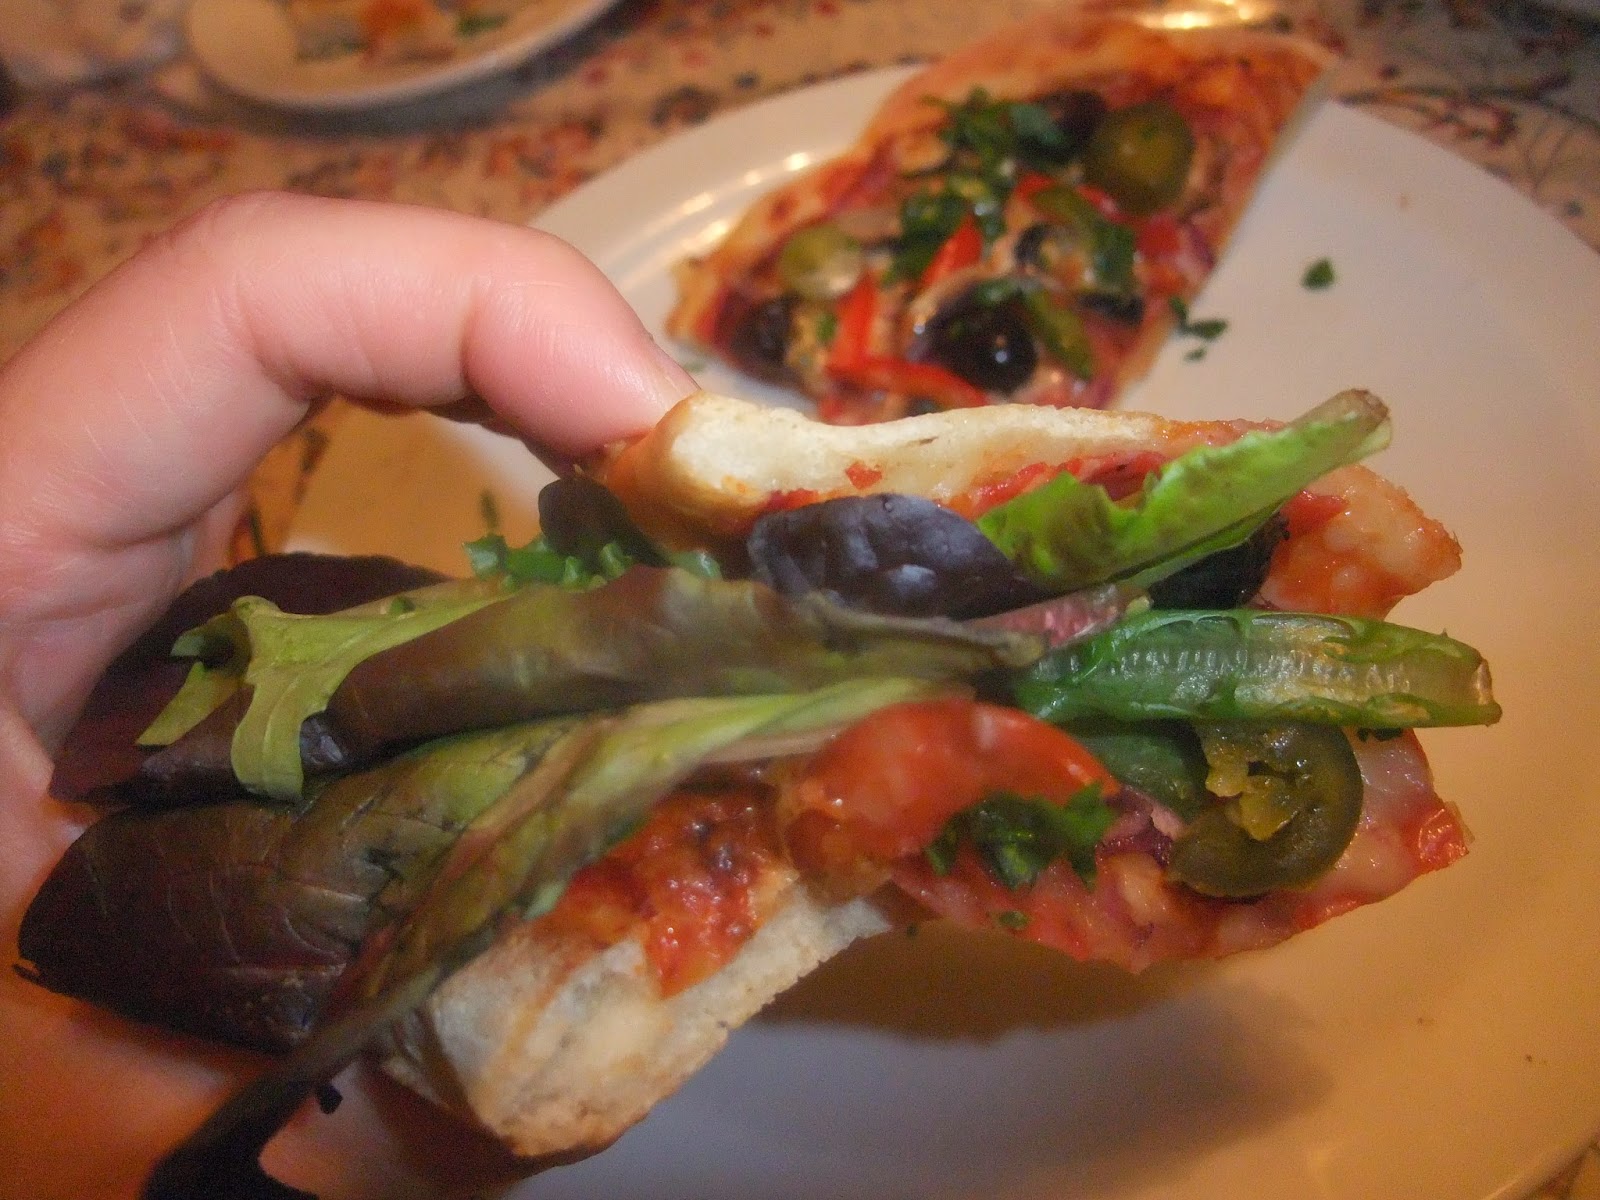
Try loading up your pizza slices with mixed greens or baby arugula for extra vegetables and texture! Just fold your slice to hold the leaves in and chow!


Success and smiles all around until.....

Thanks mommy, I had a long day... I'm full and exhausted.... zzz!

For step-by-steps and tips on making your own pizzas at home, check out my previous post homemade pizza mania.


Friday, September 26, 2014

Chinese Vermicelli Stir-Fry


It's been a long overdue date night for my husband and I... my mom and dad are graciously coming over to look after the boys while we go chow on good sushi! Stir-fried noodles is a quick no-frills all-in-one-meal to make with protein and/or vegetables that will please both my kids and parents. It really is an excellent way to use up leftover ingredients to customize your own "chop suey" noodles with whatever you have in the fridge. I had some ham left from making lunch sandwiches so it was perfect to serve as protein along with some eggs. Give this a try with your own favourite variations!

Chinese Vermicelli Stir-Fry
Makes 6 servings

1 pkg. (375 g) vermicelli noodles, cooked according to package instructions
2 eggs, beaten, cooked into a thin crepe; let cool and slice into short strips
2 cloves garlic, minced

5 shiitake mushrooms, rehydrated if dried in water to cover for two hours, drained and sliced
1/4 cup sliced Szechuan preserved vegetables, in water to cover (this really gives the dish a lot of flavour)
1/4 cabbage, thinly sliced
2 carrots, cut into match-sticks or TIP: peeled into strips with a peeler
1 green onion, cut into 1-1/2 inch pieces

1/2 pound baby spinach or torn spinach leaves, stems removed
1 Tbsp. canola oil
2 Tbsp. oyster sauce
1 tsp. soy sauce
ham, cut into strips


Heat oil in skillet over medium-high heat; add the garlic, mushrooms and drained preserved vegetables; reserve the water for later. Stir-fry for two minutes, then add carrots and cabbage. Add one Tbsp. oyster sauce and continue to stir-fry until the vegetables are crisp-tender about five minutes.


Toss in green onions and spinach and stir-fry for another minute. 
Add the cooked vermicelli and toss well with reserved water from the preserved vegetables, soy sauce and remaining oyster sauce; then add the eggs and ham and mix well to incorporate.


Make Ahead TIP: You can prepare by cutting all your vegetables in advance and cook with the noodles when you are ready to serve. This will save you a lot of precious time later!


Wednesday, September 24, 2014

Ethiopian Teff Vegetarian Stew...


Fall is in the air... and my mind is on soups and stews... I heard so many good things about teff and today I am cooking with it for the first time. Teff is the smallest grain in the world- a tiny whole grain that has been an important staple of Ethiopian traditional cooking for thousands of years. It is gluten-free with a mild nutty flavour, has a unique texture and packs a serious nutritional punch! Teff has an excellent balance of amino acids, and it is also high in protein, calcium, and iron. Whole grain teff is a great healthy addition to porridge, stews, pilafs or baked goods. Even add it when you're cooking Chinese rice- it doesn't compromise the taste and your kids won't know it's there. Ground into flour, teff is used to make the traditional bread, injera- a flat, fermented bread that complements the exotic spices found in the regional food. 

Here is an adapted recipe from the package recipe on Bob's Red Mill Teff. A true vegetarian stew with lots of vegetables and chickpeas to stand in for protein that is inspiring me to adopt a meatless Monday or weekday every once in a while. I loved it.. I hope this plants a seed of adventure in you to explore and discover new and different cultural ingredients!

Teff Vegetarian Stew
Makes 4 to 6 servings

2 Tbsp. olive oil
1 small onion or three shallots, chopped
2 cloves garlic, minced
1/2 tsp. each paprika, ground cinnamon and ground all-spice
1/2 tsp. cayenne pepper (optional or add hot sauce at the table)
1/2 tsp. salt
1 cup teff
4 cups vegetable broth
2 large tomatoes, chopped
1 medium each yellow and green zucchini, slices quartered
1 can (540 mL) chickpeas
1/4 cup fresh lemon juice
chopped cilantro for garnish

Originated in Africa thousands of years ago, it comes in a variety of colour from white to red to dark brown.


Heat oil in a heavy 4-quart pot over medium heat. Add onions and cook until soft, about five minutes. Add garlic, spices and salt. Reduce heat to low and cook for one minute, stirring constantly. Add teff and cook for two minutes, stirring frequently. Add broth and bring to a boil. Cover, reduce heat and simmer, stirring frequently, until teff is soft, about 15 minutes.


Add vegetables and chickpeas; cover and cook on low until tender about 20-25 minutes. 
NOTE: do not rush the process by cooking on higher heat otherwise the bottom of the pot will burn, which is what happened, and I had to pour everything out quickly into another pot. 


Add lemon juice and cook three more minutes. Garnish with cilantro and serve.


Cooks up thick and hearty like a porridge.

I served the stew with a baked baguette side, with each slices brushed with olive oil mixed with fresh chopped garlic and kosher salt. A quick sauté of buttered mushrooms to top the slices was a welcomed pairing along with this amazing comfort stew.


Really an interesting and delightful stew with warm spices that opens up your senses and makes you feel so good knowing you loaded on a meal of nutritional goodness! My older kids were not keen on it at first, but after dousing it with their favourite green mild hot sauce they managed most of their bowls. The little one did not eat one bite. But I will make it again, and eventually he will be tempted to give it a try and maybe enjoy it, like they all did with other foods they turned their nose up to. My mantra for feeding my kids has always been... if they don't like something, try and try again... don't give up! 

Something to really try: To give you a simple health boost regularly with teff, add it to rice. For Chinese rice cooked in a rice cooker, add 2 Tbsp. teff to 2-1/2 rice cups measure of Jasmine rice and 1/4 cup more water. Teff will cook settled on the rice surface. Toss to mix. Your kids will see the little brown specks but won't taste it. Before you know it, it will be your regular routine- makes me feel better serving white rice.